
Required Materials
Airtech 3000
Pump from a 2nd Airt3k
Great Stuff Insulating Foam
Tube connectors for common fish tank tubing
super glue
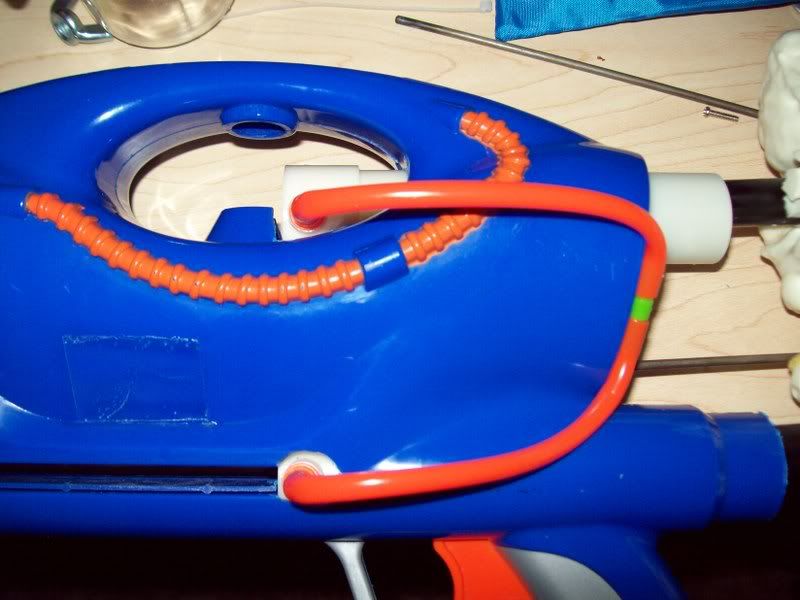
Here's my creation:
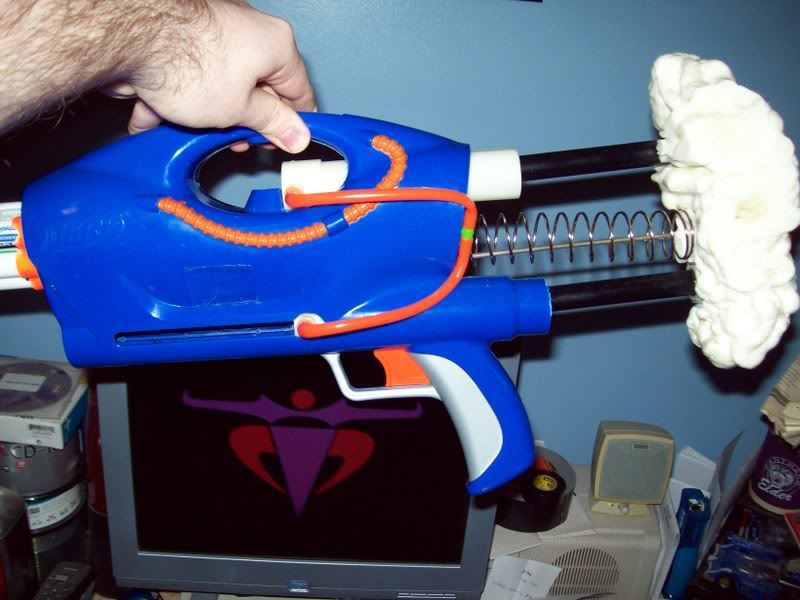
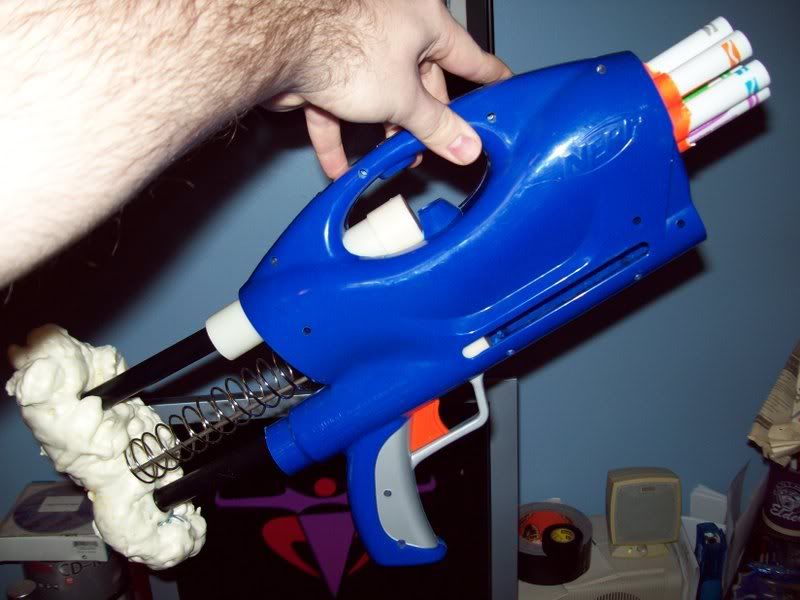
The idea is that by reversing the plungers, to prime the tank, all you have to do is press into the shoulder stock with your shoulder. This would also allow the stroke length of the plunger to be nearly doubled, and with the addition of the 2nd plunger, each pump puts roughly 4 times as much air into the tank. (1-pump At3k mod.) The reason I did this rather than the more common 1-pump modification is because with this set-up, the auto-rotation mechanism still works. Thereby increasing RoF significantly. (1 pump for greater range, no need to manually rotate the turret)
And how to get what I managed thus far.
cut the pump from a 2nd Airtech assembly (preferably a broken one), and cut away the goo gauge from your intact one. just snip the line at each end with scissors. From here, find a T-Junction piece from the package of tubing connectors. I happened to use connectors I found at a pet sore, used for simple aquariums, to rig an air line to the tank filter, those goofy bubble-emitting decorations, et cetera. (I started this project before I knew what instant connectors/barbed connectors were.)
You'll have to cut off the back of the At3k, behind the trigger, and a groove for the reversed plunger.
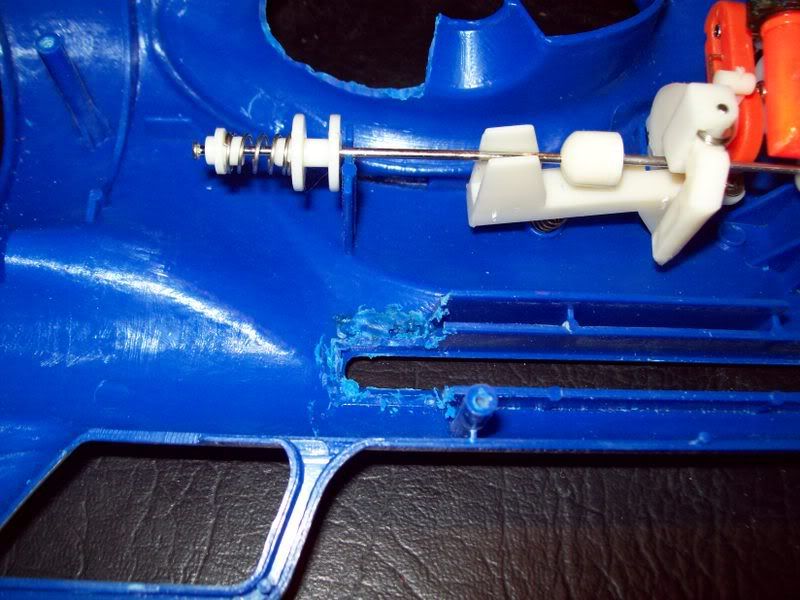
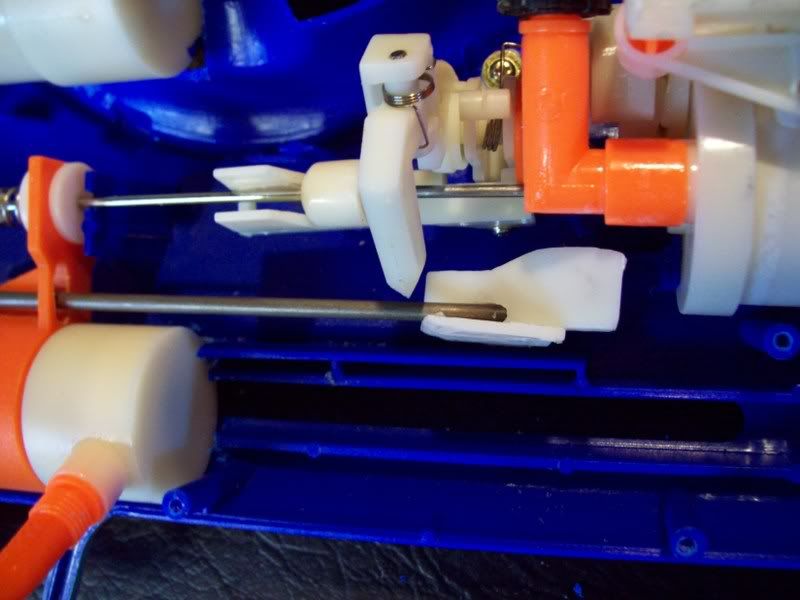
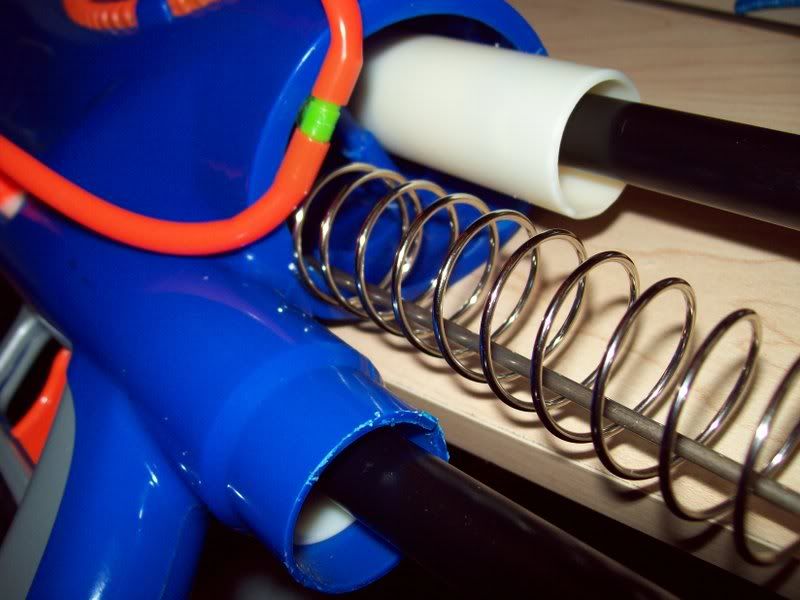
What's with the metal rod? It's attached to the shoulder stock, so when the stock/plungers are compressed, to tooth glides forward and back (the spring pushing the plungers back out of the cylinder) activating the rotation mechanism.
You'll need to do a bit of cutting so the upper plunger fits as well.
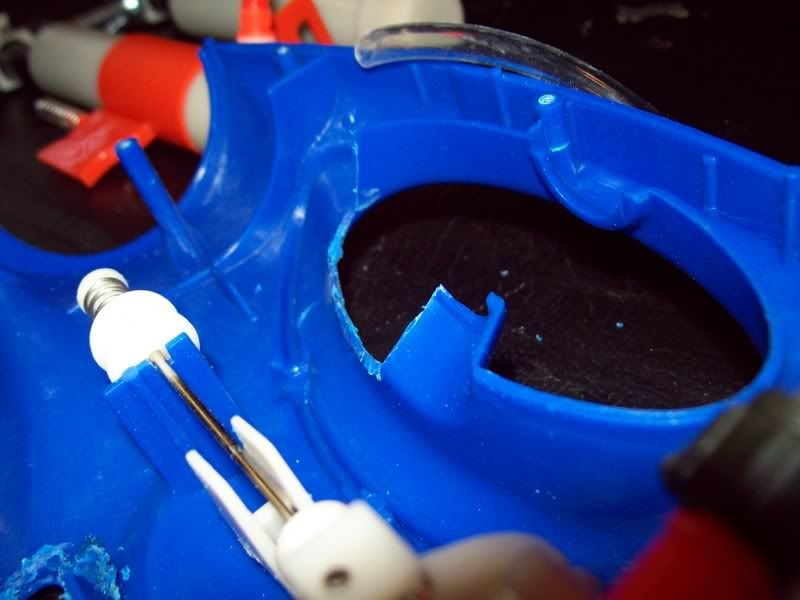

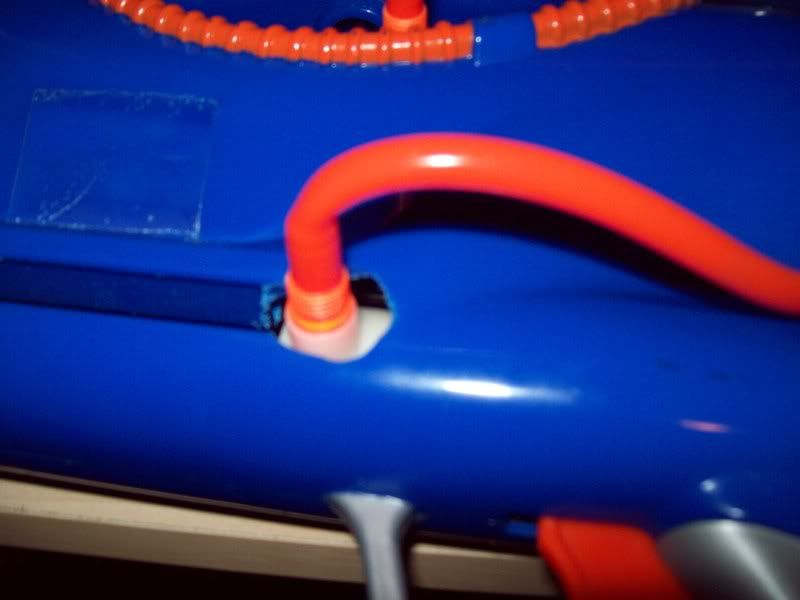
Because I wanted to keep the tubing from interfering with the motion of the advancing tooth, I connected all tubing outside the shell of the gun. (which actually worked fine aesthetically, since the At3k has the fake orange tube embedded in the shell anyway.)
To do this, I had to make a bit of a hole, so the tubing could slip outside the shell.
Next, the creation of the shoulder stock. a 5/16-18 threaded bolt fits perfectly into the hole in the plunger rod. The Home Depot near my house carries it in lengths as short as 12", but you only need about 6"-7."
(That's what she said?) I used my cutting torch (MAPP gas) to sever the excess. I imagine the rest of you can use other methods, though certainly none as fun. Next I grabbed a few wing nuts and washers and had the spacing between the two plungers set. (you obviously want these parallel.)
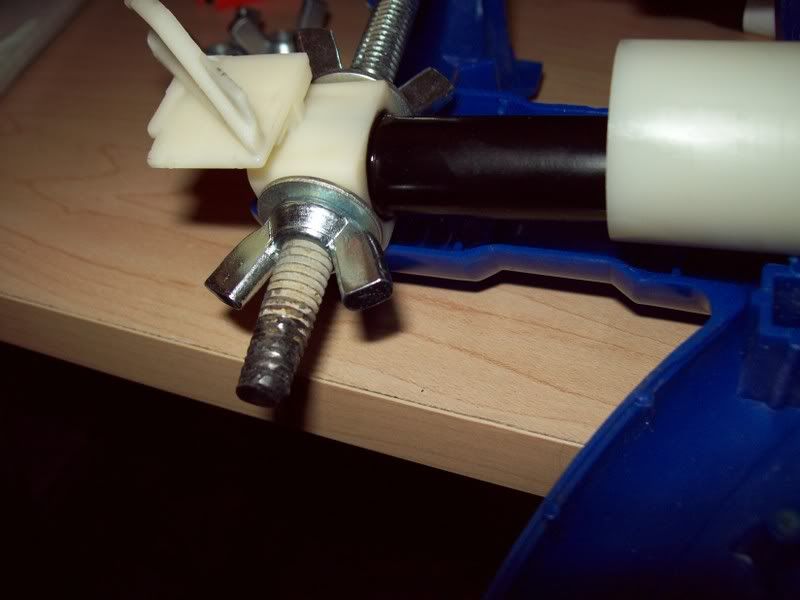
This spring pushes the stock away from the gun, thereby cocking the gun (the mechanism advances the turret on the backstroke)
To make the stock more comfortable, I coated the bolt & nuts with Great Stuff insulating foam, then trimmed to fit once it cured.
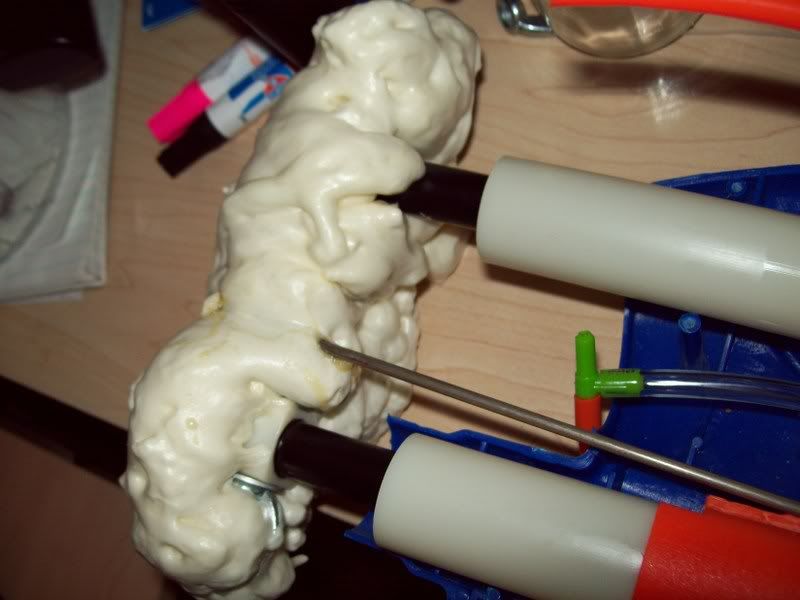
(has not been trimmed in this picture)
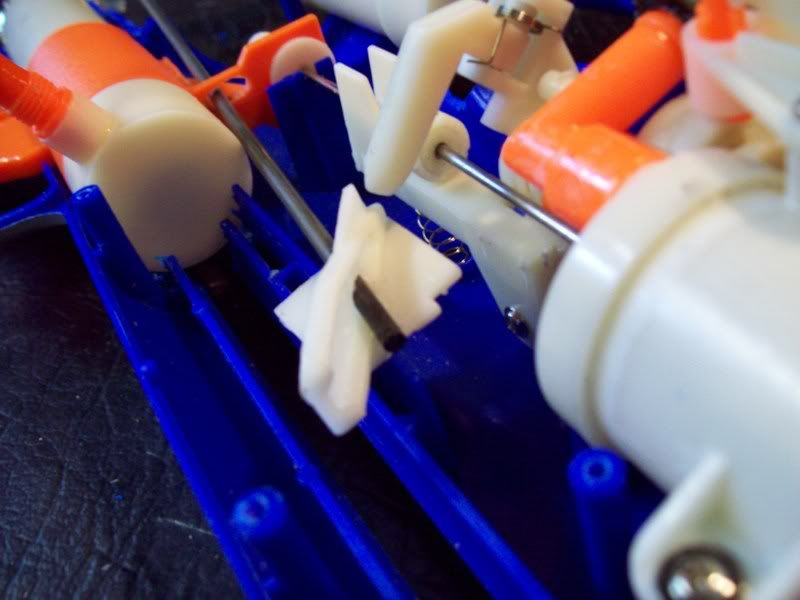
Advancing Tooth
The length of the rod needs to be cut (again, I chose fire.) such that the tooth just nearly bottoms out against the rear of the tank, when the plungers bottom out in the cylinder.
In the picture, you can see a hole in the base of the trigger. I placed this as a guide for the rod holding the tooth, so it wouldn't wobble left/right. In the picture, only 1 rod is present, but after testing, I recommend a 2nd rod as well, to keep the tooth/rod from being twisted about the axis of the rod as it is pushed past the advancing mechanism.
Without the pump handle being located in its normal locale, there now exist a nice spot in the front of the gun, below the barrels. facilitating another integration of your choosing.
At this point, you can close it up, and have a functioning At3k that gets more pressure/pump, and the auto-rotating mechanism still functions. Here's why I still consider the modification a failure.
As stated in the beginning, ideally the stroke length of the plunger is nearly doubled, resulting is nearly four times as much air being pushed into the tank. As it rest on my dresser right now, this is not the case (only twice the volume of air.). Because the plunger's range of movement is being doubled, the advancing tooth's range of motion must be doubled. However, the trigger gets in the way, preventing the tooth from sliding back any further than it originally could. I see 2 options, and seek counsel as to how to best rectify the problem.
1: Find some way to let the plunger/shoulder stock, etc. more twice their stock distances, but the tooth it's normal distance.
2: Relocate the trigger.
I'm thinking the first one would be best solved via. leaving dead space between the stock and rear of the tooth's guide rod, with a compression spring pushing off the back of the gun, and pulling the tooth back to rotate the turret. The 2nd method I think could be best solves using a wire and pulley to relocate the trigger, but still keep my hands in the same place.
Thanks for your time.


