Jump to content


UnscrupulousModefiler's Content

There have been 13 items by UnscrupulousModefiler (Search limited from 03-December 96)


By content type

See this member's

Sort by                Order  

#363468 Modification and Paintjob Pictures

Posted by UnscrupulousModefiler on 06 November 2018 - 11:18 PM in Modifications

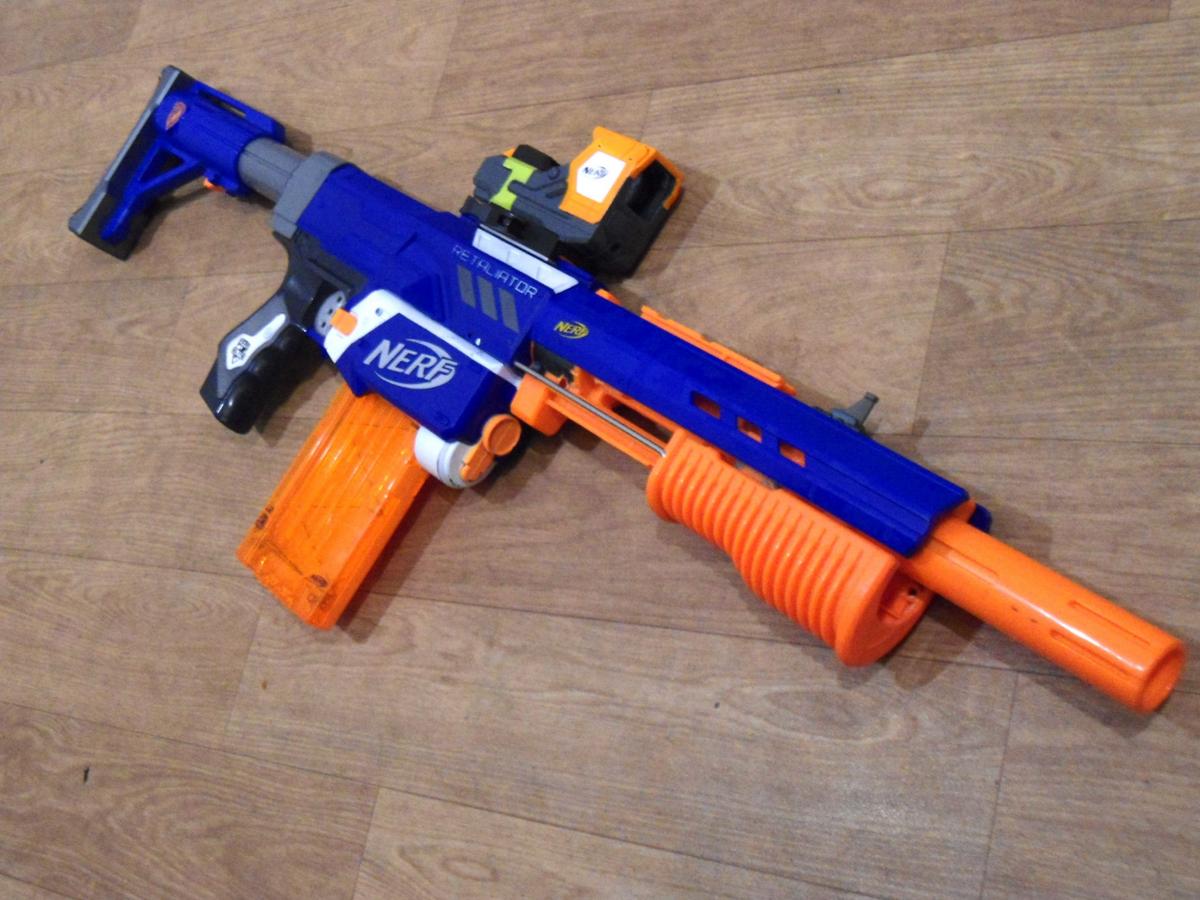
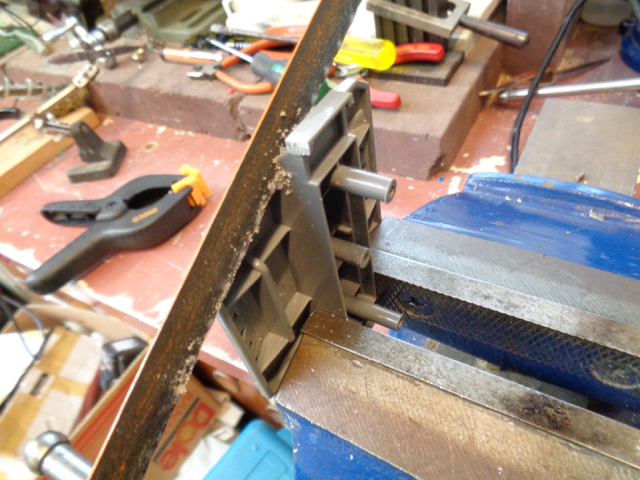
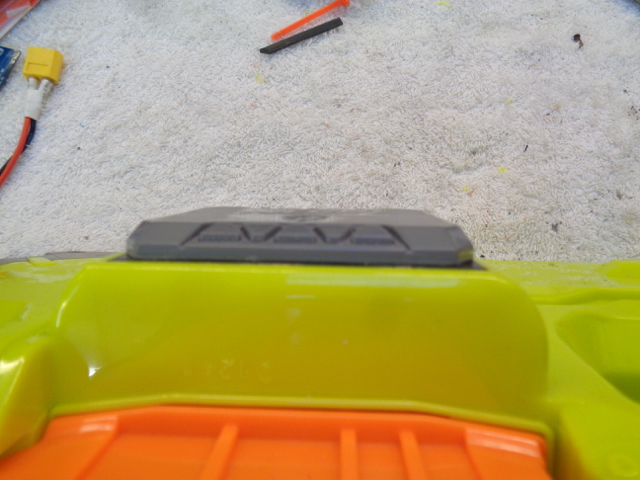
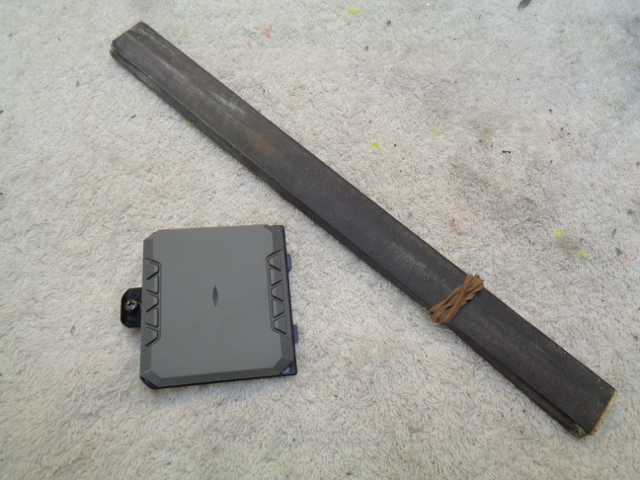
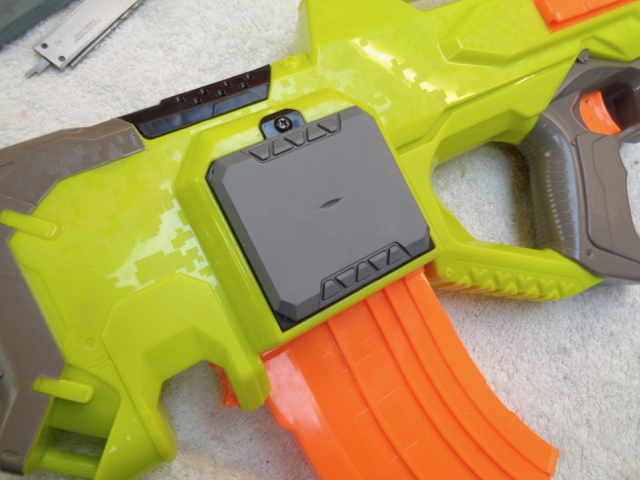
Semi-enclosed priming-arm pump-action Retaliator

[Retaliator body, Longstrike barrel, Scatterblast pump-grip, ø6.4mm 304 stainless steel welding rod pump-arms, AR intact, Tek-6 spring, Raider stock, "SleeperScope" fully-functional red dot sight.]

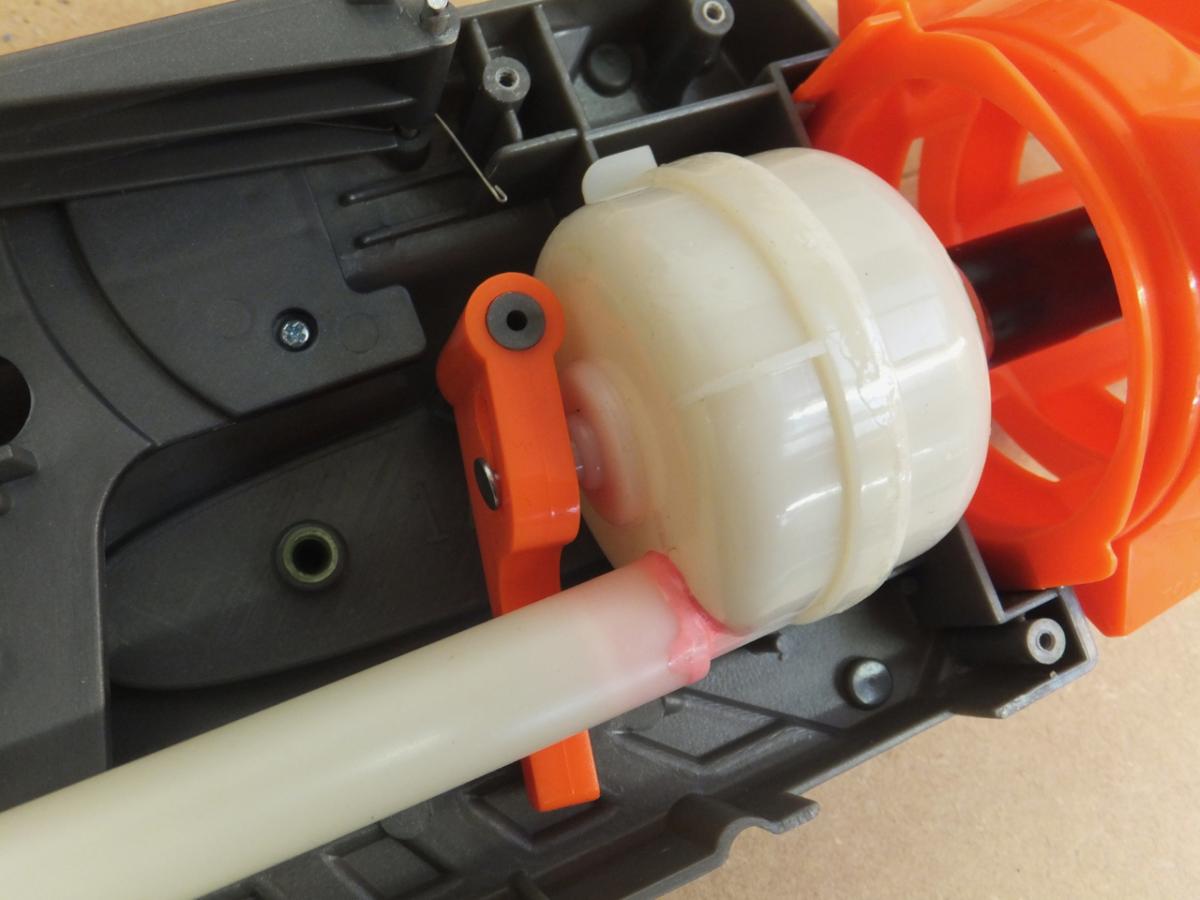
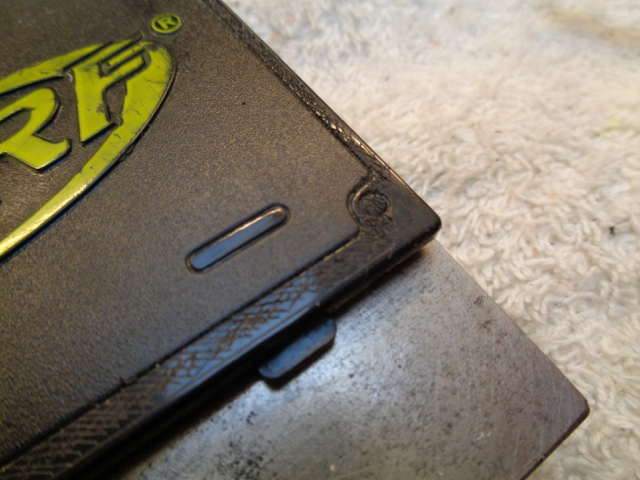
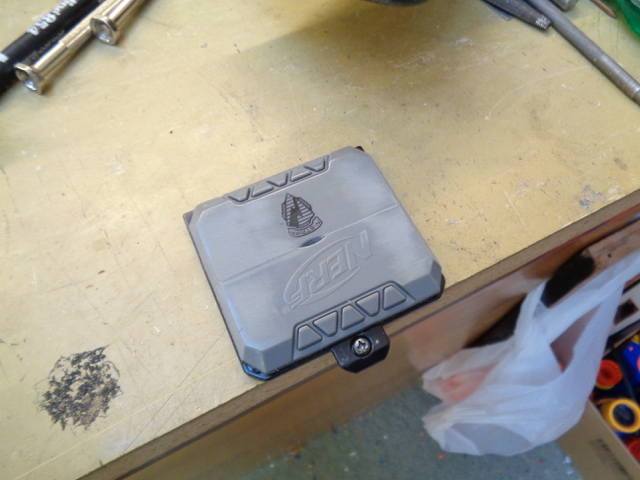
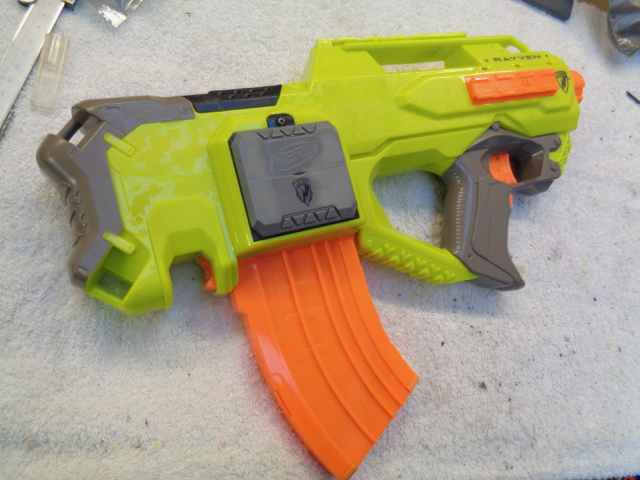
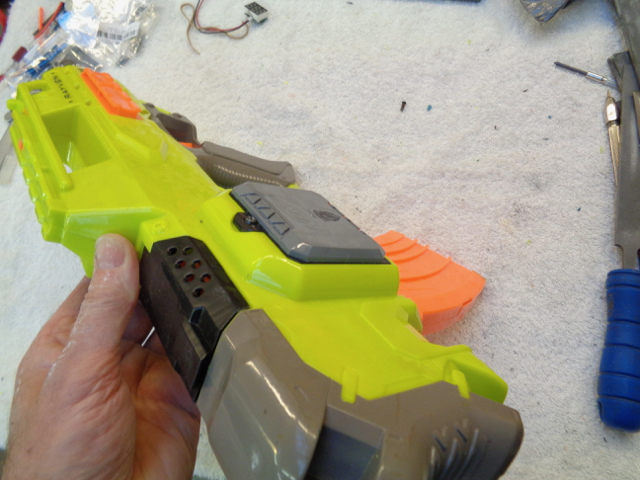
Imgur album for internal pics. (Sorry not really good enough detail to do a proper write-up yet...) Mod uses no additional screws or bolts though - it's entirely about the fit of the bent rod inside the shells.


DSC03252.jpg DSC03253.jpg


DSC03254.jpg DSC03255.jpg


#351760 Modification and Paintjob Pictures

Posted by UnscrupulousModefiler on 24 February 2016 - 08:54 PM in Modifications

What's on workbench at the moment:


_raptorstrike__wip_part_4__triggers_installed__by_nscrupulousmodefiler-d9uwyoe.jpg

"RaptorStrike" (Work In Progress). Ultraminimised Rapidstrike re-shelled in a Tornado Strike body, with integrated Demolisher launcher. Currently running 180's and teeny-tiny 2S lipo in a power-stock until I fit the triggers and sort the wiring properly. Just sorted rev and pusher-motor triggers and switches. Because I inadvertently cut off the supports for the pusher-motor control switch when minimising, I've decided to go with MTB's Rapidstrike wiring-loom. Some shots of the basic internals here.


And some older stuff:


"The Postman" - 8.jpg

The "Postman". 'Cause he always rings twice. Hammershot/Messenger masterkey integration. Hammershot trigger sorted to first fire Hammershot (on a hair-trigger), then the Messenger (with a longer pull). Have run Messenger before as a shotgun, but prefering it now in it's usual 1-2-3 firing sequence.


Edit: Firing video here.


Nerkita - 72.jpg

"Nerkita" Rayven. Hypercats Dewalt coil-nailgun "homage". Makita 9.6v NiCd battery fully integrated to run the Rayven. This one currently running stock motors on improved wiring and switchgear; Mark 2 has 180's, INR-18650's (and an infinitely better paint-job ...eventually).


DSC00811.jpg

The "MessStrike". Messenger/Firestrike integration. My take on SBNC Rob's Retaliator-gripped Messenger. Brassed, air-flow tuned and running the legendary Champion BS0939 (3-3/4" x 5/8" x 16G) AU$2.00 spring addition. No chrono so will make no wild claims ... you'll just have to trust that it's pretty decent. Some comparative spring data here though.


#357352 Modification and Paintjob Pictures

Posted by UnscrupulousModefiler on 30 December 2016 - 07:45 AM in Modifications

Work In Progress. "The HushPuppy" - Demolisher Bullpup. Built for balance and ergonomics as a more compact replacement for my Rapnadomolisher primary.


Current build-log here.

'Tater-Cam shell-disassembly vid here.


Shell: Demolipuppy'd Demolisher, Stampede "flash-suppressor" barrel attachment (Spectre inner barrel and mount), Strongarm grip, Stampede thumbhole, RS stock, Praxis barrel for battery tray.


Internals: Recon inner barrel, Artifact Red flywheel cage, Worker serrated wheels, 3x re-claimed FK180-3539 motors, RS pusher-box, 2x Samsung INR25R-18650 drop-in's in custom removable battery box.


Za7oSlv.jpg


RS pusher-box fitted, Firestrike motor-covers for FWC 180 motors, Nightfinder for pusher-box 180 motor, minimised RS stock:

DSC01987.jpg


3v Tac-light and targeting LLLLLLLLLaserrrrrr mounted internally:

DSC02065.jpg


Nightfinder voltmeter housing:

DSC02211.jpg


#364665 The Official Internals Directory

Posted by UnscrupulousModefiler on 13 September 2021 - 06:28 PM in Modifications

Buzz Bee Ultimate Missile Blast Internals (including tank internals):


https://imgur.com/a/aghCcIh


Hadn't ever seen the inside workings of a pull-pin tank myself, so dentured the dart and cut this one open.


The mechanism looks fairly easy to replicate with just one o-ring at the front and a tiny one on the pin at the rear forming the seal.


* Exhaust valve type: Pull-pin

* Tank volume: 60cc (75cc including connector-tube to the pump)

* Tank max. OD (at overlaping seam at waist): ø56.0mm
* Tank max. OD (main part of body): ø52.5mm

* Tank max. ID: ø48.0mm

* Tank max. external length (at valve seat): ø39.0mm

* Tank min. wall thickness: ≈2.0mm

* Pull-pin valve max. throat ID: ø11.4mm


5166DC97-B163-4BEF-8034-C69891D95425.jpeg

E4A7109B-6E21-4D86-A115-47BC22055DDA_1_201_a.jpeg

793E28C5-9A0E-440D-B31F-5558AFDAFA25.jpeg

AFF869EE-2E25-4B05-A9B7-8F186BF18B36_1_201_a.jpeg

65F10CB3-97A4-4F53-A29B-9EE68D661707.jpeg

4A3BDE73-7C16-4EDF-8381-276352D3473D.jpeg

C20506E1-4DB3-4BEF-B138-CD436CA8F441.jpeg

EFF8C3D3-9120-4BBF-997B-33E4BF8468BC.jpeg


#352409 The 'Rapnadomolisher' - SSTS/RS/Demolisher Integration

Posted by UnscrupulousModefiler on 24 March 2016 - 06:19 PM in Modifications


Here you can see that the tank sticks out on the side.


The power of hot-glue commands you!


I'd got a Shot-Blast to see if I could use the tank to power up the Demo-launcher. It uses an unconventional combination of spring-plus-air-pressure to achieve that "peww!". Turned out it's a bit big though, so I'm on the hunt for an XBZ...


#352384 The 'Rapnadomolisher' - SSTS/RS/Demolisher Integration

Posted by UnscrupulousModefiler on 23 March 2016 - 02:30 AM in Modifications

That is one awesome integration. I never thought about integrating supersoaker blasters until now. I actually have a Tornado Strike so it is cool to see something great come out of it. I noticed the gap in the front where the spinner used to be. If you could wire LEDs right in front of the flywheels and cover the gap with a frosted plastic sheet, it would definitely give it a menacing look from the front. Good luck and great job!


Hey thanks EtA. I reckon the TS has the best shell in the game - I love it's almost cartoon-scale chunkiness, and its grip certainly fits better in my hands than a Rapidstrike or Demolisher. LED's would be waycool I'm sure - there's heaps of room in there for extra electronics - but I'll probably keep this one simple (it barely survived my soldering as it is...).


Pretty damn cool yo, very original! I like the Aesthetic
Are you going to paint the green strip on the optic? 


Cheers! Surprisingly - considering it's a mag'd blaster - you don't see too many mag'd mods for these around. Once I'd started I did find Jerm781's Recon/TS integration from about 5 years ago, but all the rest seem to be RSCB's or turrets. Did I miss some? The platform itself is very ergonomic and roomy (a Styfe integration would rattle in there!) though it may be too bulky for some tastes, plus the plastic feels thinner and the clam-shell fit less solid than a RS so a bit of reinforcement will be necessary to get that level of rigidity.


Paint though??? The bane of my existance ;0) At this stage the idea is to keep it as Super Soaker-esque as possible, so yeah, the green will eventually go. (Does it really irk people that much??)


SS Shot Bast Tank in a Retal Shell.


That I'd like to see!


#352429 The 'Rapnadomolisher' - SSTS/RS/Demolisher Integration

Posted by UnscrupulousModefiler on 25 March 2016 - 03:11 PM in Modifications

Still for sale? Where? I have one, but I would like more.

 Good ol' Amazon. I'd go there, but the postage to NZ's about as much again!


#352425 The 'Rapnadomolisher' - SSTS/RS/Demolisher Integration

Posted by UnscrupulousModefiler on 25 March 2016 - 02:04 PM in Modifications

Yeah, as 2BB says, the Buzz Bee XtremeBlastZooka. It has one of the best performance-to-size ratios out there, and is still for sale.


#352369 The 'Rapnadomolisher' - SSTS/RS/Demolisher Integration

Posted by UnscrupulousModefiler on 22 March 2016 - 06:56 AM in Modifications

Base integration here is a 'RaptorStrike' (Nerf Rapidstrike reshelled in a Supersoaker Tornadostrike body), with an additional integrated Demolisher Launcher.


This is very much a Work In Progress. Shell-work is NOT complete and a proper battery and volt-meter are yet to be fitted, but the basic wiring's done and it's firing now.


DSC00992.jpg


DSC00991.jpg


DSC01037.jpg


DSC00970.jpg


DSC01054.jpg


Quick video of state of build here. Apologies for the potato-quality, but this is just a quick intro before I finish the body and do the paintwork.


2nd test firing on 9.6v here.


* RS shell and dart-carriage ultra-minimised to fit inside TS shell. (RS is a bit fat in the arse around the pusher-assembly while the TS tapers there, so RS had to poke through the sides).
* Jam-door area opened up.
* RS front iron sight attached.
* Rayven fly-wheel-trigger serving as the mag-release switch inside the trigger-guard.
* TS pump-grip fully integrated into the Demolisher grip.
* Barrel is a 5" cut-down Recon barrel-extension. Straight-rifled bore, plus it has a handy central locating tab to align and secure the barrel inside the TS shell. Original RS barrel-extension lug attached at business end.
* Blaster with stock retracted is now same length as a RS , or with stock removed same as a Rayven .
* Motor covers and tac-rail rescued from the RS shell and monstered onto RHS of TS shell to cover the larger motors.
* RS triggers installed with 16amp microswitches and 18g wire.
* Scavenged and matched 3 x FK180-3539E motors from several RC helicopters, so pusher is a 180 too now.
* I accidentally cut off the pusher-motor control switch's attachment points while separating the trigger assembly so using MakeTestBattle's wiring-loom pattern to eliminate this switch from the circuit, with the addition of a kill-swich.


Thanks for checking it out!


#362008 Rayven "Flip Clip" Extended Battery-Tray Cover

Posted by UnscrupulousModefiler on 24 November 2017 - 02:26 PM in Modifications

For those that missed it on Reddit, here's my attempt at an extended battery-tray cover for the Rayven using an N-Strike Flip Clip. Apologies if someone's done it all before!


View Imgur gallery here: https://imgur.com/ga...y/evkvX#f8ZUQvu


DSC03599.jpg


The little 2S Lipo that I'm using was in a prior life powering 2 x FK180-3539's in an RC helicopter so should be rated to their continuous current demands. Short-term they've powered the Rapnadomolisher on full-auto... I'm just not so sure how they'd deal long-term with full stall current (approx. 15 amp each) so I'm limiting their use to lower-spec'd semi-auto builds. Here it's just powering stock motors, wheels and cage for family-friendly "Stock+" games. Rayven's mag-alignment and trigger pull sorted, 16AWG rewire and 16 Amp microswitch, volt-meter and kill-switch added plus a XT60 connector for swapping in a different cage - so it can be taken back up to super-stock when needed.


The Devcon ended up not taking onto the original black plastic cover so I resorted to small screws (recovered from the stripped RC chopper). If you look very closely in image #30 you can just see where the screws are finding purchase in the Flip Clip (into the outer trianglular depressions) without having to drill through the plastic entirely.

Note: the same completed extension will also fit exactly onto a Demolisher battery-tray cover (and adhere better because ABS).


1. T-Series T-11 RC Helicopter - Stripped for parts

1. T-Series T-11 RC Helicopter - Parts.jpg


2. T-11's 18500 2S battery pack in Rayven

2. T-11's 18500 2S battery pack in Rayven.jpg


3. Battery tray cleared and wired for XT60

3. Battery tray cleared.jpg


4. Battery tray cover won't close

4. Battery tray cover won't close though....jpg


5. Enter the N-Strike Flip Clip

5. Enter the N-Strike Flip Clip.jpg


6. N-Strike Flip Clip (rear). There's a screw cover you need to pop off then you can unscrew and separate the halves.

6. N-Strike Flip Clip (rear).jpg


7. Trim flanges to fit into vice

7. Trim flanges to fit into vice.jpg


8. Hacksaw while in vice

8. Hacksaw while in vice.jpg


9. Saw off all rear webs and bosses

9. Saw off all rear webs and bosses.jpg


10. Jeweller's Saw to remove middle

10. Jeweller's Saw to remove middle.jpg


11. Sawn

11. Sawn.jpg


12. File up to these centre webs

12. File up to these centre webs.jpg


13. Using a flat block to square edge

13. Using a flat block to square edge.jpg


14. Join is flush and even on block

14. Join is flush and even on block.jpg


15. Sits nicely on Rayven's battery cover

15. Sits nicely on Rayven's battery cover..jpg


16. Devcon cherry busted...

16. Devcon cherry busted....jpg


17. Mixing up with black concrete-colouring

17. Mixing up with black concrete-colouring.jpg


18. Texturing join for better adhesion

18. Texturing join for better adhesion.jpg


19. Lying flat on table edge

19. Lying flat on table edge.jpg


20. Clamping flat

20. Clamping flat.jpg


21. Peeling off excess glue while tacky

21. Peeling off excess glue while tacky.jpg


22. Devcon didn't bond (D'oh!) so went with small screws also recovered from the RC chopper (see image 30)

22. Devcon didn't bond, so went with screws.jpg


23. Trying on Rayven shell

23. Trying on Rayven.jpg


24. Looking good

24. Looking good.jpg


25. Decent height giving good depth extension. Nice bevel detail.

25. Decent height nice bevel.jpg


26. Scribing cutout lines parallel to edge

26. Scribing for cutout lines parallel to edge.jpg


27. Drill corners, then jeweller's saw

27. Drill corners, then jeweller's saw.jpg


28. Checking battery for fit

28. Checking battery for fit.jpg


29. Square and bevel edges

29. Square and bevel edges.jpg


30. Snip off excess web material. If you look very closely here you can just see where the screws are finding purchase in the Flip Clip (into the outer triangular depressions) without having to drill through the plastic entirely.

30. Snip off excess web material.jpg


31. Thin foam to stop rattling

31. Thin foam to stop rattling.jpg


32. Tuck under edges

32. Tuck under edges.jpg


33. Inside done

33. Inside done.jpg


34. Sand off logos with 180-grit. Ideally, to completely flatten large areas like this you'd go face-down onto a full sheet of Wet and Dry on something DEAD flat like a ~10mm thick plate of glass. A nice tightly-wrapped sanding stick does the job fine though.

34. Sand off logos with 180-grit.jpg


35. Finish with 600 grit Wet and Dry

35. Finish with 600 grit Wet and Dry.jpg


36. Finished item fitted to Rayven

36. Finished item fitted to Rayven.jpg


#362011 Rayven "Flip Clip" Extended Battery-Tray Cover

Posted by UnscrupulousModefiler on 25 November 2017 - 12:00 AM in Modifications

...use a superflat surface next time Im trying to align parts rather than just eyeball it. And maybe pick up a jewelers saw...


Hey thanks! This was kinda the one thing I've worked out that was simple enough to finish nicely and document well.


Most of my good Nerfing tools are things you'd find in any decent jeweller's supply (Otto Frei or Rio Grande in the US). If you're looking at a jeweller's saw you probably want Cut #2 blades or thereabouts - finer blades tend to heat up in ABS due to friction and get stuck (the secret is to never stop in the saw-cut, but accept that you'll be breaking heaps til you get the hang of it...) Also check out these spiral sawblades - big teeth so a bit aggressive and trickier to control, but they allow you to cut in ANY direction without turning and won't clog or jam in plastics - very useful for roughing out. That flat file pictured (Cut #00 6" Flat Hand file) is about as precise as they come and has great teeth for ABS. And a W+D-sized sheet of thick glass (8mm+) as a general-purpose dead-flat surface for sanding and calibrating is a very handy thing.


#363308 Ideal air-flow characteristics for a 6-shot absolver?

Posted by UnscrupulousModefiler on 27 August 2018 - 10:04 PM in Darts and Barrels

Hi gang. Looking to make the tiniest 6-shot absolver shells possible (without resorting to 3D-printing just yet...), so wanting to understand things a bit better. I've read a whole bunch of posts here on how people have made theirs but it seems there's very little discussion of the physics of ideal airflow regarding absolvers specifically. There's heaps of info on how to best to get one dart to fire at a time (pretty straight-forward that...), but things get squirrelly once you split that air-flow and present it to multiple darts. Is there a discussion out there somewhere that might be relevant or am I just stuck with trial and error?

Relevant issues/things to try to address in the build:

  • Minimising dead-space and smoothing air-flow. (Obviously the less dead-space the better, but how important is flow at this scale, especially when it comes to the flow through the expansion/splitting chamber? I can easily fit a cone-shape to the end of the "seventh" tube in the centre of the chamber, but would the shape of the rest of the chamber affect dart velocities much? )
  • Expansion-chamber - volume and relative dimensions. (Is small best here or do you want the compressed air to expand a bit to achieve some sort of "velocity" before hitting the backs of the darts? Is there some sort of ideal relative distance between the rear of the expansion-chamber and the back of the darts to allow the air some elbow room to work on the them? Should the darts be packed right down to the expansion chamber (to reduce dead-space), or would having a bit of extra room in each tube behind the dart better focus the pressure?)
  • Barrel Material, Length and Tightness. Starting with 16mm OD electrical conduit (ideal ID for Elites etc). Strating experimental length will be = (length of one dart) + (diameter of one dart). The extra length here will be reamed out in the middle of the bundle and then capped to create the expansion chamber (so a six-lobbed cylinder three conduit-diameters across by about 12.5mm high)
  • Air Tank: I've got a BBBB and Lanard Big Salvo to play with. Salvo tanks would be ideal for overall compactness, but then there's an individual trigger/pilot valve to sort for each of them. Will initially be running a small 12v compressor with a pressure-switch to fill the tank but ideally want to transition to a SpeXBZ and HPA.

All this may be moot at this tiny scale... but any pointers gratefully recieved!


#363310 Ideal air-flow characteristics for a 6-shot absolver?

Posted by UnscrupulousModefiler on 28 August 2018 - 03:38 PM in Darts and Barrels

17/32nds brass might make for a better barrel material, as you'll be able to pack it more closely together with its thinner outer diameter. If you're just after 6 shots out of one shell and you don't mind messing with half darts, a three barrel absolver with each barrel double loaded might be an option to experiment with.

Hey thanks for the advice :) I've given brass a shot (haha) but the expense is crippling (I want to make a LOT of these...) plus there's the danger of denting a barrel if dropped. The (NZ/OZ standard size) conduit's working for me as far as overall absolver diameter goes because of the convenient "shell" I'm using to fit everything in - plus it's reeeally cheap. PTEG is my next option to try because I want to get Mega darts in as an option too. It's more the length of the whole unit that I'm trying to minimise now, so major issues I'm looking to explore will be around ideal barrel length (is a longer barrel of any benifit in an absolver??) and expansion chamber modelling. There's a super-stubby six-shot Elite/four-shot Mega half-dart shell in the pipeline... I'll post a build-log once I get cracking trying a few things out.