V2 is now live on Thingiverse. First post updated. Incorporates some suggestions from others as well as some of my own ideas. Ask questions, I didn't really do much documentation this time around. My nerf time got severely limited a couple months back and I'd rather push content than write exhaustive guides. But I'm here to help you get things up and running.
TantumBull's Content
There have been 1000 items by TantumBull (Search limited from 03-December 96)
#363305 OpenWheel - V2 now live
 Posted by
on 24 August 2018 - 12:49 PM
in
Homemades
Posted by
on 24 August 2018 - 12:49 PM
in
Homemades
#363089 Getting whirly bird darts after mod
Posted by
on 12 June 2018 - 06:38 PM
in
Modifications
50% of stock nerf darts are whirly birds. I have one Accustrike dart and that flies ok.
From this I'm going to assume that when you say "stock nerf darts" you mean elites? Those are junk and the source of your whirlbirds. Accustrikes will be much better, as you've already noticed.
Also seems to be chewing up the darts.
Those workers are serrated, right? That happens with toothy wheels. Darts become an expendable resource. In the future, stick to smooth. You may lose some FPS with all other variables held constant, but it's worth it in terms of dart survivability.
#363023 OpenWheel - V2 now live
Posted by
on 29 May 2018 - 09:55 PM
in
Homemades
I wonder if machined aluminium cages might help on the vibration front. I'd be curious to see if a Worker or Artifact cage would fit these wheels.
That's certainly possible. Might have different constrains on the minimum inner rim diameter but I'm sure that could be worked around.
#363021 OpenWheel - V2 now live
Posted by
on 29 May 2018 - 06:38 PM
in
Homemades
V2
V1


Exhaustive write-up and documentation:
 OpenWheel.pdf 1.44MB
1123 downloads
OpenWheel.pdf 1.44MB
1123 downloads
Copy and pasted from the introduction of above document:
Here I present OpenWheel – my efforts at lowering barriers of entry into the world of high performance flywheels on standard (non-Eclipse) OFP cages. That means working with DC brushed motors, and a 2mm shaft. This project was originally motivated by cost, but through my experimentation I quickly found that I could also get superior performance to commercially available machined wheels.
The results, for those who are as impatient as me: 150 fps through a Morpheus guide on OG Fangs.
Everything is in the document. I can't stand the formatting in forums and uploading each figure individually, otherwise it would be here as well.
#362999 Stryfe Mk-13
Posted by
on 11 May 2018 - 05:29 PM
in
Modifications
Rev trigger. Or at least, a rev trigger. I've got mine wired up with the flywheels on one switch. Thinking about it, with how big that blower motor is, it's probably terrible for all parts involved, I should really try to set up separate wheel/blower triggers to stagger current flow a bit.
Yep, that's what I mean. The MOSFET powering the flywheels is controlled by the stock rev switch. MOSFET is rated to 195A so I'm not super worried about hooking up the blower to it: I use the same model to power on 4x wolverines in my 2 stage demo build.
I am also thinking about giving it its own switch at the "foregrip", so I don't have to waste power on the FW motors when loading the coil. There are some functional advantages to having it on it's own circuit.
#362997 Stryfe Mk-13
Posted by
on 11 May 2018 - 12:55 AM
in
Modifications
Went down a 10' coil segment, at Meaker's suggestion. I guess I was trying to run 20' before. Worked much better this time around. Starting playing with the servo gate a bit more and was able to control the fire. I was fluttering the trigger but you can see that this thing just really wants to spit out foam.
Interesting note: Pretty severe whirlybirding. It's possible that its hitting the inside of the stock orange muzzle, as I forgot to dremel it out like I normally do. However, I don't think that's all of it as AFAIK I'm the only person who is obsessive enough to do that to stock muzzles. I think the more likely culprit is the blower itself destabilizing the dart after losing contact with the wheels. Further evidence of this theory is the fact that the whirybirding increases as the tube empties, ie volumetric flow rate increases. It's an interesting problem to have, "muzzle blast" on a flywheeler. This might benefit from an extended Morpheus guide with venting. Or maybe some porting just before the cage.
Jerky camera at end is my mad rush to shut off the blower before my ears started bleeding. I really need to rig the blower to the flywheel mosfet circuit rather than just having an on-off slide switch.
#362989 3d sledgefire scan
Posted by
on 08 May 2018 - 02:46 PM
in
General Nerf
I need a translucent shell. Im trying to do an led job that requires more then just cutting a slot and gluing some sanded polycarb.
Who do I ask?
Edit: I just realized I could try resin casting. I still would like to get a sledgefire scanned, because it isnt as imprecise as casting
I think Lucian is the scanning dude. Depending on what you do with the scans, casting can be far more precise. If printing off of FDM, casting will be more precise. If printing off a 300k Polyjet printer... casting is maybe slightly less precise.
Regardless of the printer, you aren't going to get the optical clarity achievable with casting without significant post processing. The best I've seen is Polyjet pseduo-acrylic painted with a thick clear coat to remove layer effects. I've seen some pretty clear DLP/SLA prints (after similar post processing) as well but I'm less knowledgeable about that tech.
#362954 Ballistic coefficients?
Posted by
on 27 April 2018 - 02:26 PM
in
Darts and Barrels
A similar discussion was going on at r/nerf recently. The discourse there might be worth a look.
#362876 OpenChrony - open source, DIY chronograph
Posted by
on 08 April 2018 - 11:32 PM
in
Homemades
If you take a look at V1.5 you will find ISR's implemented. However, I still have a while loop that holds things up before the first gate is tripped. Which is unnecessary because the ISRs are present. While having that while loop in 1.5 doesn't affect accuracy, it does unnecessarily hold things up.
I'll look into how you got around the while loop. I got informed of another way to get around it on the Arduino forums but I haven't gotten around to implementing it. Either way the only end effect on the user is that the first gate needs to be tripped before pot test mode works properly, but you need to block the gates to get feedback in the first place, so I'm not worried about it.
One final thing I'd add is that you can totally get rid of the flag variables inside your ISR's, they are needless operations during a time-critical routine. You can have a function return various output depending on the result of math on your micros() readings, as in v1.5.
#362848 Which and what to do for a super-stock springer?
Posted by
on 04 April 2018 - 04:25 PM
in
Modifications
I have an OG blue longshot with the stock plunger AND lip seal. It's brassed, and when I plug the barrel and fire, the plunger STOPS midway through its travel. Again, unless the o-rings themselves are damaged, the seals are more than adequate. What do you mean by seal on the stock barrel? If you're referring to the hole in the bolt, then yes, obviously plug that.
Also, there's zero reason to bother with a brass breech if you need to stay under 130 FPS. It's also pretty clear the OP is a beginner, which is another reason to avoid a brass breech for now.
Just brassing the bolt is reasonable, but depends on the darts you use. You don't want to brass it to 9/16 as that's looser than stock barrel, but 17/32 is far too tight on most 3rd part full lengths that I've tried.
To reiterate, if your goal is 130 fps, then do the following: Reinforce the boltsled, upgrade your spring (let's say 9 kg) and if you are under performing you can brass the bolt. This entails buying a 17/32 drill bit, and drilling IN REVERSE and VERY SLOWLY through bolt so you can insert the brass. If these mods give >130, you can re-open the hole in the stock bolt that you've probably plugged with a bead of hot glue at this point.
As far as the exact spring to get, I kind of pulled 9 kg out of my ass. I've never ran a longshot that didn't have a [k26] plus stock spring. Someone else may have better FPS data for stock bolt, replaced spring.
#362844 Which and what to do for a super-stock springer?
Posted by
on 04 April 2018 - 01:41 PM
in
Modifications
I would ignore unicorn dude's advice. The stock seal is adequate and a brass breech is neither a good place to start nor keeping your blaster "super stock".
There are a variety of aftermarket springs available for the longshot. If you retain the stock priming set up (pulling a bolt handle and loading eccentrically) you will want to reinforce the bolt sled with pretty much any spring replacement. I've heard of stock sleds breaking at 9 kg from the high torsional stresses. If you install a pump grip, you can get away with higher spring loads without reinforcing the sled.
#362811 Stryfe Mk-13
Posted by
on 29 March 2018 - 06:43 PM
in
Modifications
Ha! That coil is great/not a coil at all. You should be able to get a tighter radius and maybe loop it backwards to get your input/output configuration to work without being so overly large.
I didn't use the blower's adapter, that may be causing you more grief than anything (just came straight off the housing). How many darts did you end up loading/firing?
I've noticed that a more complete (eg; no more darts will fit in the coil and all deadspace has been filled) load helps with feed rate, which should be obvious but wasn't.
We will see. My first trial run had tighter bends and barely fed at all. But yes the final config needs to be something that I can actually use. I think that I can get more out of the blower if I run it at 4s.
And yeah the blower adapter sucks. I'm going to glue it on, the coupler provides enough interchangeability. I think I fed around 80 darts through, but on the second I noticed that there were about 10 I couldn't get in that I could the first time around. So definitely some deadspace in the coil.
I've noticed that as well. I'm pretty sure both trials had coil deadspace. It can be difficult to fill it perfectly, and it seems like using my lungs helps with that.
#362809 Stryfe Mk-13
Posted by
on 29 March 2018 - 05:18 PM
in
Modifications
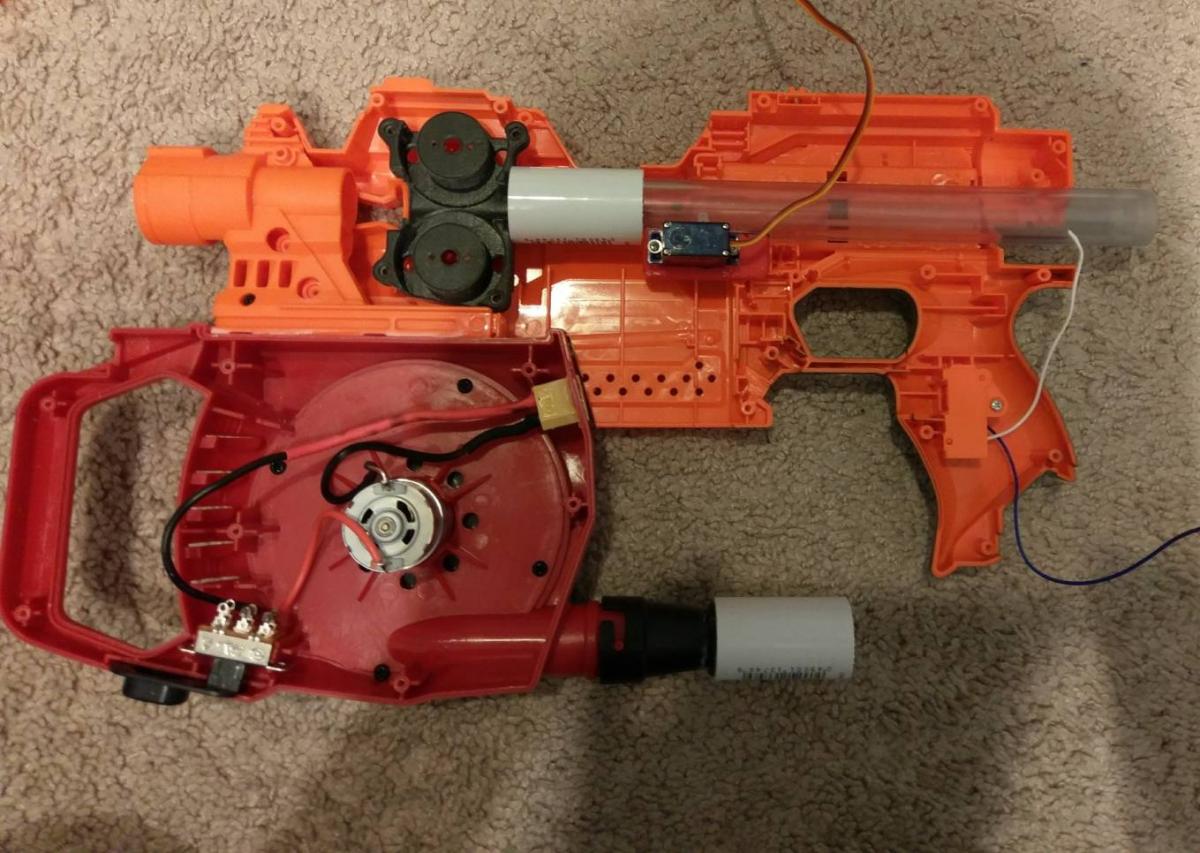
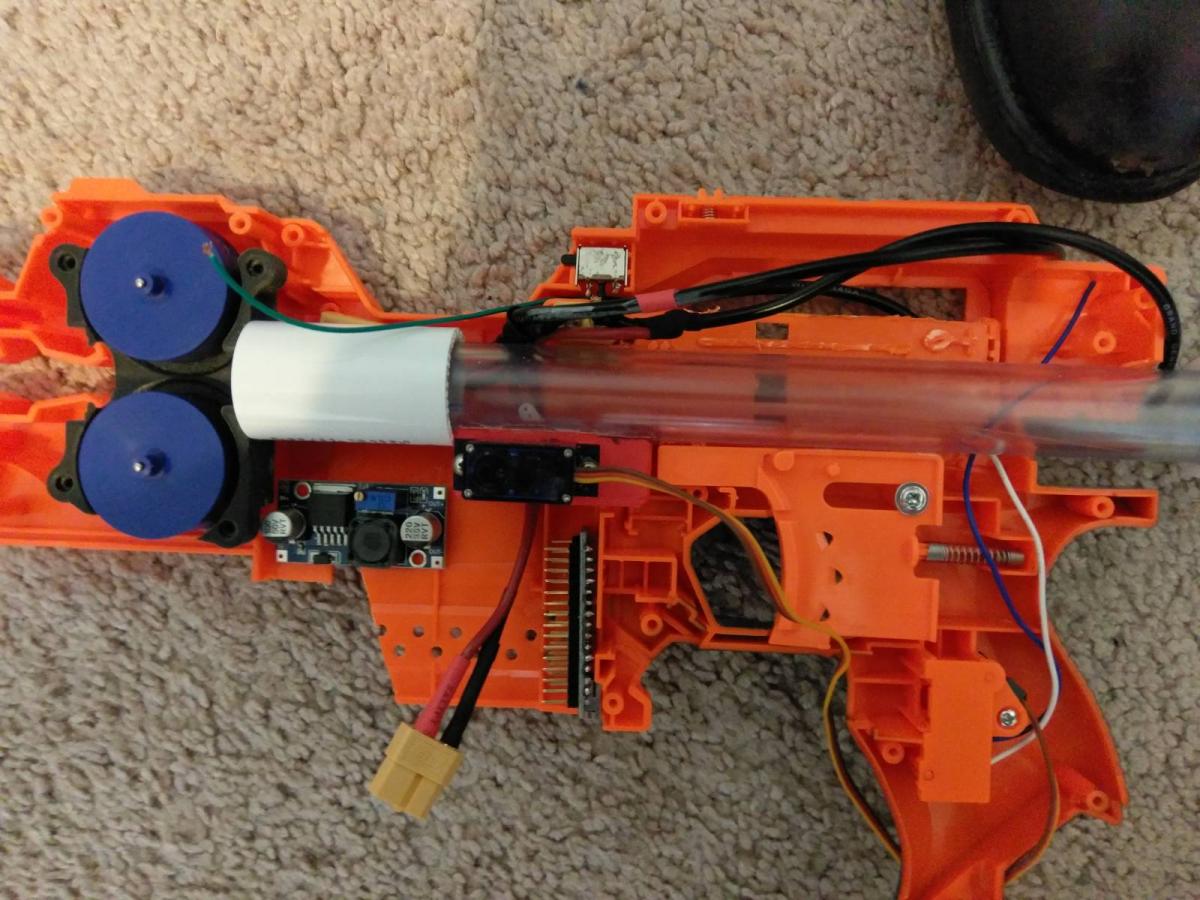
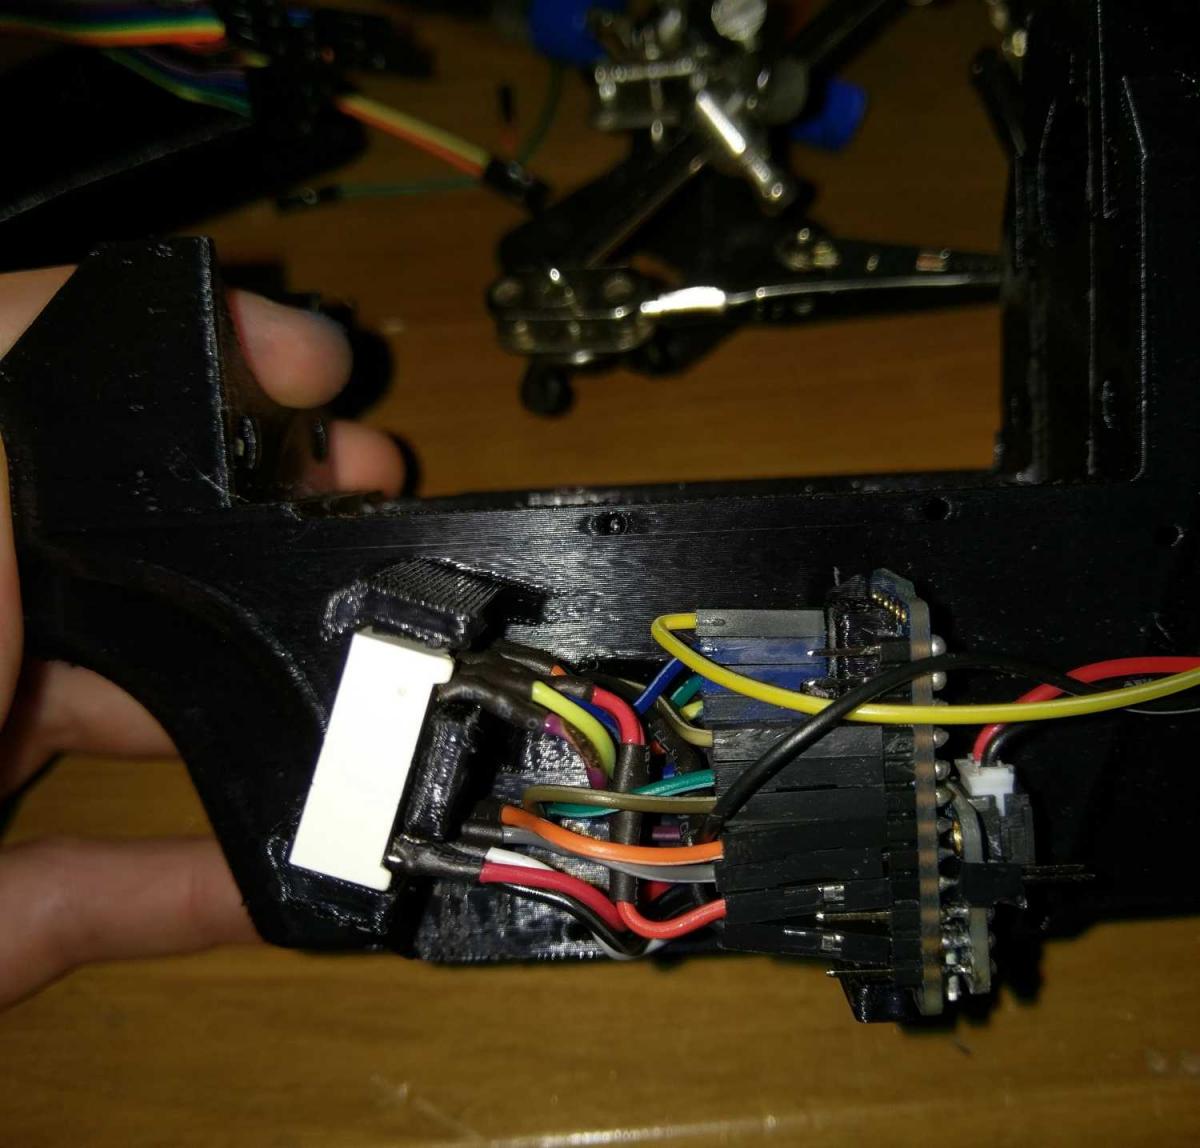
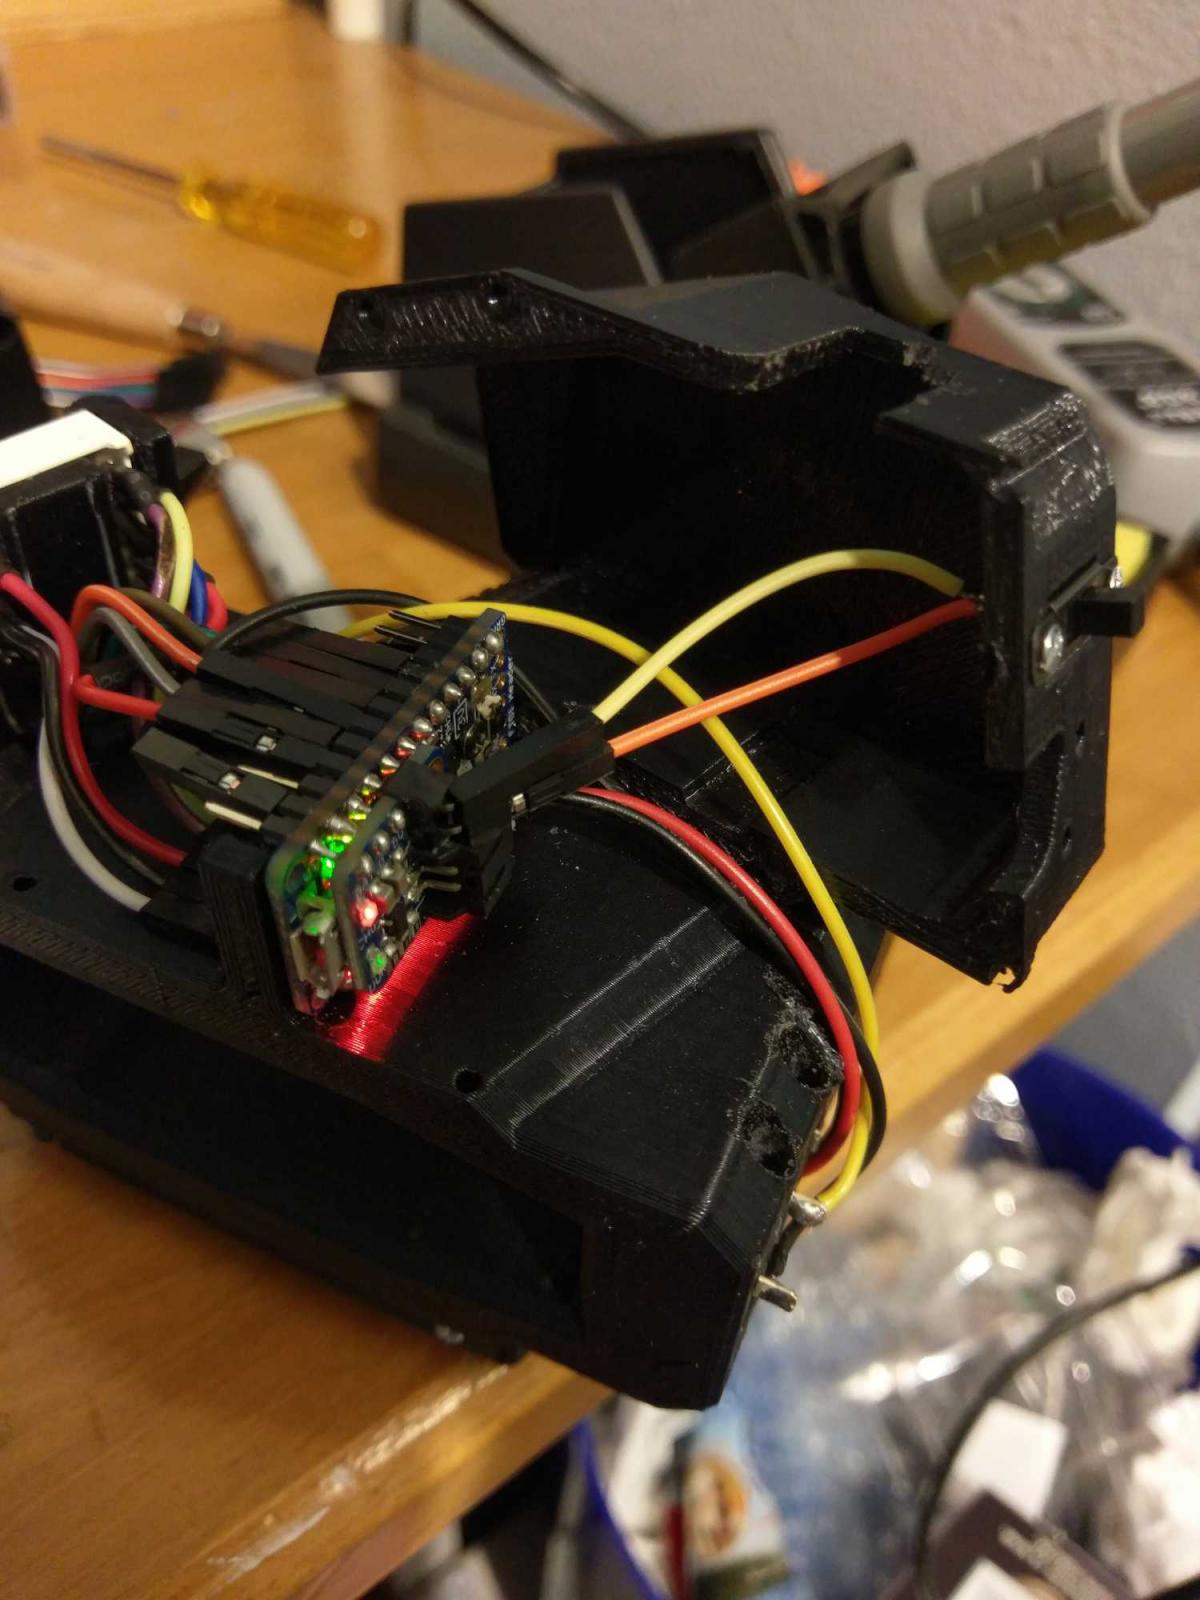
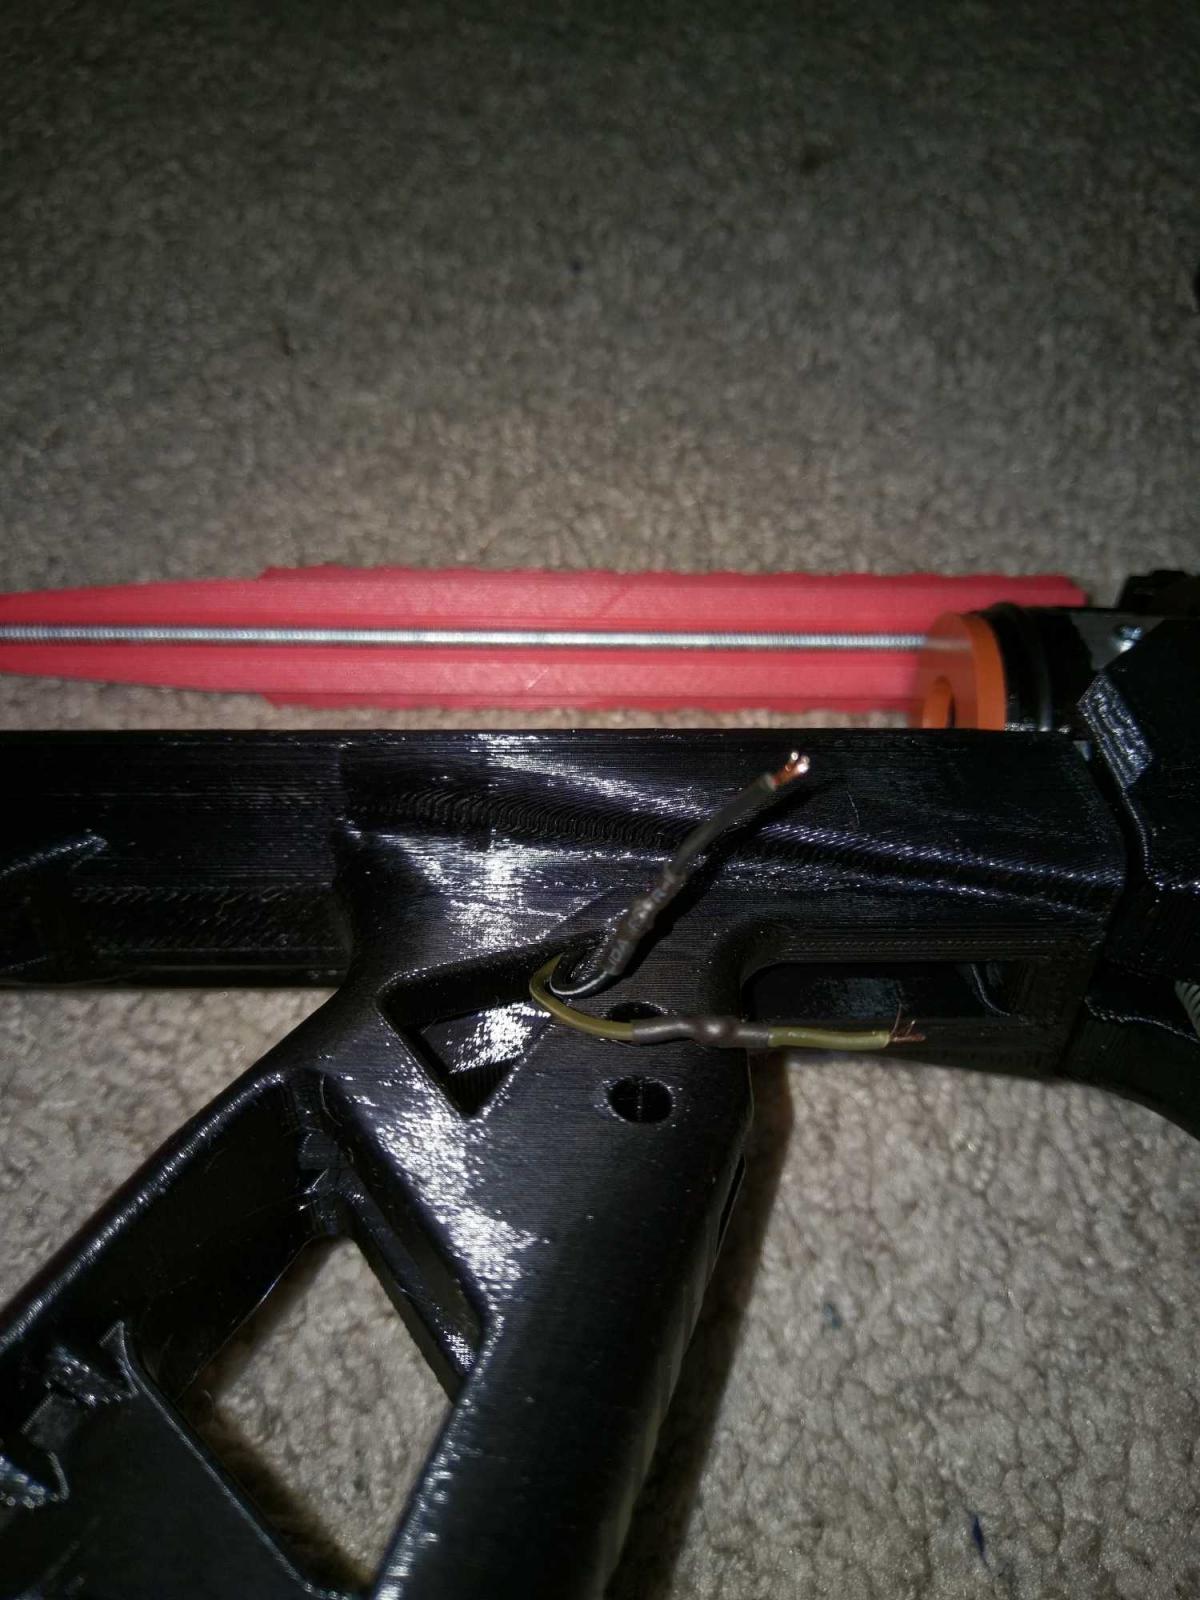
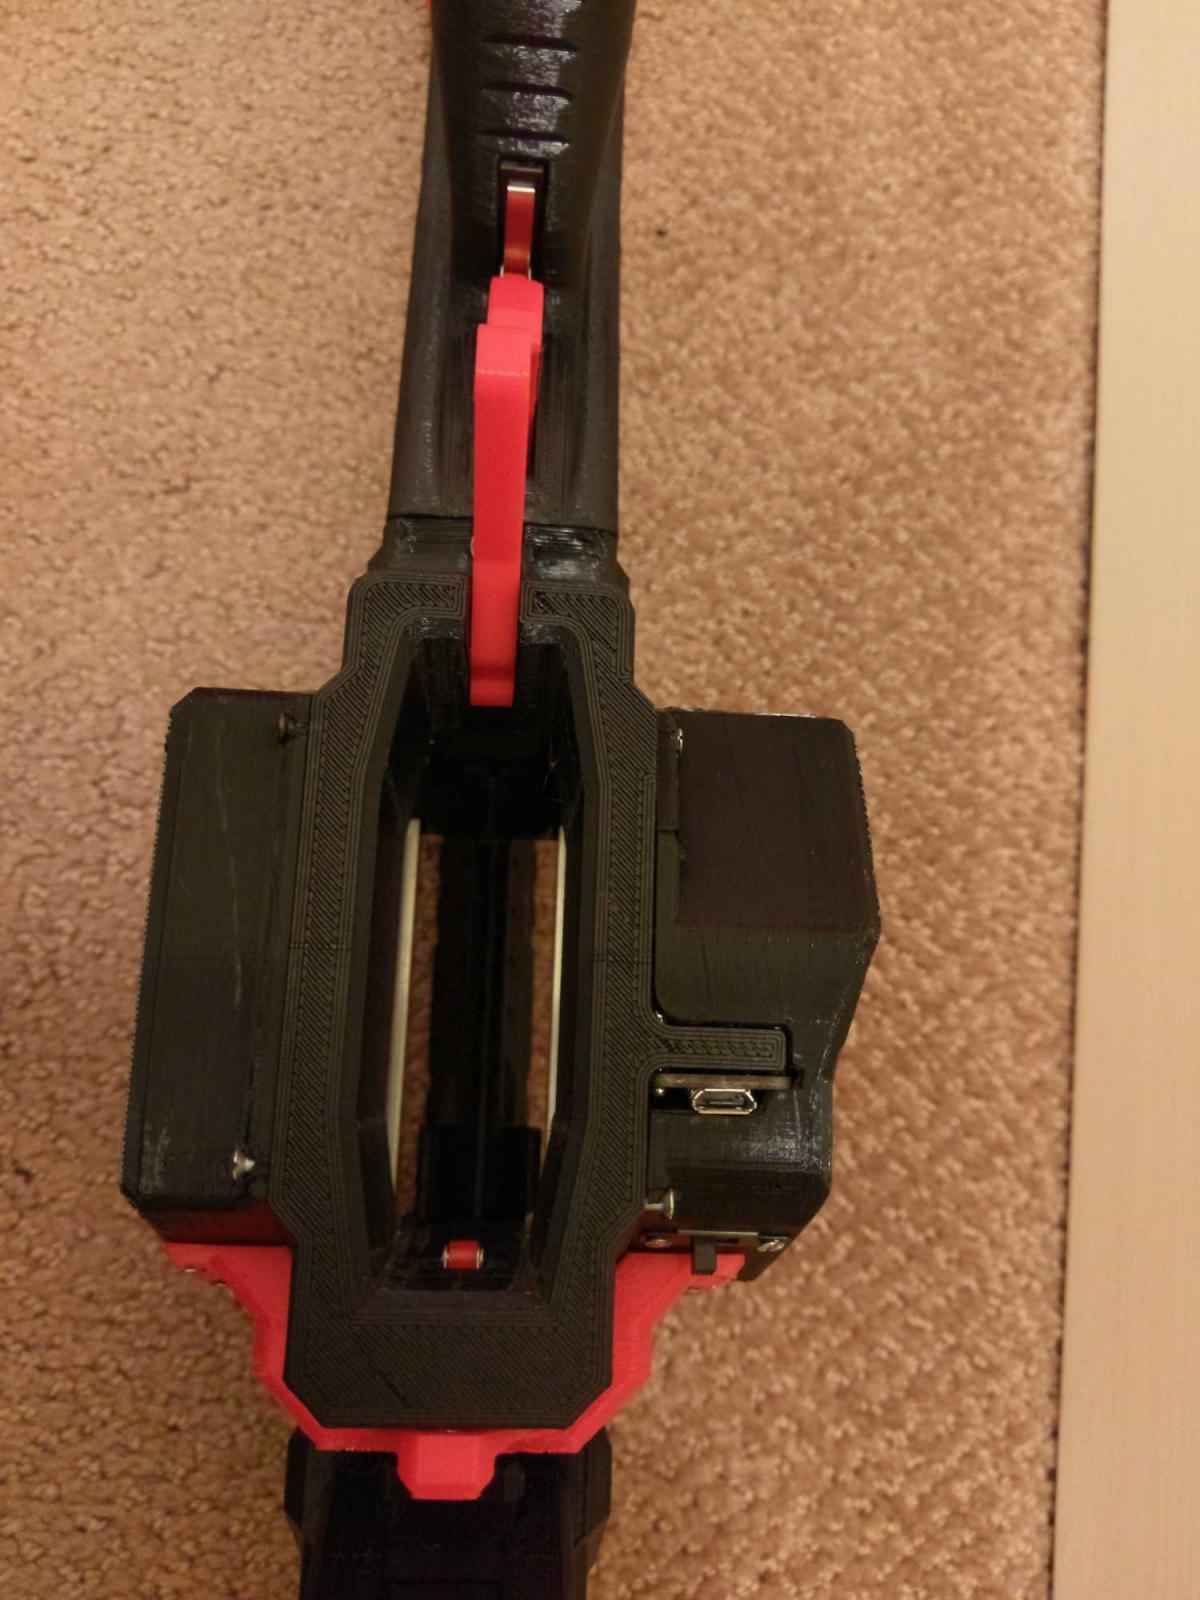
So, many of you are aware of Meaker's efforts with massive magazines/clips for flywheels. I was intrigued by the ridiculousness of the project and decided to roll with it. I took the idea behind his Mk-13 and stuffed it in a Stryfe shell, while also incorporating some fire control.
Labelled internals:
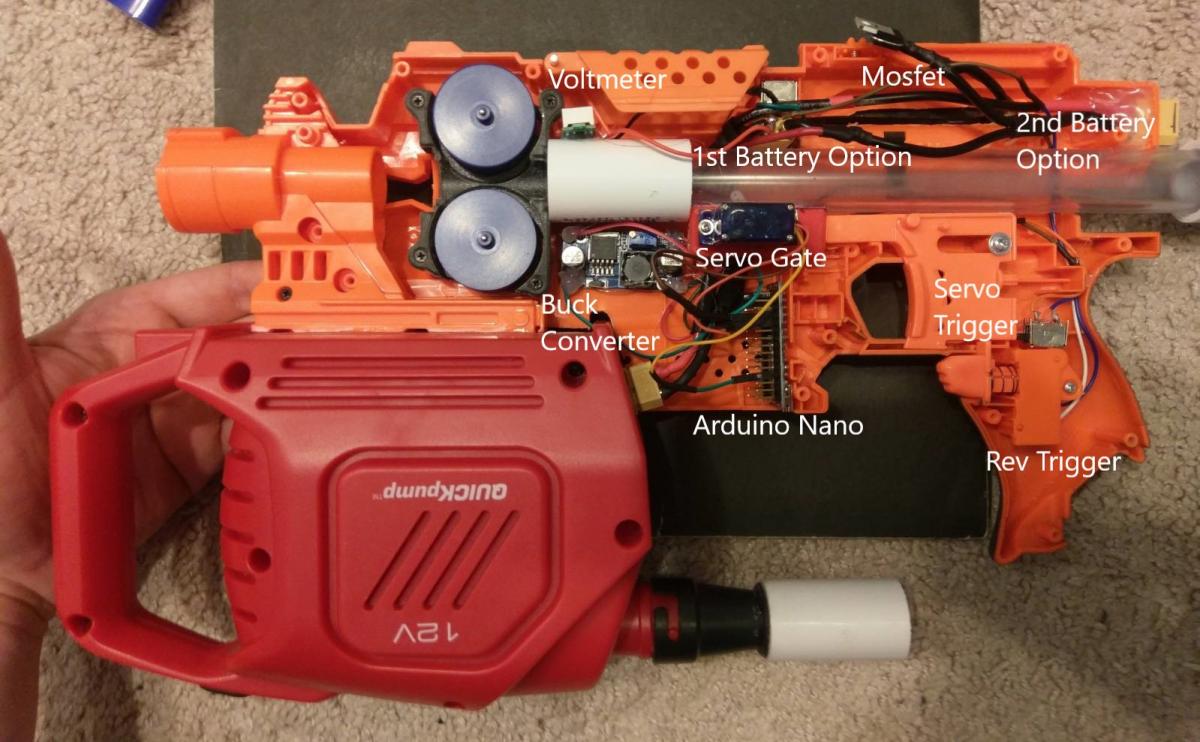
The cage has a 41mm gap and is running Blasterparts wheels spun by OG Fangs.
A lot of this is pretty standard flywheeler electrical work. Some stuff that is less obvious:
- There's an integrated Arduino that controls the servo gate. When the trigger is depressed, that little arm inside the clear PVC depresses to allow darts through.
- The linear regulator included in the arduino sucks and wastes a lot of energy to heat when stepping down from the flywheel system's 12v to the Arduino's 5v. So I included a buck converter, which essentially steps down voltage but accordingly increases current so that the power value stays roughly the same (I think 80 - 90% efficiency on this model).
- The push button that controls the servo gate was sourced from a lock IIRC
- Obviously a lot of shell cutting going on here to fit the PVC.
Next I will just put up a bunch of pictures from throughout the build process.


Next some videos of the blaster in action. I'm going to post the second ever firing test first, because it worked better than the first test, and it seems like NH only does embedded vids for the first link.
2nd Fire Test:
1st Fire Test:
https://youtu.be/33D_ze4I4RA
Servo Gate Demo:
https://youtu.be/WI7XwnQfBf0
Closing Remarks:
There is still some work that needs to be done regarding feed issues. I'd like to experiment with different coil materials and wrapping techniques. I also would like to see what overvolting the blower motor does for reliability. I'd also like the provide some reinforcement, particularly by connecting the blower outlet to the pistol grip.
#362804 OpenChrony - open source, DIY chronograph
Posted by
on 26 March 2018 - 11:10 PM
in
Homemades
will a gamer kit from tech will save us all work for this
I'm not familiar with that board or the chipset it uses. Whatever chip you use needs to have an I2C pin and 2 external interrupts, and the board needs the corresponding pinouts. Off-brand Arduino uno's are inexpensive, I recommend just picking one up if you're unsure about compatibility.
#362791 Nerf "High-powered" Blasters
Posted by
on 24 March 2018 - 10:50 PM
in
General Nerf
Up until the past several years, velocities in the 250 fps range were the norm. I stopped nerf in 2011 and just started up again a few months ago. When I stopped everything was high velocity. Now I see this 200 fps cap all over the place.
A lot of people will tell you that it doesn't help your ranges to go over 200 fps. This is basically true. However, it absolutely helps your accuracy. Time to target can be noticeably reduced for closer range encounters, so you don't have to lead as much.
It all comes down to inclusivity. If you want more people at a war, you set strict fps limits. The games I host run a 300 fps cap, and I get notably less attendance than the other wars in my area. I'm fine with that, I'm a classic NIC dude and it's how I like to play. I can have plenty of fun with 10 people at a war.
#362723 Upgraded Air Cannon Design - W.W.A.C. 2.0
Posted by
on 13 March 2018 - 03:39 PM
in
Homemades
I thought the problem with HIRs was that they don't want to go faster than ~130 FPS no matter what you do. Hopup, smooth bore; I haven't seen reports from anybody using rifling but I suspect the result is the same: the things won't go much past 130 FPS.
Keep in mind that I think we, as a community, have yet to see anyone use a propulsion method other than springer or flywheel on HIR. In Slugs rivalburn post on reddit there was some back and forth about ballistic limits, and I think someone referenced an air blaster shooting rival. I didn't follow through and don't recall if the commenter's reference had chrono data or was more of an anecdote.
Assuming we can put enough energy into the ball, as long as it doesn't destroy the ball itself (looking at you people shooting nerf with shotgun primer), there isn't really any limit to the muzzle velocity. That's not to say the drop off will be insane, but we should be able to get higher muzzle velocities if we put enough energy into the rounds.
#362718 Trying to get back into it
Posted by
on 13 March 2018 - 03:14 AM
in
General Nerf
Fancy mill? Its just a vertical mill. Wouldn't be hard to put some barrel material in an indexing collet and start drilling some holes. I don't typically use the fancy cnc mill. Also, I always hated those fishing line and nail-on-a-stick methods for getting a rifled barrel.
Again, rifling isn't really what matters here. Check out Slug's recent thread about the VF1 barrel alongside the SCAR. Both were identical unless the fit wasn't right in the SCAR, then performance was better on the SCAR. The whole idea of fishing line is an adjustable elastic barrel, not to impart spin. People like JSPB and others who do it for spin are correlating two things and assuming causation. In terms of fluid dyanmics, it makes no sense that spin would help a nerf dart, DOOM wrote a dissertation-style nerf document that modeled a dart and came to the same conclusion, and cited evidence that spin doesn't help. DOOM'd document is an excellent read if you're up for it, its on his website, go read it.
What Meaker is getting at is there is zero advantage to turning/milling a rifled barrel for nerf. Either 3D print Slug's VF1 and tune the diameter, or use a SCAR barrel.
Get me some dimensions and I can make a solidworks file simply enough.
I hope that you are either being flippant or are referring to the dimensions of some specific part, like a nerf dart or stock vulcan chain. The dimensions are dictated by the design that no one has come up with. Everyone and their little sister can CAD these days, that part is trivial. Spending the time to design, prototype, and revise is what they were asking of you, not simply drawing up someone else's work.
#362708 Trying to get back into it
Posted by
on 11 March 2018 - 08:06 PM
in
General Nerf
What is the current preferred barrel material for the rival rounds?
I recommend contacting Slug on that front. I, personally, have very little interest in rival and I'm not up to date on related mods/homemades. However, I do know that Slug has a version of the Caliburn that accepts rival rounds. He might have some suggestions related to barrel diameter and his experiences with what worked and what didn't.
#362706 Trying to get back into it
Posted by
on 11 March 2018 - 07:03 PM
in
General Nerf
Oh btw, when I say I can make anything I mean it. Being a senior mechanical engineering student doing research has its perks. What is something you guys would like to see?
That's adorable.
Seeing as rifled barrels are becoming more common place on darts, I'm assuming similar tactics have been tried on the balls. What has been tried? From personal experience I know that, when fired fast enough from a barrel, golf balls will be unstable in flight unless you use a rifled barrel. Hell even a little back spin makes them much more stable at higher velocities.
To be clear, rifled barrels when used on darts are not used to impart spin. Anyone who claims that spin is the what makes the dart more accurate has a pretty elementary understanding of what's going on. I'm sure you already knew this though, being an engineering undergrad and all. The only reason that it's useful to change the twist ratio (a la Scar) is that doing so also changes the elastic inner diameter of the muzzle device. As you might imagine, more turns = smaller effective diameter.
Rifling and hop-up would be much more beneficial on a projectile with uniform density, like a rival round. As you nay surmise with your spud gun experience, hop up can increase the range and rifling the accuracy. I have seen some work with hop-up, but haven't seen much with rifling. That would be an interesting place to start if you're looking for a project.
#362600 OpenChrony - open source, DIY chronograph
Posted by
on 20 February 2018 - 12:48 AM
in
Homemades
V1.5 Firmware is up. Accompanying file set will be up in the next week or so but existing files are fully compatible. Check first post for video. I've also formalized the write-up and uploaded a PDF.
#362532 Countiburn - Ammo-Counting Caliburn Modification
Posted by
on 12 February 2018 - 01:22 PM
in
Homemades
Hey great job on the build, I took a look at your code and it looks like your using a variant of our code from http://ammocounter.com Could you please add attribution to your code?
Absolutely dude. This code uses your counting method and a version of your mag toggling. I did mention you at the beginning of the thread. Where else would you like me to mention you? Thingiverse, header of the .ino file? I'm new to this coding stuff, sorry if I stepped on any toes. Why don't you shoot me a PM and we can discuss there. I just contacted you to notify you of changes to the .ino.
Added stuff into the .ino to credit Deal and Westaby. Forgot the .ino is accessible on Thingiverse so someone wouldn't necessarily see my attribution that's in the thread.
#362517 "Cascading Compressed Air" Design for a modular repeating barr
Posted by
on 11 February 2018 - 04:14 PM
in
Darts and Barrels
If you increase the throw on the barrel valves and select the right springs I don't see why this wouldn't work on higher powered blasters.
That said, besides being a fun design project, what's the point? A breach and magazine or hopper are much more effective means of achieving the same end.
That said, besides being a fun design project, what's the point? A breach and magazine or hopper are much more effective means of achieving the same end.
#362505 Countiburn - Ammo-Counting Caliburn Modification
Posted by
on 09 February 2018 - 05:08 PM
in
Homemades
Right handed files are now up on Thingiverse.
#362503 Countiburn - Ammo-Counting Caliburn Modification
Posted by
on 09 February 2018 - 11:25 AM
in
Homemades
That's an excellent point. I honestly hadn't considered that use case as it's not a feature of the Caliburn I intend to utilize. I will consider adding that in a future iteration. I really like how the count decreases on trigger pull, and I do have 1 or 2 I/O pins I can make use of still. So what I would do is add a switch at the location you suggest (basically opposite of magwell switch), and increase the magnitude of count decrements on trigger pull if more than one primes are detected.
In the interim, the user can pull the trigger before priming for the first round for however many rounds besides the first are being loaded. This is obviously far less satisfying.
In other news, I completely forgot to add right-handed files before posting this! I will be adding these to the Thingiverse link in the next several days.
#362498 Countiburn - Ammo-Counting Caliburn Modification
Posted by
on 09 February 2018 - 02:52 AM
in
Homemades
Here I present my Caliburn modified with an integrated ammo counter. Fittingly, I'm calling it the Countiburn.

Video showing operation:
Credit/Inspiration
Caliburn - Captain Slug (duh)
Ammo counter script - Nathaniel Deal (this guy's mag toggle and counting method are used)
Another ammo counter script - Dustin Westaby (borrowed his number display method)
Bill of Materials
Adafruit Trinket Pro 3V
Lipo Backpack for Trinket
Adafruit 1200 mAh Lipo
Assorted Jumpers
Slide Switch
Ligitek 2-digit Seven Segment Display Common Anode
Roller Lever Switches
M2x10 mm bolts (DO NOT GET FLAT HEADS LIKE ME IF YOU DON’T HATE YOURSELF)
Tools Needed
Variable wattage soldering iron
3D printer
Helping hands for soldering
Electrical solder (thin, .032", I like lead-based but use whatever you're comfortable with)
Heat shrink tubing
Solder sucker
Multimeter
Datasheets/Useful Links
Ligitek display pinouts
Windows driver for Trinket Pro
Setting up Arduino IDE
How to install and use libraries (my code uses one)
Soldering to PCB guide
Code/Libraries
 Countiburn Code.zip 14.71KB
391 downloads
Countiburn Code.zip 14.71KB
391 downloads
Thingiverse Link
Countiburn
Okay, first of all get your trinket pro set up. Follow the linked guides. I can answer questions if people are struggling. You can also google your problem/error code and get answers that way.
At this point you also want to start printing everything from the thingiverse link. As explained in the link, there are two sets of most components: with built-in support and without. If you have a multi material printer/dedicated support material use the without version. If you’re doing single material PLA I suggest using the versions that include support. It is drawn in by hand rather than auto-generated and is optimized for a .4mm nozzle.
Next let’s assemble our trinket. Unpack the trinket and the lipo backpack.

Snip your headers and arrange your pins as shown.

Solder your pins on. See the linked guide for help, the videos included are the most useful parts.

Notice the bulbous joint at the red x, and the hershey’s kiss shaped joint at the green check. Try to get them looking like the latter. You can tell which side I started on.
Next grab your backpack, flip it over, and note the bit circled in red.

We need to solder closed that bridge so charging the lipo doesn’t take forever. Only do this if you use the lipo included in the BOM. Adafruit suggested minimum capacity of 500 mAh to close this bridge and enable higher current charging.

Next flip the backpack right side up and use a sharp blade to break the contact pointed to by the arrow. I have already cut this contact in the below image. Use a multimeter to make sure it’s broken.

Use leftover pin headers to solder pins to the pinouts between the cut bridge.


Apply e-tape as shown. We don’t want any pins shorted when we solder on the backpack.

Solder on the backpack. Note that I applied solder to the incorrect side which loosened other joints and I had to completely resolder the backpack. Apply solder at the tip where the green arrow is pointing rather where it is shown at the red arrow.

Go ahead and start adding components to the Magwell. Cut the NC terminal off of the switch before screwing it in.
Next glue some foam/rubber to the base of the Lipo Cover. Then insert the battery and put foam on top as well (no glue, this will be a friction fit). We want to sandwich the battery in something shock absorbing. Cut up darts can also work here. Make sure you test fit everything and that the battery is snug, but NOT tight.


Go ahead and plug the lipo into the backpack. Note that your Magwell won’t need those ugly Dremel marks cut in, I have fixed that on the supplied files. Luckily they are hidden by the wire cover anyways.

Now we will begin wiring stuff up.
First get a jumper that is female on one end. Plug the female end into A5 and route to the switch as shown. Measure, snip, strip, and solder. Placing the Ecover on the Magwell will help with routing correctly.


Next cut down the pins on your Ligitek display as shown. Green arrow points to cut pins, red arrow to uncut.

Make wiring for the display anodes as shown. Females on all ends, but the end with two need the black housing removed. This can be accomplished with a knife. Solder to pins 13 and 14 on the display and apply heatshrink. These pins can be soldered together, as I have done. Connect the other end to the 3V pin on the Arduino to make sure everything fits.


Now make a double ended ground wire as shown. The single end should be female, and the other ends should be bare wire. Note how I criss-crossed the direction of the wires, which is helpful for routing them. Pull one end through hole in the Magwell and out the back. The other needs to be routed and soldered to the other terminal of the mag switch, as shown.


Next figure out the wiring for the LED display. The included pictures follows the pin definitions in the code. These can be interchanged but I recommend following the way I did it, it matches sequential pins. Get different colors for each pin. I ran out of colors, and the “B” added at the end of the last 4 denote that I painted the female ends of the jumpers blue on those wires to differentiate them.

Now we need to cut the wires to size. Test the length needed for each one, and then give yourself an extra 5-10 mm. I tested the length one by one while plugging the female ends into the Arduino and marking where it needed to terminate on the display. After marking everything up cut them to size. And remove the display from the Magwell.


Solder all the wires to the display. This takes some patience. The solder sucker is your friend. I accidentally shorted neighboring pins multiple time and had to resolder. The display is forgiving and the linked item comes with 3 in case you cause thermal damage.

Remove the Arduino from the magwell and wire everything up to test the display. Upload the code and verify that numbers are being displayed correctly. You can short pin 3 to ground to change the numbers to check all of the “pixels”.


Now unplug everything and begin rewiring with the components installed on the Magwell. Start with the pins on the bottom row. Also, important note, snip the end off of a female jumper. Run the bare wire end through the hole (along with the ground wire from earlier) so it sticks out the back end of the Magwell. Forgot to get an image of this. Plug the female end into pin 3 of the Arduino. This may get removed and re-plugged in as you wire the display to the Arduino, I had to do so several times.
When you get to the last wire on the bottom row, you need to cut one side of the plastic housing off of the female end. This is to make room for the fillet on the Magwell. That fillet is important for strength and is well worth this extra step.

Now wire the top row and replug in anything that you disconnected earlier to give yourself room.
Now we need to bend the pins on the backpack up as shown to make room for the Ecover to slide on. Bend up as shown by the red line.

Go ahead and wire up a slider switch as shown and bolt it to the Ecover. Test to make sure it works (lights come on on Arduino). Affix the switch with 2 M2’s.
Next bolt on the Ecover, and then the Wire cover with M2’s. Congrats, the worst is behind you!

Now we are going to assemble the Caliburn a bit out of order from Slug’s instruction. First assemble all components from muzzle to bore, as in the beginning of his instruction. However before adding anything to the Pistol Grip (like Sear or Trigger) we need to get the trigger switch wired up. Get to the point in the image below. Note that everything forward of the Magwell is tightened down, while everything behind is floating on the threaded rods.
Feed the exposed wires through the hole in the Pistol Grip. My jumpers weren’t long enough and I had to solder on extensions at this step.

Solder on your wires. As before, snip off the NC terminal. Doesn’t matter which wire goes to which of the remaining two terminals. Carefully insert the switch and bolt down with two M2’s.


Now assemble the rest of your Caliburn. That’s it! You did it.


Now a quick aside on changing the default mag size values. Open CaliburnAmmoCounter.ino and locate the following line.
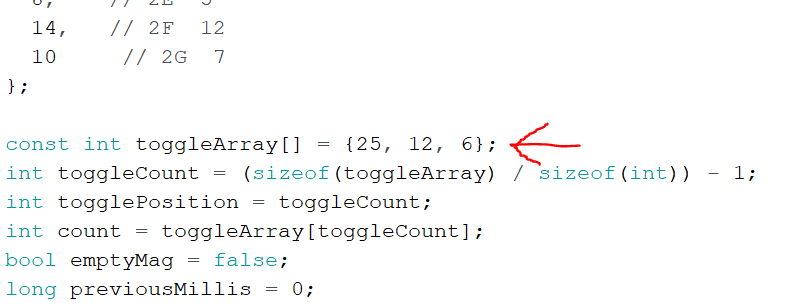
You can change the values in that array to whatever you want and/or add more. You can have only one value as well if you only use one mag type. Just be sure to separate values with commas.
As always, questions, comments, and criticism are all welcome. I hope this guide is a little more straight forward and digestible than my last electronics-y write-up!
#362487 Mark-13 w/60 Dart Mag (Prototype)
Posted by
on 06 February 2018 - 05:57 PM
in
Homemades
So I just tested the stryfe cage with stock gates on and it worked. With a 1/2" PVC tube I was able to blow the darts through the gate with minimal effort. The rate of fire was so high however that I'm not sure how much this will really control your set-up, but it certainly works. Theoretically the added pushback should slow things down some. I would imagine your blower can out perform my lungs so it shouldn't be a problem. Hmm now I need to buy a blower apparently...
#362486 Mark-13 w/60 Dart Mag (Prototype)
Posted by
on 06 February 2018 - 04:36 PM
in
Homemades
I doubt the gate would be an issue if done right. Do you have an estimate of how much force is generated on the lead dart in the mag? When I get home I'll measure the weight needed (plus the dart's weight) to open the stryfe gates. I would be really surprised if your blower can't generate enough force on the lead dart to open those gates. Plus the torsion springs are always replaceable to something with a lower constant.
I like the wheel idea. If you take it a step further, you could have automated gates via servos. That way you don't have to worry about active breaking on a DC motor spun flywheel. You could also program bursts really easily.
Both of these ideas can easily work in junction with the wye combiner thing (also great idea).
You know what I actually really like the servo gate. I'll get some servos and code something up. In place of a blower I'll use my lungs for now. I'll also test out the stock stryfe gate with my lungs, sort of like a blowgun with an afterburner.
As far as continuously running the blower, I'm guessing that's a heating issue. If you open it up and check what overheats (probably motor) you could slap on a heat sink and even add an active cooling fan. I have a spare stock Intel CPU cooler that I could donate to the project as well as some thermal compound.
#362484 Mark-13 w/60 Dart Mag (Prototype)
Posted by
on 06 February 2018 - 02:11 PM
in
Homemades
I wonder if a little spring hinged dart gate would help normalize firing rate. Think about those little hinges on a stock stryfe flywheel cage. The blower would still be easily able to overcome the springs and open the latch but it would allow a bit of a build up of force before the gates swing open, potentially lowering the fire rate (something we discussed as being useful). You can easily experiment with different spring constants and see if that affects your fire rate and control
If you wanna try this out I have a stock stryfe cage that I could just give you.
If you wanna try this out I have a stock stryfe cage that I could just give you.
#362480 Accufake darts
Posted by
on 05 February 2018 - 07:18 PM
in
Darts and Barrels
I can't speak for that Amazon link, but I recently ordered off of Lightake. The order shipped out on 2/1 and got here today (2/5). Not sure if that's typical or not but I was pretty impressed with the speed.
#362433 Computer Vision Accuracy Measurement Software
Posted by
on 31 January 2018 - 03:36 PM
in
General Nerf
I should have clarified, when I was talking about differentiating air sound from board sound, I was talking about sound of dart hitting board travelling through air vs. sound of dart hitting board travelling through board. Not sound of blaster vs. sound of dart impact, those two spike will be miles away at the scale we are considering. If your SOS through the board is close to that through air, you are going to have real problems differentiating the two unless the peaks of the spikes are sufficiently different i.e. different volume.
What I'm advocating is measuring sound of dart hitting the board through air with a sufficiently high SOS board material.
Taking Shmee's suggestion of picking up the sound transmission through the plexiglass, and if we wanted 1" resolution on the target, our a sample frequency would need a minimum period of 9us. This is actually within reason for an arduino, but would either require a dedicated timer IC or a better timing function than micros(), which has 4us resolution. There are tricks available involving using interrupts to time PWM signals, and I believe that can get you down to 0.5us for timing. Unfortunately reading the signal constantly puts us out of our target period, as each instance of digitalRead() take 1 or 2 us. Even worse if we don't amplify the signal and use analogRead().
tl,dr: Measuring through air would likely allow something as simple as an Uno. Measuring through board material, unless significantly lower SOS than air (see my previous post), will almost certainly require a Pi or full on PC.
#362429 3D Printed TornadoBow Internals
Posted by
on 31 January 2018 - 01:09 AM
in
Homemades
Just look at your faith in printing grow! I wonder if you couldn't get that remaining polycarb piece (priming handle reinforcement) to be printed as well. If you took the same dimensions of the piece you machined and added sufficiently large fillets to both internal corners (and made mating fillets on the plunger rod slot and yellow handle) I bet you would be good to go. I know that piece is thin, but most of the load should be down the length of it, and the largest stresses will occur at those 2 internal corners, hence fillets. Probably wouldn't hurt to fillet the outer corners as well but those needn't be as large and likely won't be points of failure.
Overall good work man.
#362427 Computer Vision Accuracy Measurement Software
Posted by
on 30 January 2018 - 07:46 PM
in
General Nerf
I like that more than my idea.
With some back of the envelope math, if you wanted say 1" resolution and assuming that speed of sound through air is sufficiently slower than the medium that makes up your target, you would need timing accuracy of about 75 microseconds. That's extremely reasonable even with something as simple as an arduino. I like that a lot.
A quick note about measuring sound through the target medium, as shmeee suggests, is you would need to differentiate between the wave spike from sound through air and sound through board. However, assuming your delta SOS is sufficiently large, this is acceptable. It would obviously only make sense to take this approach if the sound through your target medium is less than that through air. Let's take some arbitrary rubber and assume SOS is 150 m/s. You would now need timing accuracy of abs( 75us - (.0254 m / 150 mps)) ~= 94us to discern the difference in pulses. You would only need .(0254/150) = 169us for the 1" resolution discounting the singnal from the air. You can see here how if the rubber instead had a SOS of something like 300, you would need wildly more accurate sampling than if you simply went with a solid wood backing (sufficiently high SOS that initial wood pulse is relatively far out from air pulse).
Basically be careful choosing your target medium. If your system can also take into account volume and filter out the same pulse from one medium or another, then this is a non-issue.
#362403 Caliburn: Mag-fed Pump-action Springer
Posted by
on 28 January 2018 - 03:44 AM
in
Homemades
Caliburn owners, what are your opinions on how this would affect priming the pump grip?

I'm trying to integrate an ammo counter in the lower receiver, and after spending a bunch of time placing it and building a housing, realized that this could easily affect access to the pump grip. I have yet to print a lower receiver (and thus assemble my Caliburn), so I don't really have a feel for how annoying this would be to prime. This is for a lefty btw if that wasn't clear. Thanks!
#362399 Western Washington nerf community
Posted by
on 27 January 2018 - 02:36 PM
in
Nerf Wars
Frost I have lots of experience with classic NIC events. Would be happy to cohost assuming a few things. Mostly that the fps limit is something considerably higher than 200. I think 250-275 is reasonable, especially if no homemade darts. I can get a few friends involved, but they also would need a bit of higher velocity gameplay to be interested.
#362388 Question regarding Lightake darts: Worker short dart gen2 & Men Gu
Posted by
on 26 January 2018 - 05:01 PM
in
Darts and Barrels
Not really a waste. I have 1000 green ones and they still work well. They just don't hold up as well as the 1200 yellow ones I have. They are damn good darts either way. They will not work in a traditional wye though. They work great in my caliburn. I have a 3d printed wye that they feed through super consistently for my rainbow pump and my supermaxx 5k.
That's not what I mean, I want gen2's regardless for accuracy reasons. I mean that the only listing that said "gen2" was for 50 darts. There were other white workers listed in 200 dart amounts at a better rate. So If I had bought 5x 200 packs rather than 20x 50 packs I would have saved $15 on the darts that I ordered. I didn't realize until your initial post in this thread that all short white workers are gen2.
#362385 Question regarding Lightake darts: Worker short dart gen2 & Men Gu
Posted by
on 26 January 2018 - 02:11 PM
in
Darts and Barrels
Those are gen 2's. Gen 2 worker darts come in both white and green foam. Gen 1 is only yellow foam. I recommend gen 1 over gen 2 mostly due to durability. Gen 1 has better glue and will last longer. The gen 2 darts have a little thicker foam. The foam thickness, color, and the glue are the only differences I have noticed between the two. The fly great out of 17/32nd brass and 1/2 cpvc. The have a gap between the head and foam which causes a whistling sound in flight but mostly acts as a way to stabilize the dart. They are the most accurate half length dart I have ever used including slugs. They do get a little less velocity due to weight and the gap between the foam and the head. I get 255 using sweet orange dart in my caliburn with a 18 inch barrel and a k31/[[k25]] spring combo. They same set up gets 240ish with worker darts on average.
Great, well I wasted about 15 bucks ordering 20 50 dart packs instead of the other bulk/white green listings. Friggin China listings. I will try contact them to modify the order but I'm not expecting much. 15 bucks isn't the end of the world, its more the principal. Also kind of my fault for being impatient and ordering before this thread got more replies.
Thanks for the info!
#362370 Question regarding Lightake darts: Worker short dart gen2 & Men Gu
Posted by
on 26 January 2018 - 12:38 AM
in
Darts and Barrels
Men Guns are okay, though they don't fly straight out of higher-powered blasters such as a caliburn.
Interesting, I always thought Men-Guns were the pinnacle of China full-lengths. Are there any manufactured full-lengths that work in powerful blasters? I've heard good things about waffles, but I've also heard that the head rubs against the barrel induces quite a bit of excess friction. Maybe certain waffles don't have this problem? There seems to be a million different waffle brands.
Edit: Just ordered 1000 gen2's. Hopefully they're good haha. Will report back
#362361 OpenChrony - open source, DIY chronograph
Posted by
on 25 January 2018 - 07:49 PM
in
Homemades

I’m calling it OpenChrony. It’s an open source chronograph, compatible with nerf and paintball. It is Arduino-based, and the code is publicly available, as are the part files (.stl, .step and .sldpart coming soon). I’m hoping that others will improve the design, this is only the first functional version.
Write-Up:
OpenChrony V1.5 Writeup.pdf 1.46MB
2511 downloads
V1.0:
OpenChrony.zip 751.42KB
1151 downloads
V1.5:
OpenChrony1.5f.zip 753.69KB
1048 downloads
Updated part files coming soon
#362353 THIS one simple design will have you in TEARS...
Posted by
on 25 January 2018 - 03:24 PM
in
Homemades
So now I have to either go back to custom printed mags and refine the current design, or switch to an integral mag. I'm leaning towards an integral mag simply because it allows me to avoid having to supply potential customers with extra magazines. And a sidearm with a proprietary or expensive magazine would be pretty dumb if it's not something that could be easily adapted to a primary.
This might be a dumb question, but when you say integral mag, do you mean a non detachable magazine in the grip? That would either load from the top when the slide is locked back, a la Grendel P10, or sideloaded at the at top of the grip at anytime? Something like the grendel might be more difficult, as you would need a way retain darts from coming out the top during normal operation, but able to move that retainer when reloading. A rotatable barrel/bolt might be able to achieve this: has a brass quarter-pipe at the top during normal operation, is turned 90 degrees during reload.
#362350 Question regarding Lightake darts: Worker short dart gen2 & Men Gu
Posted by
on 25 January 2018 - 03:11 PM
in
Darts and Barrels
I have some questions for those who have ordered worker dart on lightake.com. I'm looking to buy some gen2 worker's (not sure what the difference is between gen1 but I've heard good things about gen2's). I want to buy in bulk, so am considering this listing. Are these gen2 though? Because I also found this listing that specifies gen2 in the listing name. However, the price on the second listing isn't as good as I can't but as much at once. The images look identical besides color and quantity. Is there a difference?
I also stumbled across Men Gun darts while browsing. I thought these were extinct, I guess they made a new run of them? Can anyone comment on these Men Gun 3.0's?
For reference, I'm planning the men guns for flywheels and sometimes the caliburn, and the worker short darts for everything non-flywheel.
Thanks in advance

