Twitch's Content
There have been 204 items by Twitch (Search limited from 08-December 96)
#108473 Baby Powder Stock Darts
 Posted by
on 30 May 2007 - 09:54 PM
in
Modifications
Posted by
on 30 May 2007 - 09:54 PM
in
Modifications
#108737 Baby Powder Stock Darts
Posted by
on 01 June 2007 - 08:36 AM
in
Modifications
Firing 20 of these out of a rapid fire 20 would be hell. Your rapid fire 20 would have to have the rods removed of course, but yeah, it would be a hell of a smokey mess. Make sure you aren't down-wind.
My RF20, named "The Ruckus" has been modified with CPVC barrels, and in about a week I"ll be posting my write-up to have it using swappable clips. (I'll post it after next week, exams are coming up.)
#112583 Lonshot Air Capacity
Posted by
on 22 June 2007 - 07:47 PM
in
Modifications
Volume of a cylinder = (Pi*r^2)*L
Oh, and look at the pinned threads at the top of the list
http://nerfhaven.com...?showtopic=1610
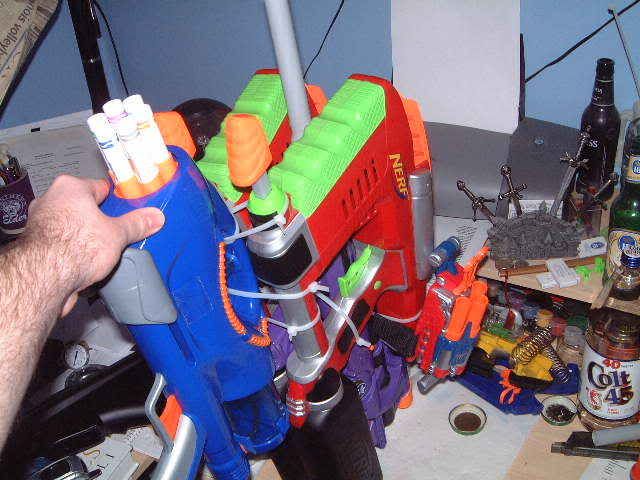
#118506 Rf20 Swappable Drum
Posted by
on 06 August 2007 - 01:51 PM
in
Modifications
That said, my group is actually an official club at my university, and we play indoors (which also requires we only use stock nerf darts so we don’t break any windows, etc.). It’s great fun storming classrooms, and while the importance of range is diminished, RoF becomes of critical importance when a group of eight people starts charging at you from around a corner, or when u want to kick in a door and jut rain a storm of foam upon a group of unsuspecting combatants guarding the other door.
While my RF20 worked nicely for such combat, it’s damn near impossible to reload all the barrels and have it ready to go before another squad charges from a different classroom down the hall and wipes out my own. I decided I needed a way to reload faster, and that meant swappable drums. After studying other mod’s, (namely echo104b’s firefly, and Nerfmonkey’s RF20 CPVC write up; many thanks to you both.) I decided to just go ahead and see if I could do something on my own.
First thing you’ll need is a few of these wonderful things here:
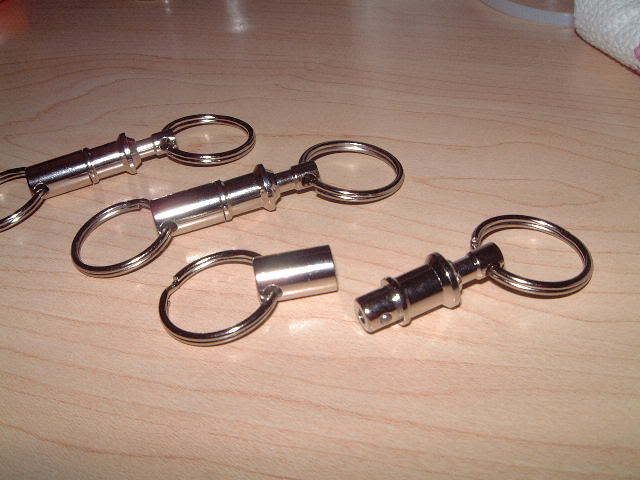
I found mine at Wal-Mart, in the automotive section, where they make copies of keys. I think they were $0.97. I’m thinking most everyone knows how these work, but just in case; these are quick-release key chains, by pressing the narrow end down, it release the wide cylinder at the other end. Hold the button down, and it slides back in place, release the button and it locks in place. You can probably guess where this mod is going.
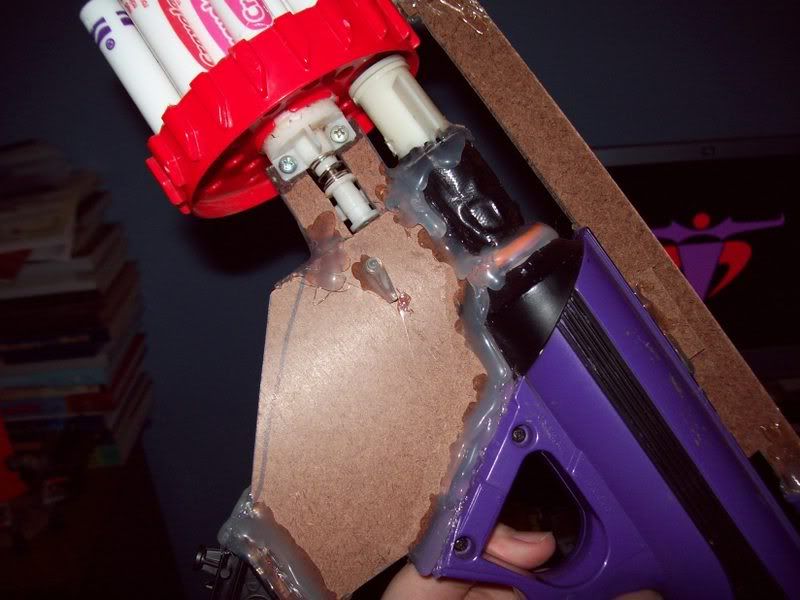
Fist thing was to modify the turret to accept the drum/key chain assembly. To do this, I had to cut off the front end of the center post of the turret. How far you need to cut off/grind down depends on what barrels you use; I’ve currently got 2” CPVC barrels, but with this mod, you can make drums of various materials, and try something different later if you wish. (I’m working on making a drum with PETG barrels, for example)
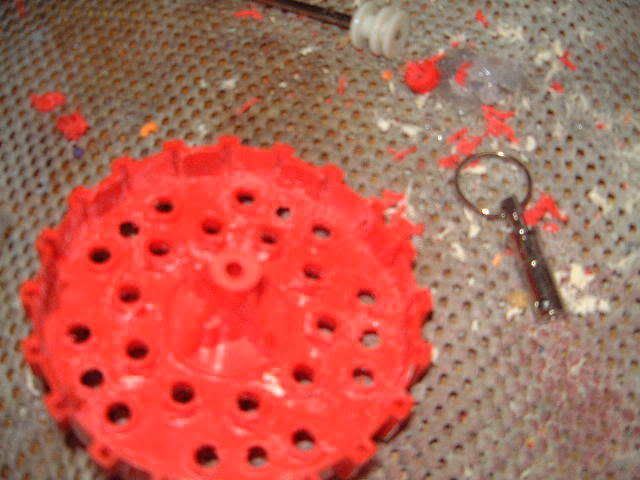
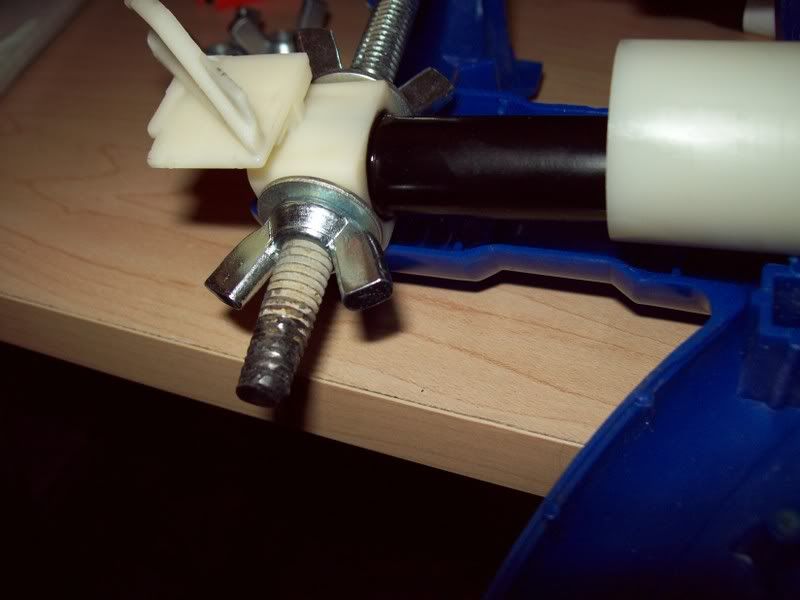
Cut the center post down so that when you glue the bottom end of the key chain, (without the button) the total length of the key chain base + button portion is the same distance as the front of the barrels. If you’re using the same barrels lengths as me, this involves a bit more work, which I would’ve preferred to avoid, since if you can’t get it right, the gun is worthless. (and no one wants to send their expensive toy to the garbage bin)
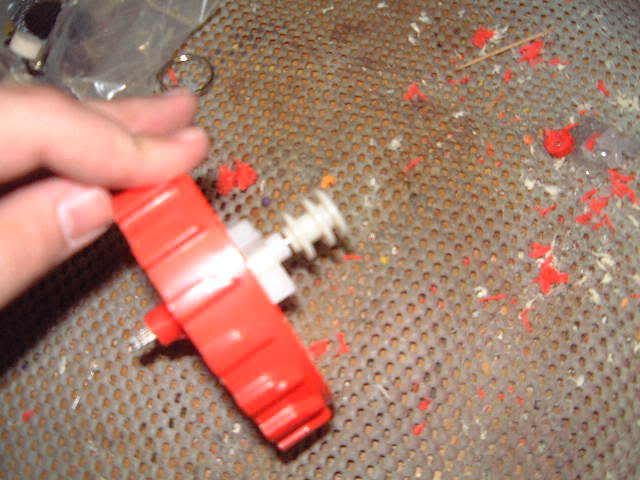
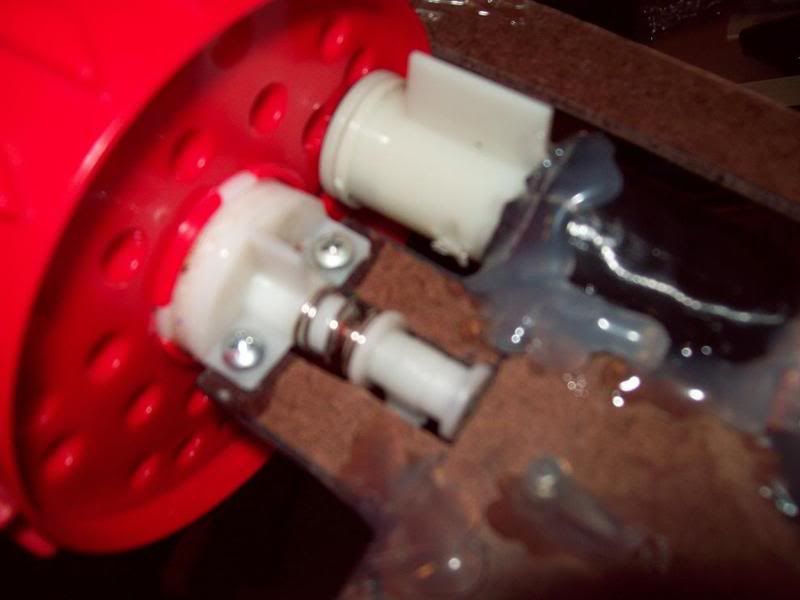
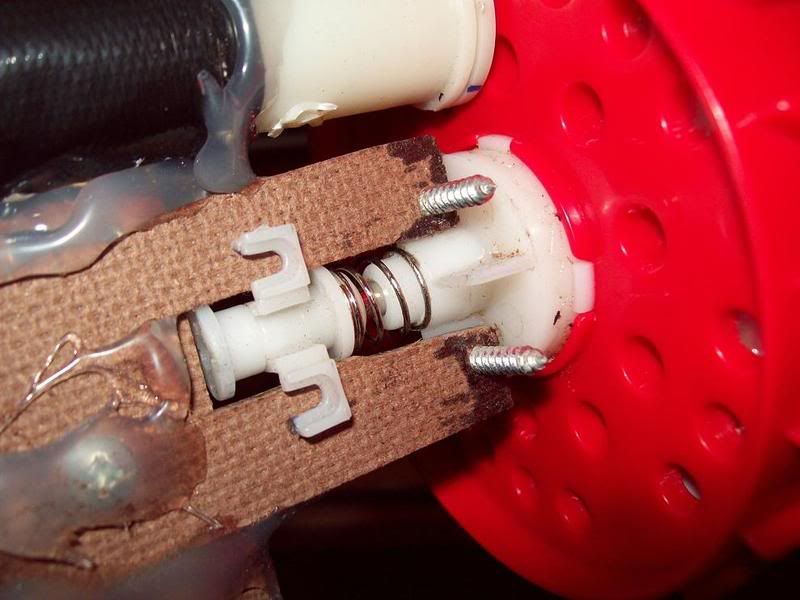
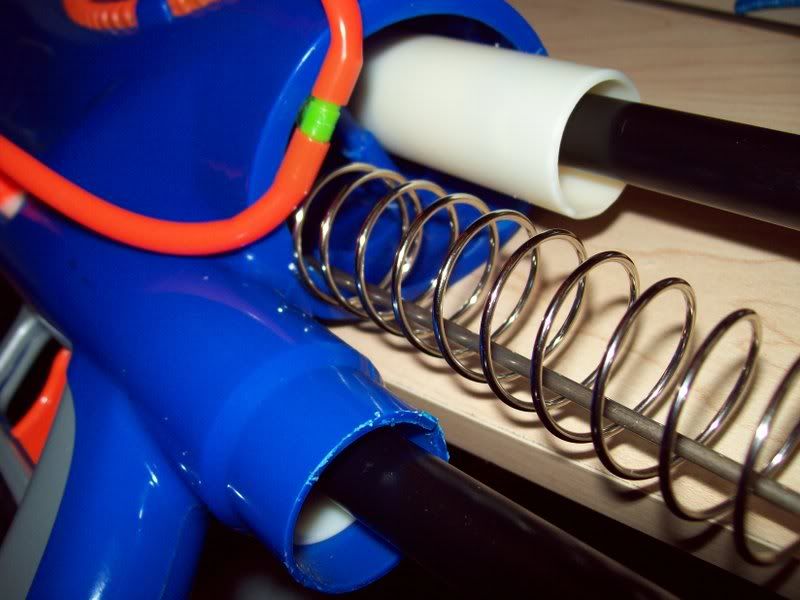
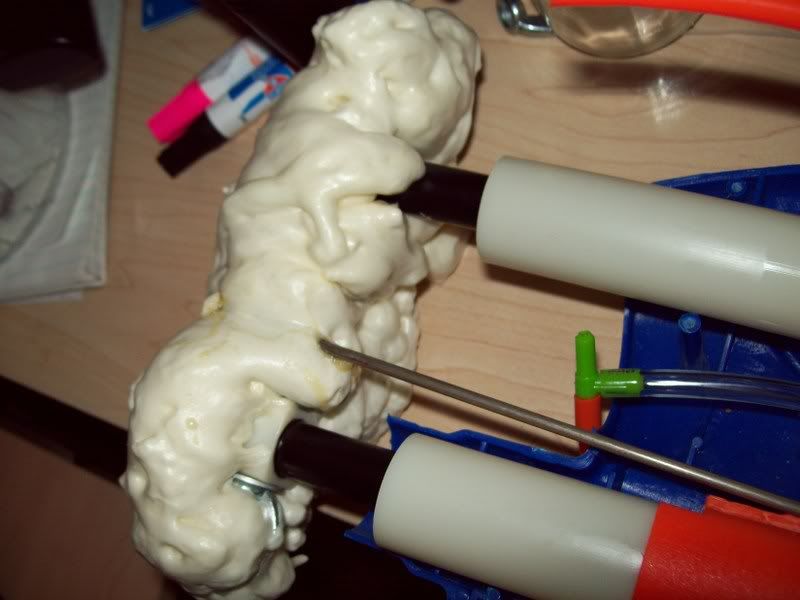
The metal rod was glued to the inside of the turret’s center post, so when that gets cut off, the white piece on the back, that holds the turret in place, goes flying away. This is usually a bad thing. There needs to be the spring there, on the back, which is not shown. The spring keeps the ratcheting mechanism of the gun working like as it should, and hence is of critical importance.
I found gorilla glue to work fine at holding things where they needed to be, but because I had to go to work, I needed something to hold the pieces at the perfect position for 8 hours while the glue cured. Enter zip-ties
The zip ties held everything perfectly, but I think I had to buy the longest ones Home Depot had (14” I think).
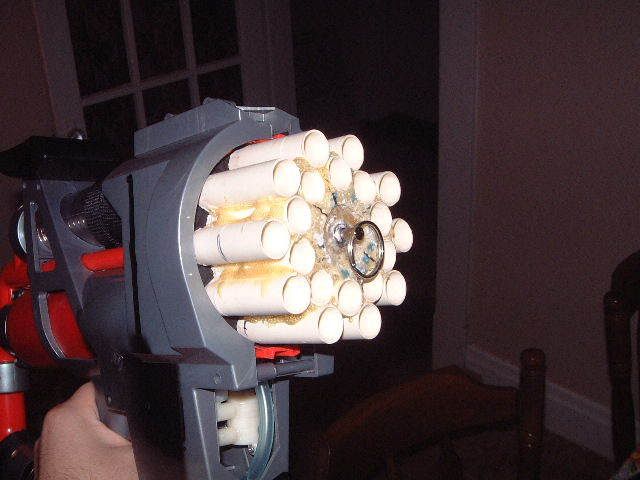
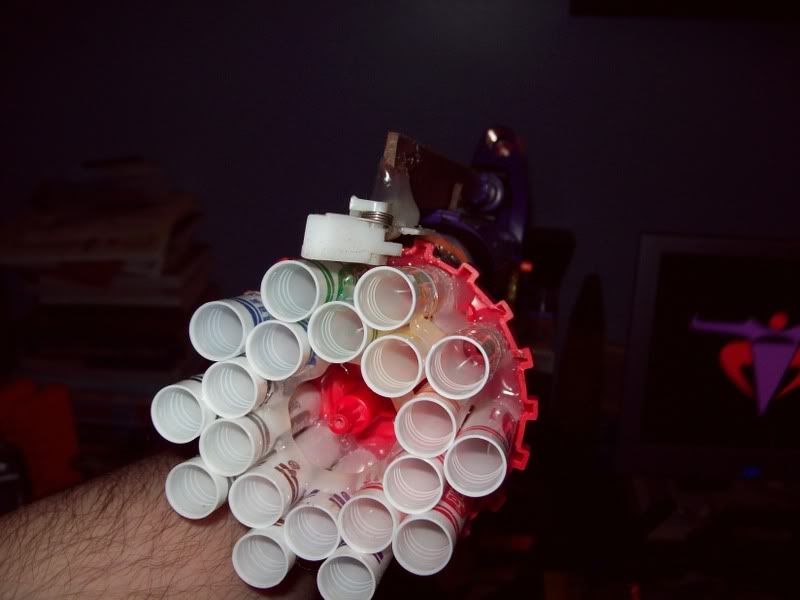
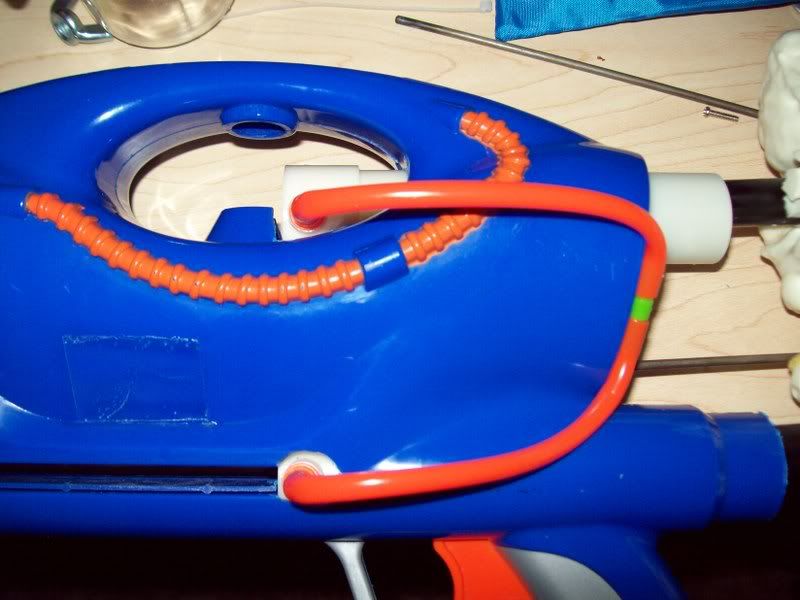
Now that the turret is set up, onto making the drums.
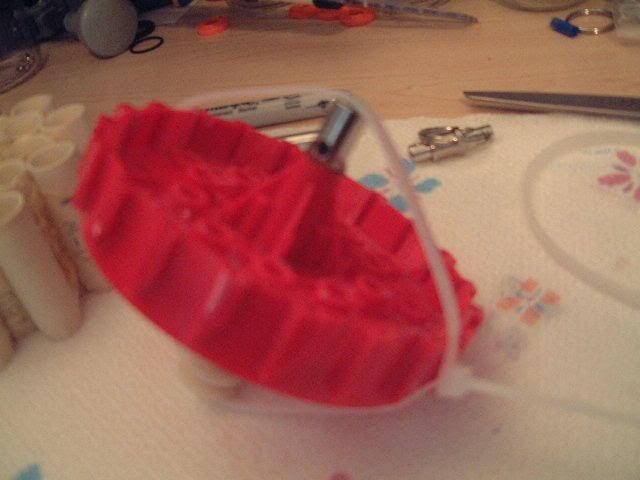
Because the barrels are not going to be permanently attached to the turret, I decided to align them this way:
The marker around the base helped me to align the barrels as each was removed one at a time, slathered in CPVC cement, then put back in place.
After that mess dries, we go make the faceplate. This will hold the button-end of the key chain, which will in turn hold the drum in place.
I made this out of plexiglass, because I happened to have a 4’x4’ sheet of it lying around. Place the drum on top, and using a permanent marker, trace the inner ring of the drum, and mark the center.
*note, if you too use plexiglass, you’re going to want to turn on a fan, open a door, and put on something around your nose and mouth, because sweet lord that crap stinks when u cut it. I think I ended up sing one of those masks used when painting, and splashed it with mouthwash so the smell of mint would overpower the melting ‘glass. But I digress…
Next step is to place the release button in the faceplate. Again, gorilla glue seems to work great. The Dremel tool worked fine for the cutting of the ‘glass.
Once that dries, glue the faceplate in place at the end of the drum, with the button facing outward, of course. Let it dry, and viola.
Repeat as desired until you have enough clips that you can reload in between matches, a your leisure.
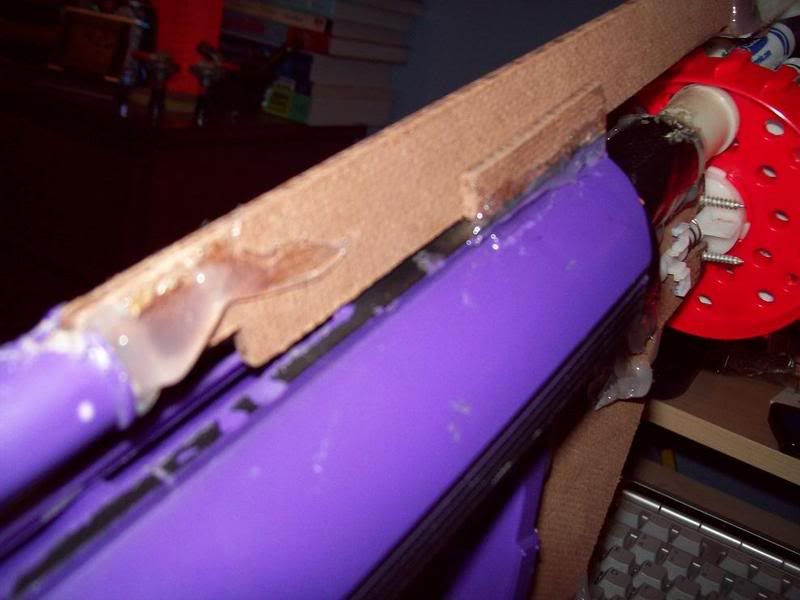
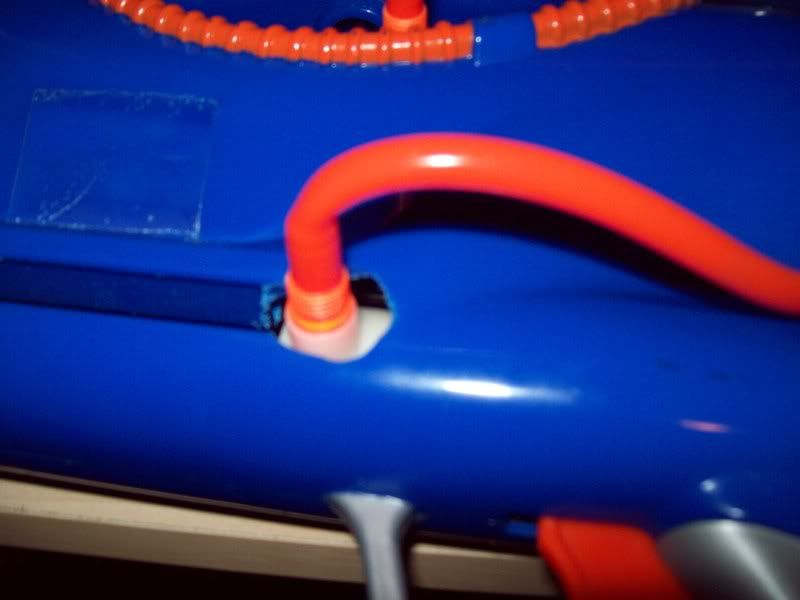
There is of course a problem with the sub-par seal at the base of the drums, where they meet the turret. I place a sheet of craft foam on the front of the turret to fix this problem.
and with a loaded drum:
I know what you’re thinking…because I was having the same thoughts…
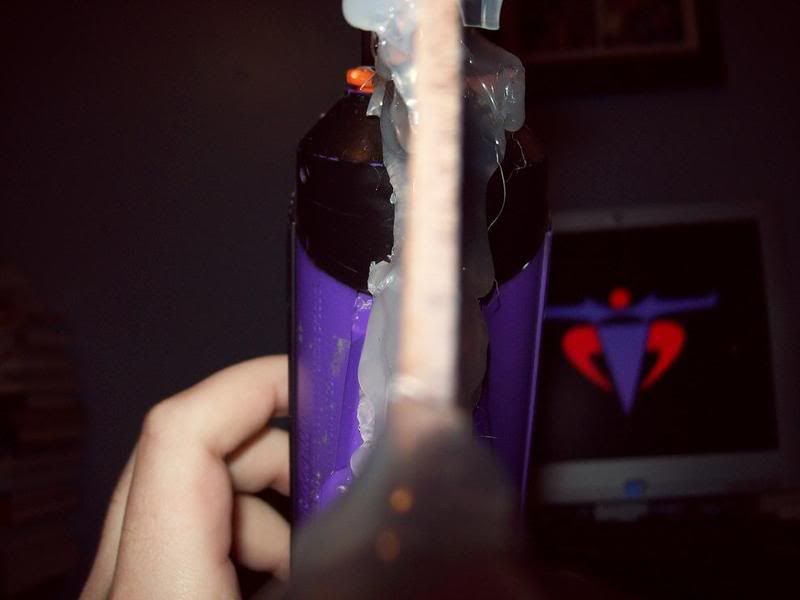
“But Twitch, sure being able to drop a drum and pop in another is great, but you still have to fill the air bladder.”
Well, before I saw Forsaken_Angel24’s mod
http://nerfhaven.com...?showtopic=9335
which just made me tear up, I found my own solution was to rig a small air compressor onto the back of the gun, integrated into a home made shoulder stock, but I found that to be more of a cosmetic thing, and I’ll post a picture of the finished product on the appropriate thread.
Ranges:
angled, fired from waist height, using Tag Darts: shortest distance is 14 feet, the longest was around 50, with the mast majority of darts landing at 30 feet.
I'm not sure how these compare to stock ranges, or with stefans simply because I've never fired the gun stock, and my group isn't allowed to sue modified ammunition.
Thanks for your time, sorry for the blurry pictures, and I hope someone out there finds this useful.
#118538 Rf20 Swappable Drum
Posted by
on 06 August 2007 - 08:00 PM
in
Modifications
Kickass!!
Mind if I ask you how you got that black rear handle case off the RF 20?
I've not removed the piece you're typing of, look at the bottom picture; you can see it present.
umdlancer, does your's screw into place? One of my initial designs used a wing nut of the front of the drum, but I decided screwing/unscrewing would take too long (plus the risk of dropping the piece(s) during combat)
#118539 Modification and Paintjob Pictures
Posted by
on 06 August 2007 - 08:15 PM
in
Modifications
 [/img]
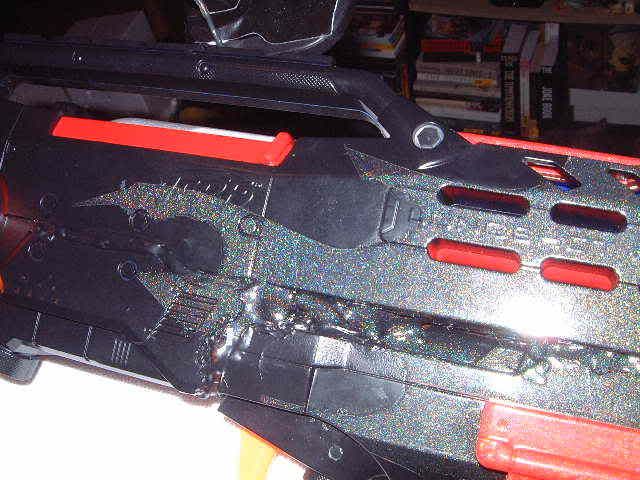
And my BBB, w/ tactical LED light under the muzzle, and laser level atop. Because it makes me smile.
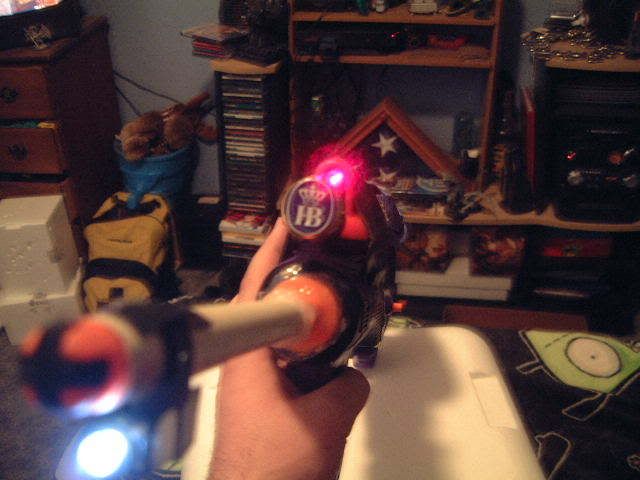
actually, the laser level actually has some combat use, the vertical line it projects enables me to hold it near the floor, and pan beneath the desks, etc. in the room; bumps in the beam show me where shoes are, and where people are hiding behind furniture.
#122883 Max Pressure For Rp20
Posted by
on 13 September 2007 - 02:06 PM
in
Modifications
As for at what psi the air bladder fails (bursts) I haven't figured that out, since the only way I can think to do it would be destructive testing.
#124185 Clip Tek Internals
Posted by
on 26 September 2007 - 08:10 AM
in
Modifications
#124263 The Power Of Stock.
Posted by
on 27 September 2007 - 01:33 PM
in
General Nerf
#124531 Modification and Paintjob Pictures
Posted by
on 30 September 2007 - 11:21 AM
in
Modifications
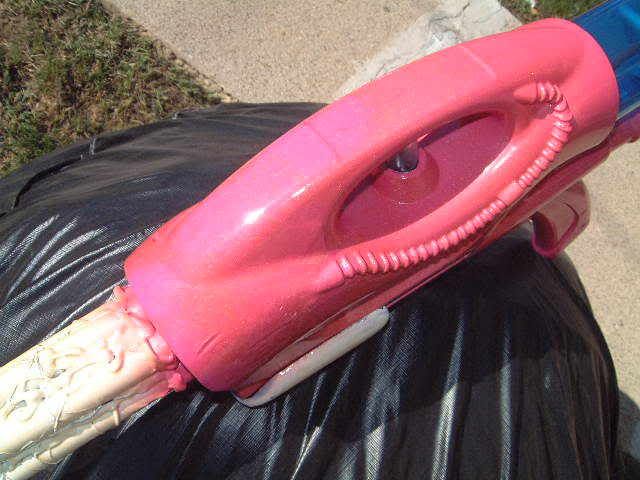
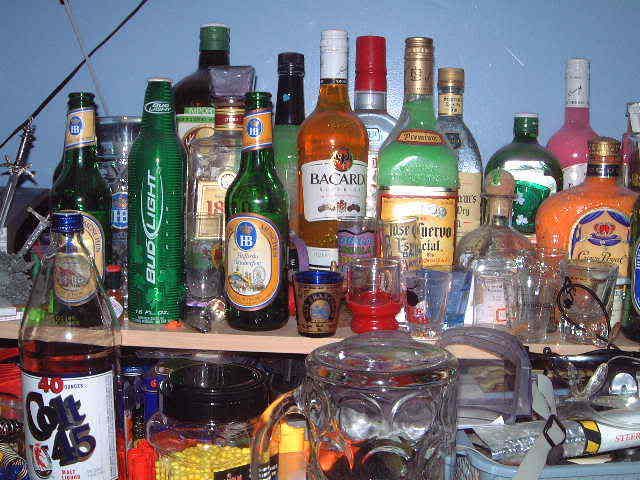
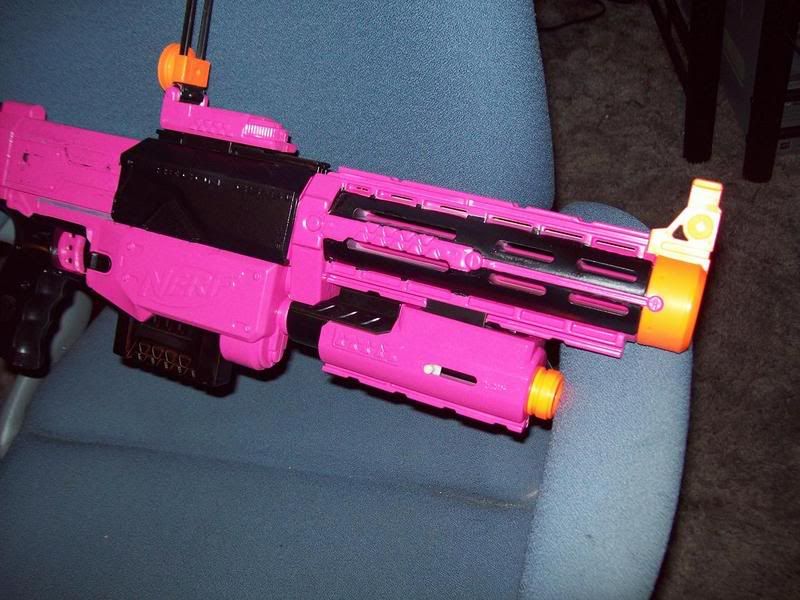
and my current Primary: Cpt. Bojangles McPoonsnatch
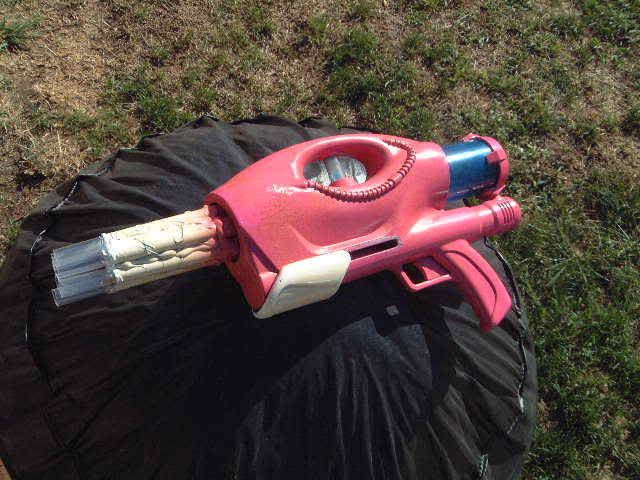
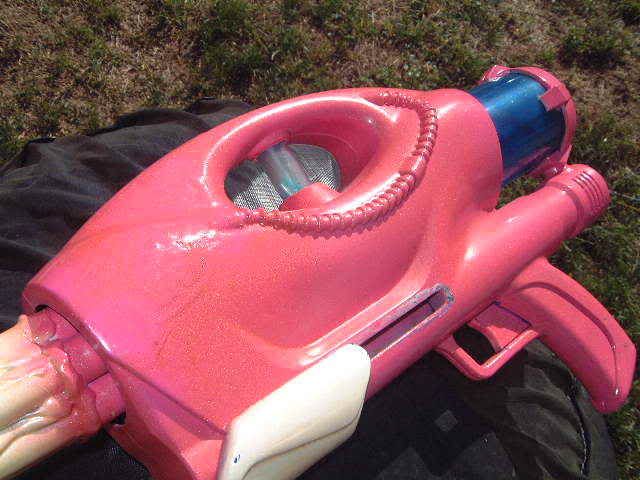
2 coats of mat black base coat, 2 coats of hot pink, 2 coats of iridescent glitter paint, and 2 coats of extra glossy finish. The enemy is usually laughing, and it hinders their aim. Plus they feel emasculated, getting hit by such a blaster.
#127875 Nerf Give-away
Posted by
on 28 October 2007 - 08:08 PM
in
General Nerf
#130107 Inter Continental Nerf Missile
Posted by
on 18 November 2007 - 06:28 PM
in
Modifications
I made something similar to this a few months ago, but used the arrows from a BBB. I carved a trench along the length of the arrow, and glued springs inside. (from my Maverick & Firefly AR's) after that, I filled the trench with either micro stefans, for just dart heads, then cut a small rectangle of plastic to make a "window" which was squeezed over the trench/darts. The "window" was glued to fishing line, which was then tied to the BBB. when the arrow was fired, and reached the end of the line, the window was pulled off, and the spring would launch the dart heads in a small spray, which would then rain down. (the arrow would of course be fired over the enemy's heads and whatever they were using as cover.) I know it's not immediately helpful, but figured it wouldn't hurt to share what I'd tried in the past.
#131411 Your Nerf Teams Or Clans
Posted by
on 04 December 2007 - 07:25 PM
in
General Nerf
(yeah, I go by the name twitch in my everyday life; my last 3 girlfriends didn't know my real name till at least the 3rd date.)
#131979 Night Finder Hop Up
Posted by
on 10 December 2007 - 09:03 PM
in
Modifications
http://en.wikipedia....i.27s_principle
bottom of the page
http://www.specialop...line_barrel.asp
http://www.airsoft.org/
#132404 Modification and Paintjob Pictures
Posted by
on 14 December 2007 - 01:22 PM
in
Modifications
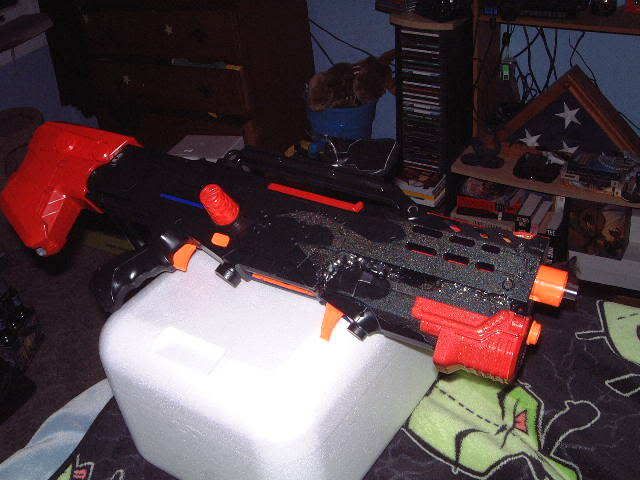
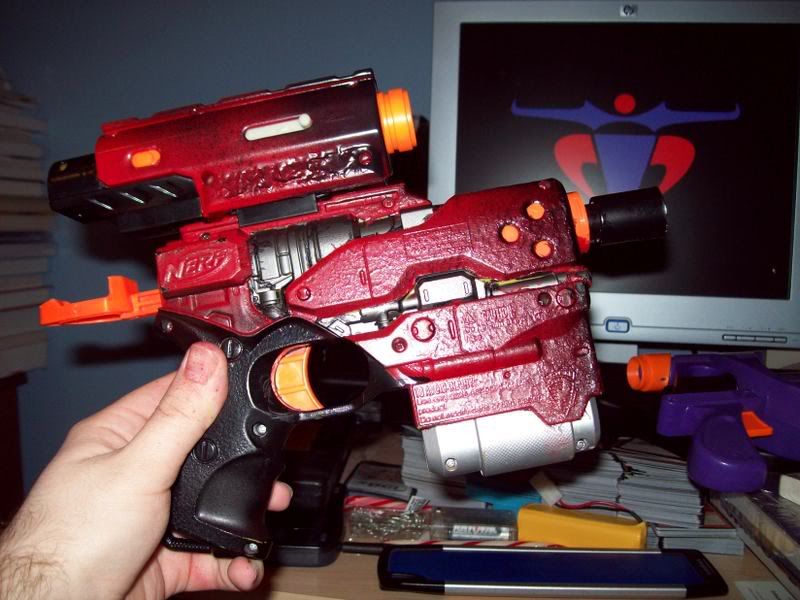
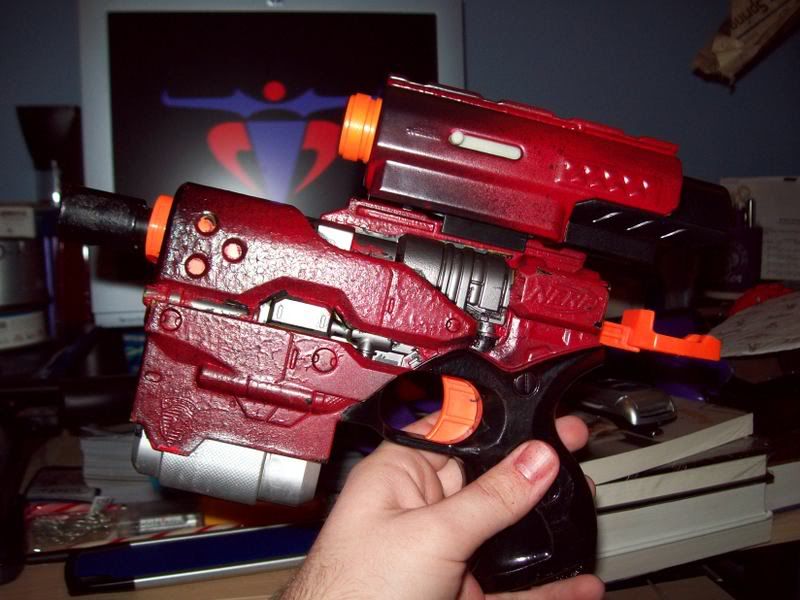
My RF20: The Ruckus
That's an air compressor attached to the back. After making extra drums for darts, and modifying the blaster so I can easily load the gun, I wanted a way to easily fill the bladder. The thing can go from completely empty to fully loaded and primed in just under 8 seconds. (great for the zombie-games).
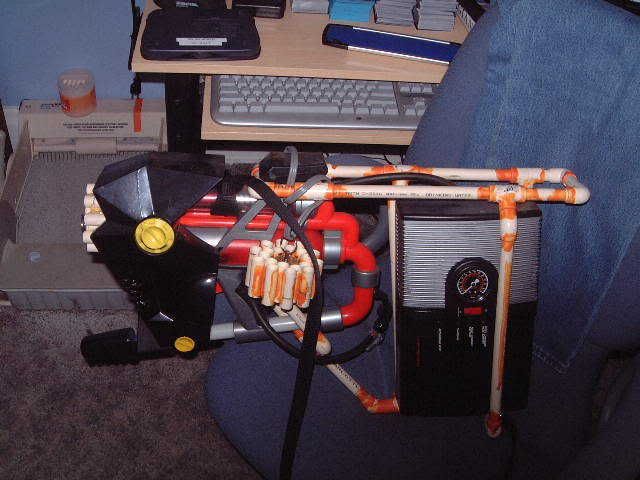
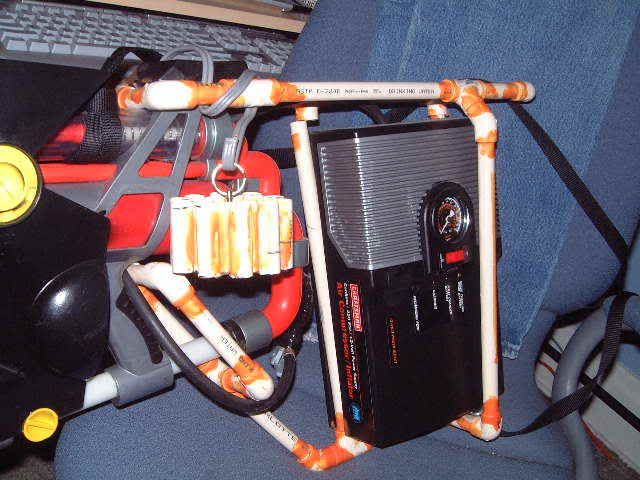

I've spliced the compressor into the stock tubing, so I can still use the manual pump if the battery dies in the middle of the games.

After the holidays are over and I have a bit more disposable income, I'm going to ditch the air compressor in place of a 3000psi air tank (Thank you Forsaken_Angel24 for the idea.) and splice a 2nd RF20 after the regulator, so I can dual-wield the beasts. (Thanks to CaptainSlug for this idea.)
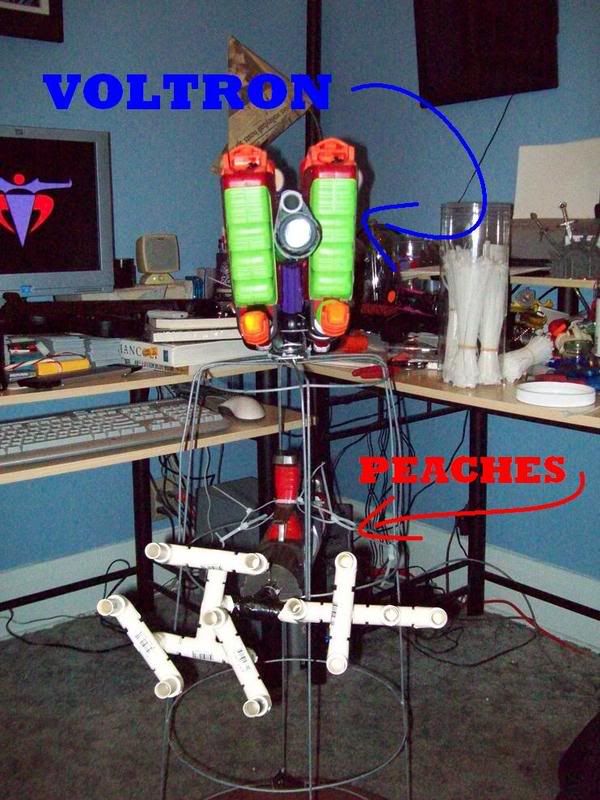
And my next "integration." This is just the prototype; if I find it manageable enough, I'm going to replace the zip-ties with various bolts and mechanical fasteners so I can disassemble the gun for easier transport. Each gun will be panted a single color, and it shall be named Voltron.
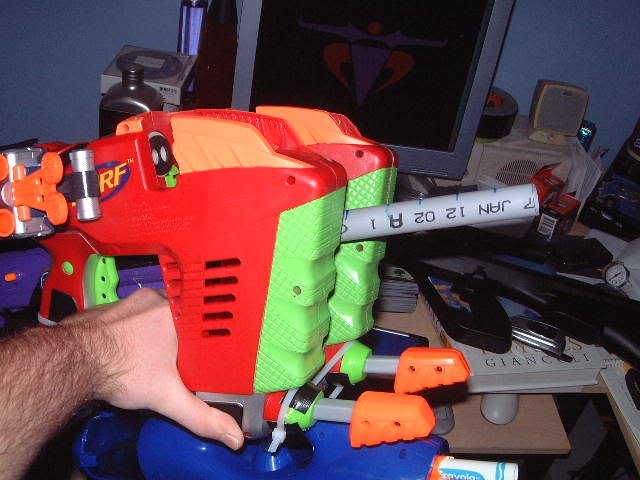
Yeah, I know Voltron was only 5, but I figure the At3k counts as the sword....
#132574 Modification and Paintjob Pictures
Posted by
on 15 December 2007 - 07:02 PM
in
Modifications
and I hold it pretty much the same way as a normal BBB, except holding a magstrike handle instead of the Bow's foregrip.
The BBB at rest
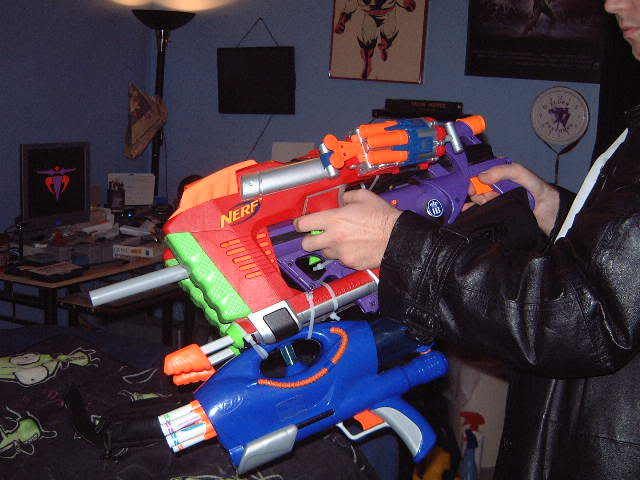
and primed

The handle of the BBB slides right between the tank-shells of the magstrikes.
While it's not really heavy, it gets tiresome hauling the thing around for four hours, holding it at shoulder height. To fix this problem I'm constructing a wheeled tripod to hold it, so I just push it around the hallways like a mobile artillery installation.
I can even carry The Ruckus along, if so inclined.

The shoulder strap lets it hang right at my waist, so all I have to do is drop my hand to the trigger.
I have decided upon a paint job; each gun will be painted a single color (black, red, green, blue, and yellow) in honor of it's name: Voltron.
As for my inspiration....well,
may have been involved.
And lastly, the sight that seems to send all the tyros running.

Thanks again, and sorry for kinda hi-jacking such a large portion of the page, and if the pictures are blurry/large, et cetera.
#132866 Modular Ls Undergun System
Posted by
on 17 December 2007 - 09:26 PM
in
Modifications
#135289 Modification and Paintjob Pictures
Posted by
on 08 January 2008 - 09:23 AM
in
Modifications
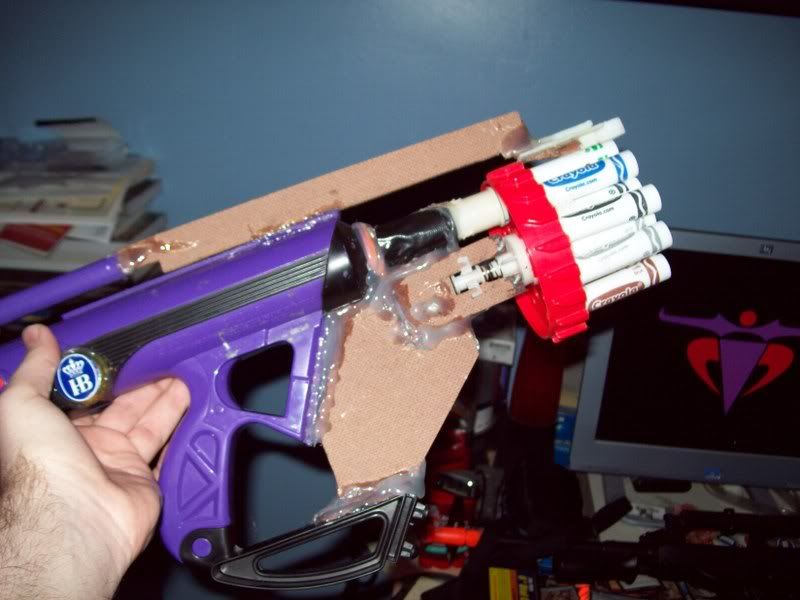
Everyone, This is Jules (Winfield.)

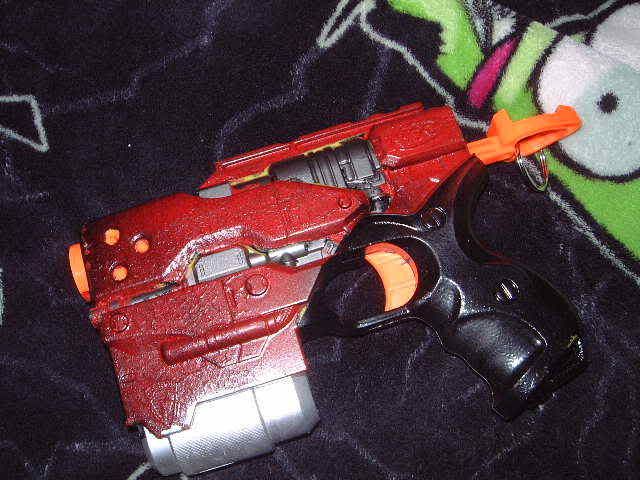
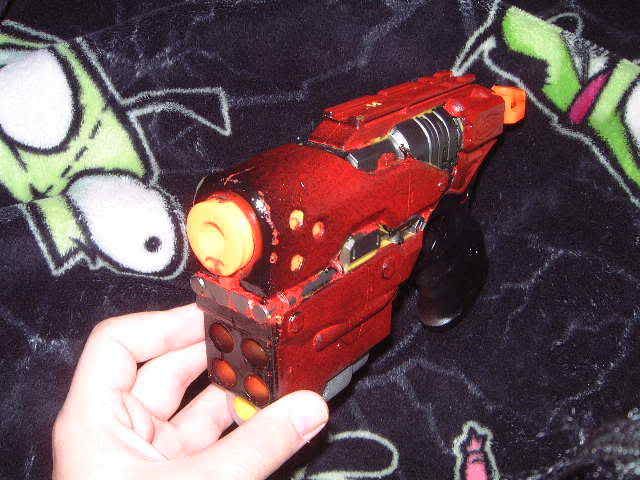
My hand cannon
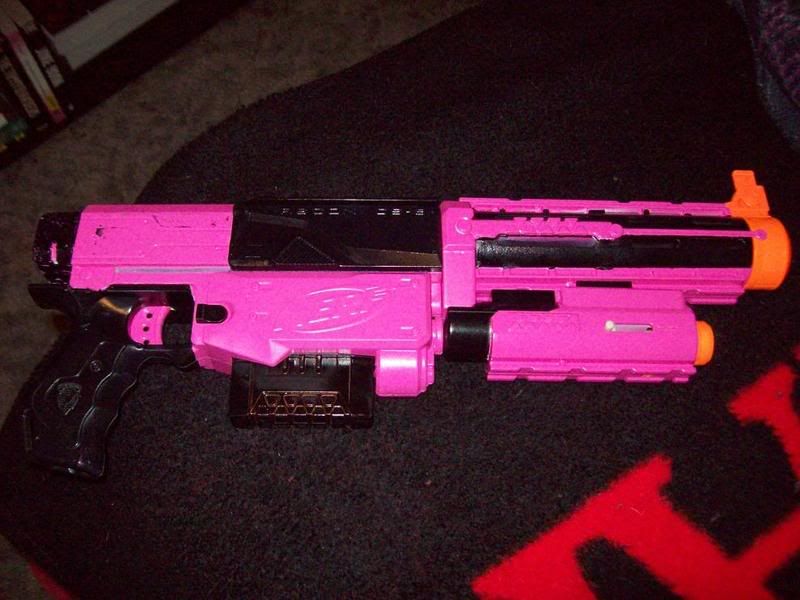
I'll be painting "Bad Mother F*cker" here. If you've seen Pulp Fiction, then you understand.
That's no trick of the camera flash. Yes, I painted the gun hot pink.
I post these with the warning/suggestion to others though; be very careful when painting your Recon. The tolerances on the various pieces that fit together (the base of the stock that clips to the back of the pistol, and the cocking mechanism especially) are apparently close enough that even a single layer of protective felt can make it difficult to work the moving pieces. I glued thin strips of felt on the inside of the cocking mechanism so it wouldn't scratch the paint on the body of the gun. Even after leaving the screws that hold the cocking mech' a few turns loose, I still couldn't cock the thing. As a result, I had to remove the felt strips.
The paint has had days to dry, but here's the result of the blaster being cocked and fired 3 times.

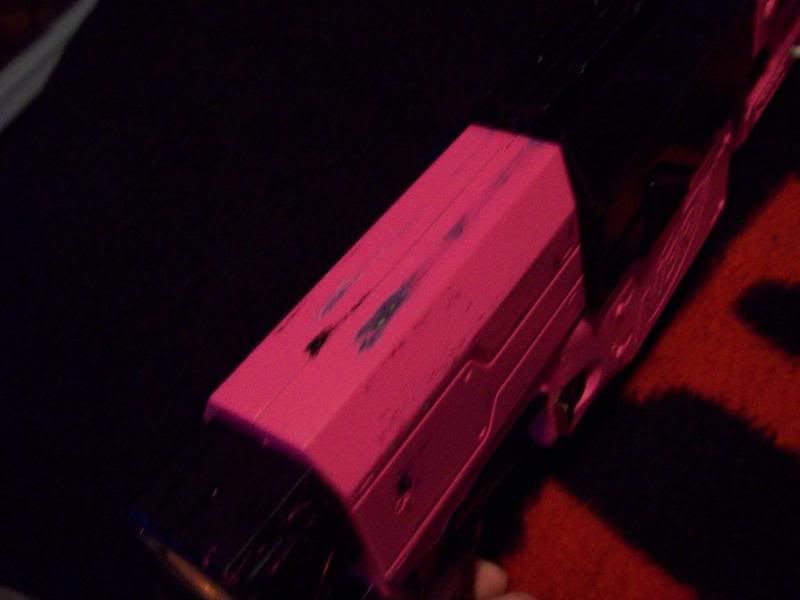
I'm giving serious consideration to dumping the entire shell in acetone and trying it again with vinyl dye.
P.S. 3 coats of paint, in case someone asks.
#135363 Modification and Paintjob Pictures
Posted by
on 09 January 2008 - 08:15 AM
in
Modifications
Twitch, that paintjob looks very clean. Not my personal choice or colors though.
I'm just so tired of seeing everyone paint their guns solid black, and I really like the sharp contrast. Also, I've noticed the enemy's aim becomes impaired when they laugh.
#136232 Airtech 1000 X2
Posted by
on 17 January 2008 - 09:47 AM
in
Modifications
Backseat moderating? If so, I offer my apologies.
#136995 Modification and Paintjob Pictures
Posted by
on 23 January 2008 - 05:44 PM
in
Modifications
A simple concept I admit, but I found it difficult to make holsters for the guns. Now I can use one hand to push these through the halls, and still wield another gun if needed. The next step is a simple one; start placing hooks on the horizontal rings from which to hang extra night finders, mavericks, ammo-bags, et cetera. At the moment, I have only the two gun mounted on it.
P.S. No, the wheels do not squeak.
#136999 Modification and Paintjob Pictures
Posted by
on 23 January 2008 - 06:03 PM
in
Modifications
Twitch, as rediculous as that is...that is seriously awesome.
I LOVE modding like this. Screw being clean and all that. Duct tape shit together...chicken wire...you name it. It's probably downright useless outdoors, but I can see that thing being DEADLY in a hallway. Especially if you took some cardboard and covered the wire areas leaving holes for barrels so you'd be shielded.
Thanks, Falcon. I was going to wrap the thing in chicken wire so it would be less...dart permeable, but the group with which I normally play has the standing rule that the weapon(s) one is wielding in their hand(s) can act as a shield; if I do anything else to make it into a tank, they'll just rise up against me, stage a foam-laden coup (I'm the group's Vice-President), and ban my delightful toys.
It would not be the first time modifications were banned because of my ingenuity/madness.
#137691 Modification and Paintjob Pictures
Posted by
on 29 January 2008 - 09:26 AM
in
Modifications
The gun's name is Dunkel, but I'm not sure what to call the modification/integration.
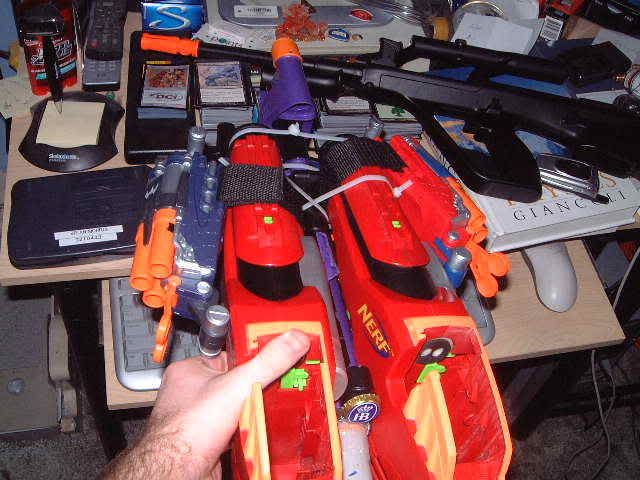
#137887 B20
Posted by
on 30 January 2008 - 09:45 PM
in
Modifications
I've gotten a lot of question about how this was done, and how it affected performance, and rather than reply to 18 different messages, this should be much simpler. (Plus if a dozen and a half people are asking questions, it stands to reason that even more are curious.) To that end, I apologize for not posting the write-up in the first place.
If any are concerned about the integration, fear not; it really is almost as straightforward as it looks.
Take an intact BBB, and an RF20 that (in my case) someone else broke, and gave to me.
From the RF20, you'll need the turret, muzzle, and the advancing tooth.
I used what I believe is called Pressboard, it seems similar to common peg board, and can be found at Home Depot. If you have the limbs from your BBB, all the better, the lower limb will make it easier to mount everything.
Just trace and cut to fill the profile as seen here.
Don't align the board in the centerline of the gun, instead you'll want everything mounted just to the side.
Rather than mount the turret via the pieces used in an RF20, I chose to use the wider flanges, as you can see.
These pieces have more surface area, should you choose to use an adhesive, rather than mechanical fasteners, and because the turret it attached closer to the center of mass, it puts a bit less torque on whatever is holding the turret in place.
The back portion, farthest from the turret, must be left free. If you glue it to something then the turret will not be able to rotate.
At some point you'll need to mount the muzzle to the front of the bow. (The white cap with two holes in the front.) I was able to do this with simple e-tape, and reinforced with gorilla tape.
Once you have the profile piece, and the turret mounted to the bracket, attach the bracket to the profile so the muzzle is flush with the back of the turret. This was the most difficult part, the axis of rotation for the turret must be aligned perfectly to ensure the barrels will align properly with the two muzzle holes. I was able to do this with just my eyes, holding the turret by the bracket, using a clamp to hold it in place, then moving it back and forth until I could manually rotate the turret while looking down the barrels to make sure they were properly aligned. After that, drown the thing in your adhesive of choice (Hot glue for me).
I advise you apply as much glue as needed along one side to keep it held to one half of the BBB shell, and apply only a small amount to the other, this way you can open the BBB up again in the future.
At this point you have a massive drum that has to be manually rotated after each shot. Which is simple enough, just a flick of your thumb or index finger, but we can do better. Time for the advancing tooth.
Just like the profile piece, cut what will be the guiding rod only on one side, on the opposite side of the shell to which the turret is attached.
If you mounted the profile portion on the left (left while holding the gun, pointing it away from you.)
mount the bracket on the right of the profile piece, and the turret attached to that from the left. (this keeps the center of the turret in line with the center of the BBB.) Mount the advancing tooth arm on the right side of the centerline of the Bow's guide rod. (the horizontal, hollow post along the top of the gun that doesn't actually do anything functional)
Here you can see the two pieces glue atop the BBB, along the side of the guide arm, these make sure the arm doesn't wobble left and right, and ensures the tooth slide forward and backward only. If it wobbles too much, it'll miss the notch atop the turret, and the turret won't advance.
Then mount the advancing tooth onto the left side of the guide arm, again keeping the centerlines aligned.
The exact lengths can vary, depending in how much of the BBB's stock barrel has been removed but I suggest mounting like this
The tip of the tooth rests along the top of the turret when the BBB is cocked, so it will not fall down. (causing the tooth to jam into the back of the turret when you collapse the gun to re-cock it.)
The tooth is going to slide past the front of the turret when you collapse the gun, and may dip a bit. In the upper picture, you can see the small "ramp" attached to the underside of the tooth, this keeps it from getting caught on the backstroke.
Once all the gluing is done, you should have something like this. (hopefully yours is prettier.)
here is Dunkel
As for performance:
RoF is obviously increased dramatically, as the BBB now has a massive drum than automatically advances to the next barrel, and you don't have to move your hands. Mine fails to advance about 1 in 35 shots. This can be reduced by adding further rails along the length of the guide arm, close to the tooth.
I've had some people ask about it being cumbersome, but it's not the case. While yours will differ a bit, mine is balanced perfectly; Dunkel's center of mass is directly in the middle of the fore grip, between the thumb and index finger.
And lastly: ranges
I was expecting a significant loss in range, but such was not the case. (the loss in range is not significant to me, at least.) Compared to my other BBB, which has effectively the same modifications done (AR removal, and nested Crayola barrel). Dunkel's loss of distance is on average < 1.5 meters.
This is only the prototype for my next project. I realize that unless you happen to have an RF20 or Wildfire turret just sitting around collecting dust, the mod will cost >$50. I'm working on producing a cheaper equivalent from scratch, which will be posted as soon as I finish it. Though I'm willing to bet there are at least a dozen members who are able to beat me to it.
Thanks for your time and kind words.
*Edit: Sorry I failed to do this originally, the gun is compressed in all pictures except for the ones which are close-up shots of the tooth; #6 and #7. Thanks TS.
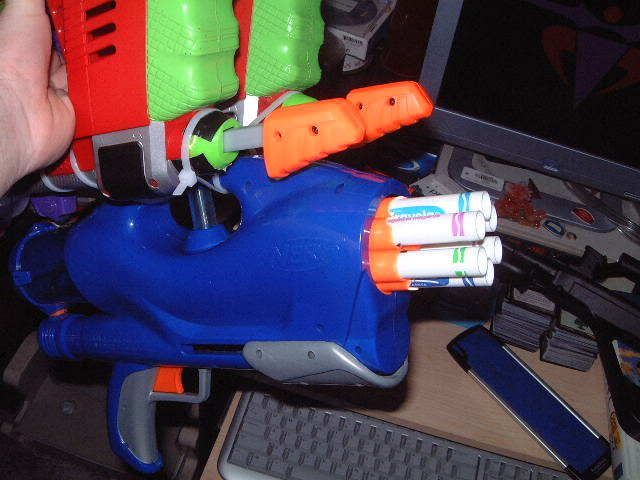
#137898 Twitchtech 2-pump Chump
Posted by
on 30 January 2008 - 11:10 PM
in
Modifications
Required Materials
Airtech 3000
Pump from a 2nd Airt3k
Great Stuff Insulating Foam
Tube connectors for common fish tank tubing
super glue
Here's my creation:
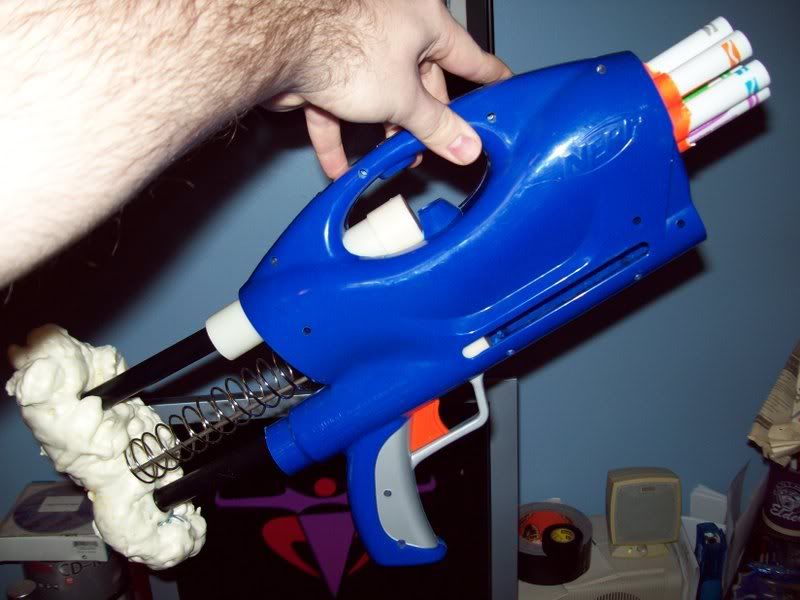
The idea is that by reversing the plungers, to prime the tank, all you have to do is press into the shoulder stock with your shoulder. This would also allow the stroke length of the plunger to be nearly doubled, and with the addition of the 2nd plunger, each pump puts roughly 4 times as much air into the tank. (1-pump At3k mod.) The reason I did this rather than the more common 1-pump modification is because with this set-up, the auto-rotation mechanism still works. Thereby increasing RoF significantly. (1 pump for greater range, no need to manually rotate the turret)
And how to get what I managed thus far.
cut the pump from a 2nd Airtech assembly (preferably a broken one), and cut away the goo gauge from your intact one. just snip the line at each end with scissors. From here, find a T-Junction piece from the package of tubing connectors. I happened to use connectors I found at a pet sore, used for simple aquariums, to rig an air line to the tank filter, those goofy bubble-emitting decorations, et cetera. (I started this project before I knew what instant connectors/barbed connectors were.)
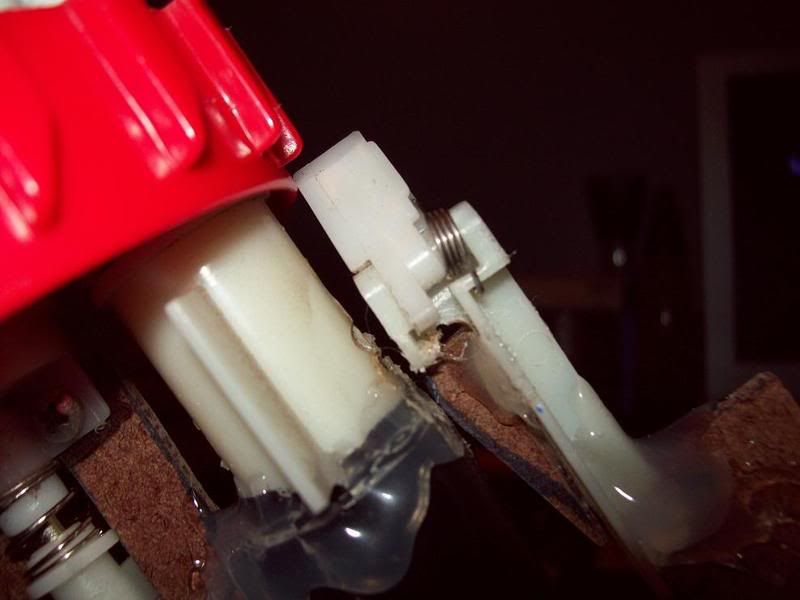
You'll have to cut off the back of the At3k, behind the trigger, and a groove for the reversed plunger.
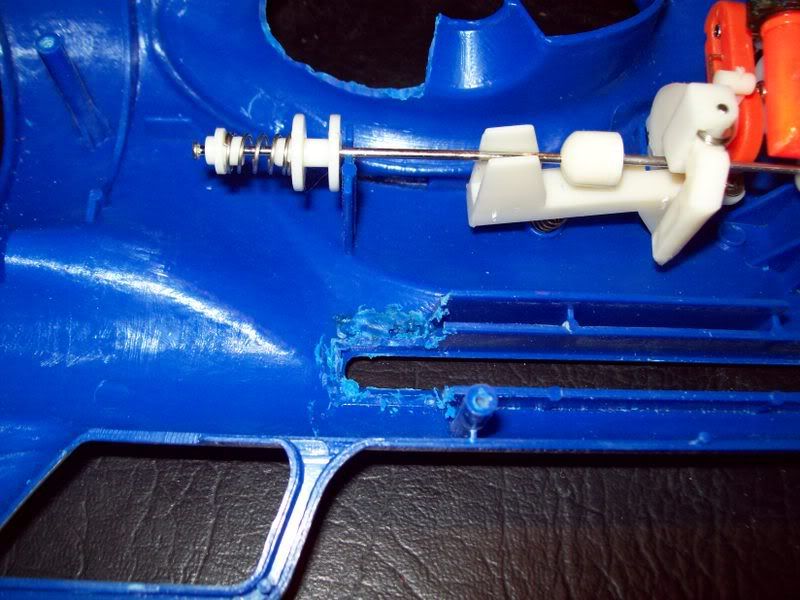
What's with the metal rod? It's attached to the shoulder stock, so when the stock/plungers are compressed, to tooth glides forward and back (the spring pushing the plungers back out of the cylinder) activating the rotation mechanism.
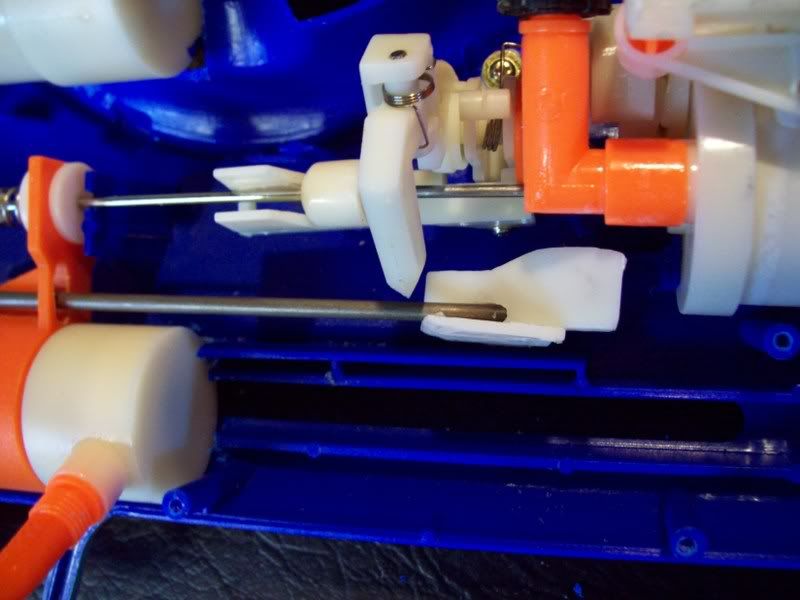
You'll need to do a bit of cutting so the upper plunger fits as well.
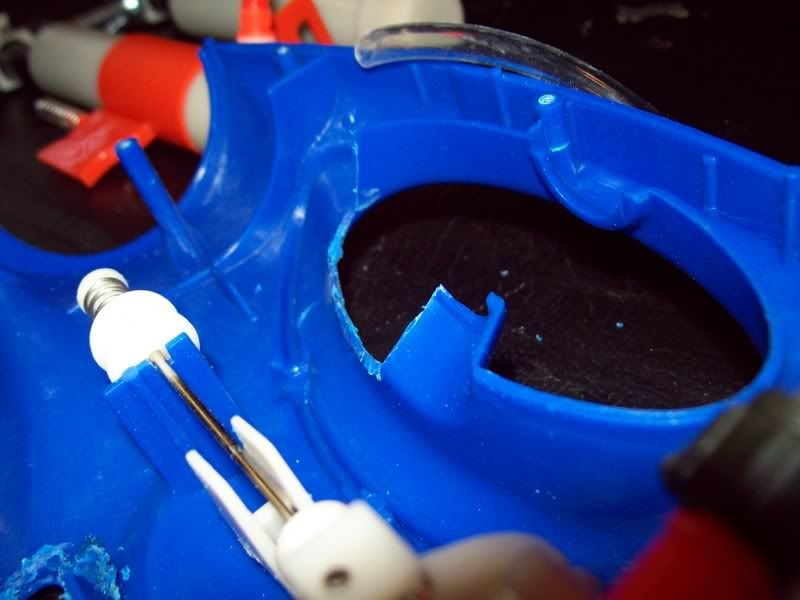

Because I wanted to keep the tubing from interfering with the motion of the advancing tooth, I connected all tubing outside the shell of the gun. (which actually worked fine aesthetically, since the At3k has the fake orange tube embedded in the shell anyway.)
To do this, I had to make a bit of a hole, so the tubing could slip outside the shell.
Next, the creation of the shoulder stock. a 5/16-18 threaded bolt fits perfectly into the hole in the plunger rod. The Home Depot near my house carries it in lengths as short as 12", but you only need about 6"-7."
(That's what she said?) I used my cutting torch (MAPP gas) to sever the excess. I imagine the rest of you can use other methods, though certainly none as fun. Next I grabbed a few wing nuts and washers and had the spacing between the two plungers set. (you obviously want these parallel.)
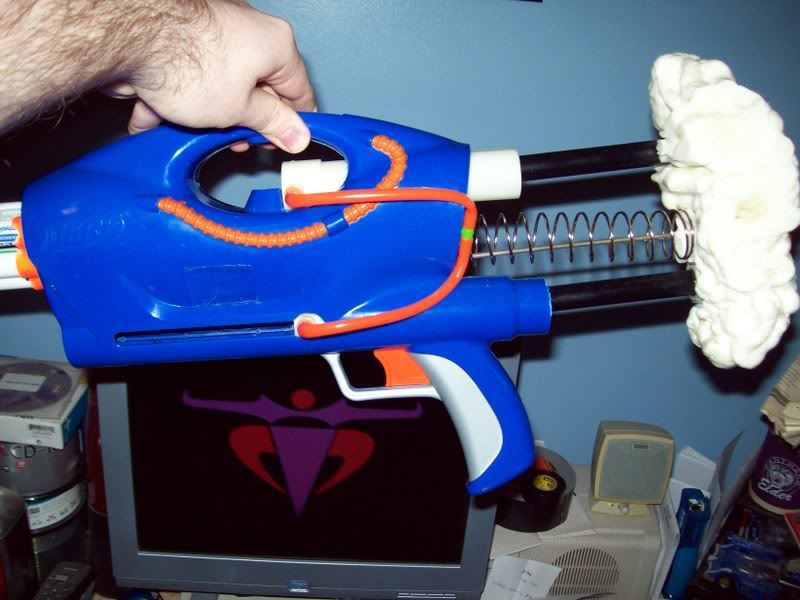
This spring pushes the stock away from the gun, thereby cocking the gun (the mechanism advances the turret on the backstroke)
To make the stock more comfortable, I coated the bolt & nuts with Great Stuff insulating foam, then trimmed to fit once it cured.
(has not been trimmed in this picture)
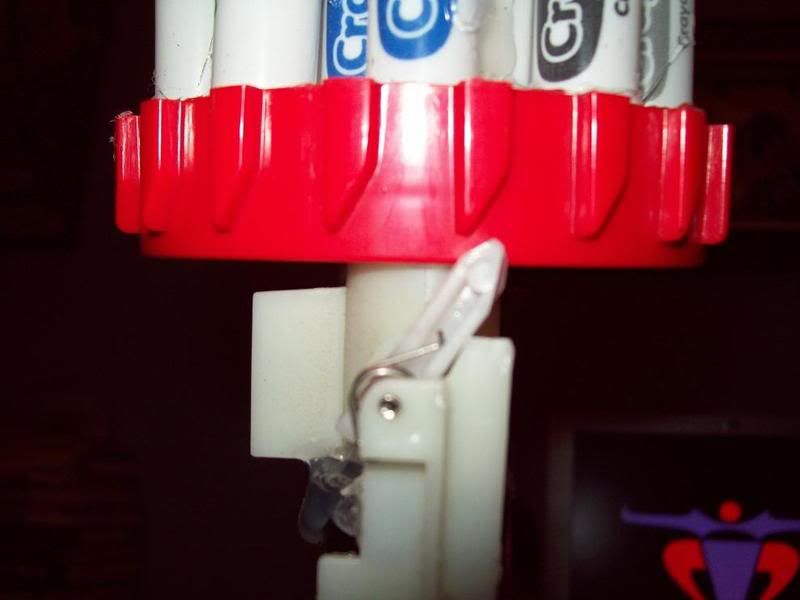
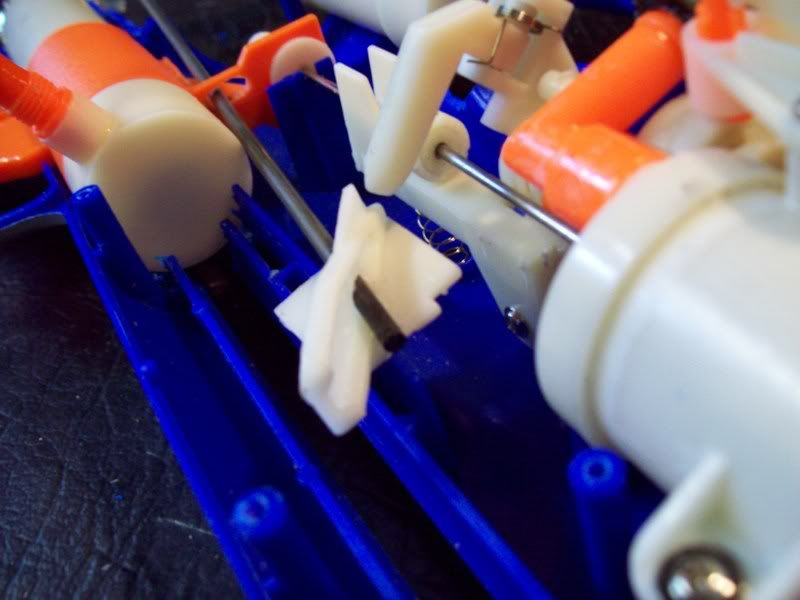
Advancing Tooth
The length of the rod needs to be cut (again, I chose fire.) such that the tooth just nearly bottoms out against the rear of the tank, when the plungers bottom out in the cylinder.
In the picture, you can see a hole in the base of the trigger. I placed this as a guide for the rod holding the tooth, so it wouldn't wobble left/right. In the picture, only 1 rod is present, but after testing, I recommend a 2nd rod as well, to keep the tooth/rod from being twisted about the axis of the rod as it is pushed past the advancing mechanism.
Without the pump handle being located in its normal locale, there now exist a nice spot in the front of the gun, below the barrels. facilitating another integration of your choosing.
At this point, you can close it up, and have a functioning At3k that gets more pressure/pump, and the auto-rotating mechanism still functions. Here's why I still consider the modification a failure.
As stated in the beginning, ideally the stroke length of the plunger is nearly doubled, resulting is nearly four times as much air being pushed into the tank. As it rest on my dresser right now, this is not the case (only twice the volume of air.). Because the plunger's range of movement is being doubled, the advancing tooth's range of motion must be doubled. However, the trigger gets in the way, preventing the tooth from sliding back any further than it originally could. I see 2 options, and seek counsel as to how to best rectify the problem.
1: Find some way to let the plunger/shoulder stock, etc. more twice their stock distances, but the tooth it's normal distance.
2: Relocate the trigger.
I'm thinking the first one would be best solved via. leaving dead space between the stock and rear of the tooth's guide rod, with a compression spring pushing off the back of the gun, and pulling the tooth back to rotate the turret. The 2nd method I think could be best solves using a wire and pulley to relocate the trigger, but still keep my hands in the same place.
Thanks for your time.
#137927 Twitchtech 2-pump Chump
Posted by
on 31 January 2008 - 09:13 AM
in
Modifications
The spring I used is actually the stock spring from my Longshot (the Longshot has a BBB spring.) and can return it well enough. Because of the tooth being pushed past the mechanism it's not quite as fast as I'd like, but I have an extra AR-15 spring laying around and will probably put that in there instead.
#137928 B20
Posted by
on 31 January 2008 - 09:22 AM
in
Modifications
Yeah, I'm also concerned with durability, but only slightly since this is just a prototype and if it breaks I'm not that concerned; this was just an experiment so I could get an idea what I'll need to do for the next model.
Thanks again for all your time and kind words.
#137944 Twitchtech 2-pump Chump
Posted by
on 31 January 2008 - 01:02 PM
in
Modifications
This is more of an observation than a suggestion...but I was thinking that the auto-rotation won't make thr ROF any faster if you're not pumping with your left hand. The reason some turrets take longer to reload than auto-rotating turrets is that the cocking/priming action is done by the same hand that rotates the turret. In this case, however, your left hand is free while you're pumping so you can rotate the turret at the same time that you are pumping the gun. I know that this doesn't solve your problem, but rather argues that there is no problem. If you use your left thumb to turn the turret while you're pumping you can lengthen the pump stroke and fire just as quickly as if the turret rotated itself.
My concern about rotating the turret manually is that I personally would rotate the turret a click too far, or too short, and the gun would misfire. I suspect the overwhelming majority of those who read this would be able to do just fine, but I am paranoid beyond reason.
Another Point I feel I should make, The original intention was that with the turret rotating automatically, and the gun only required 1 hand to prime, that I could in theory dual-wield a pair of these. (Hence my desire to ensure the rotation mechanism was operational)
I'm thinking Forsaken Angel probably could, but I can not. Despite all my knowledge of chemistry and physics (I'm applying to medical school at the moment) I forgot that it would take a much greater force to compress 4 times the volume of air in a single pump, instead of 4 smaller pumps. The end result is that the gun will most certainly be wielded with both hands.
With that in mind, yeah, manually rotating the turret wold work just fine, but there's always room for improvement. And I'm paranoid/neurotic.
#138201 B20
Posted by
on 02 February 2008 - 05:42 AM
in
Modifications
Awesome. Really effin' awesome. Two really good guns intertwining thier plastic rods and joints and combining to make one beast of a gun. It looks a little shaky overall, but still pretty cool. But, uhh... what's that bottlecap or whatever glued to the side of the gun in the first pic?
Those are bottle caps from my favorite beer. Hofbrauhaus beer to be precise. I'm personally fond of the original, and their Dunkel (Dark). Hence the gun's name: Dunkel
http://www.hofbrauhausnewport.com/
Anywhere that serves beer by the liter is acceptable to me. I always did prefer the metric system
Thanks to everyone for their time and thoughts
#140081 Modification and Paintjob Pictures
Posted by
on 13 February 2008 - 09:40 PM
in
Modifications

#141011 Modification and Paintjob Pictures
Posted by
on 18 February 2008 - 12:26 PM
in
Modifications
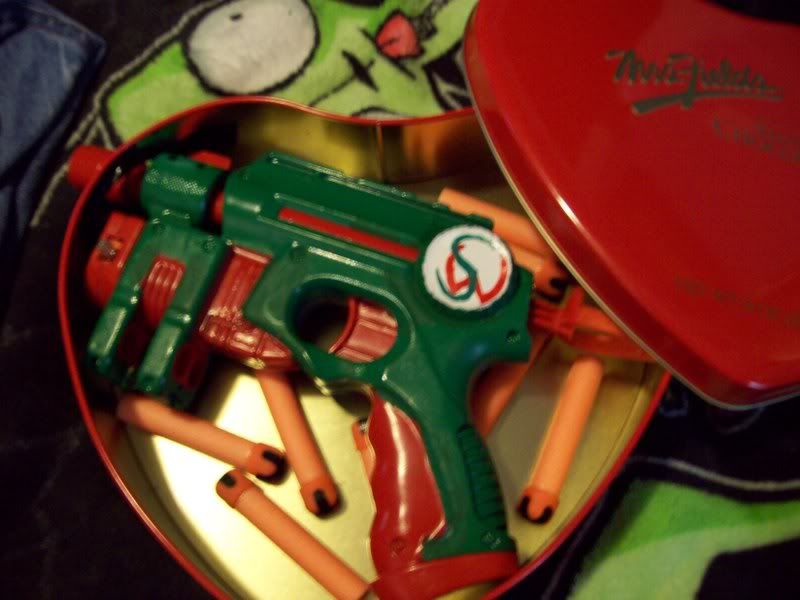
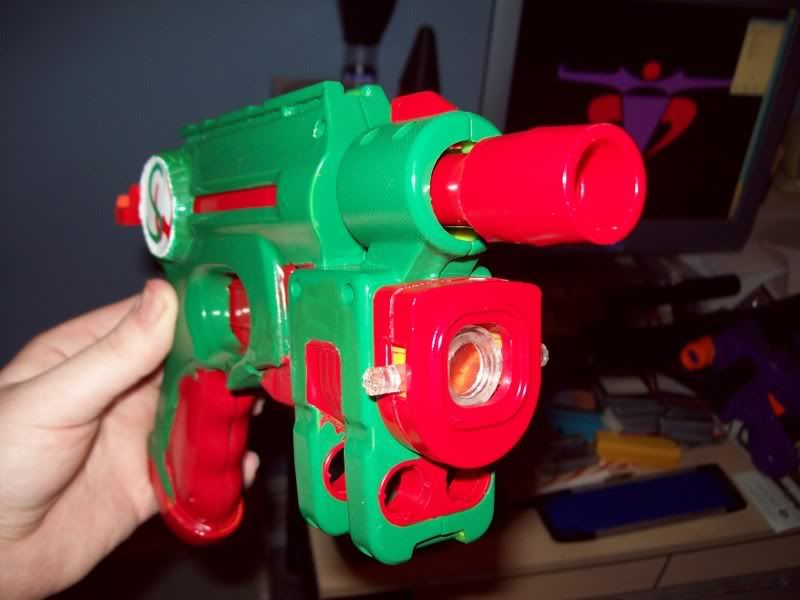
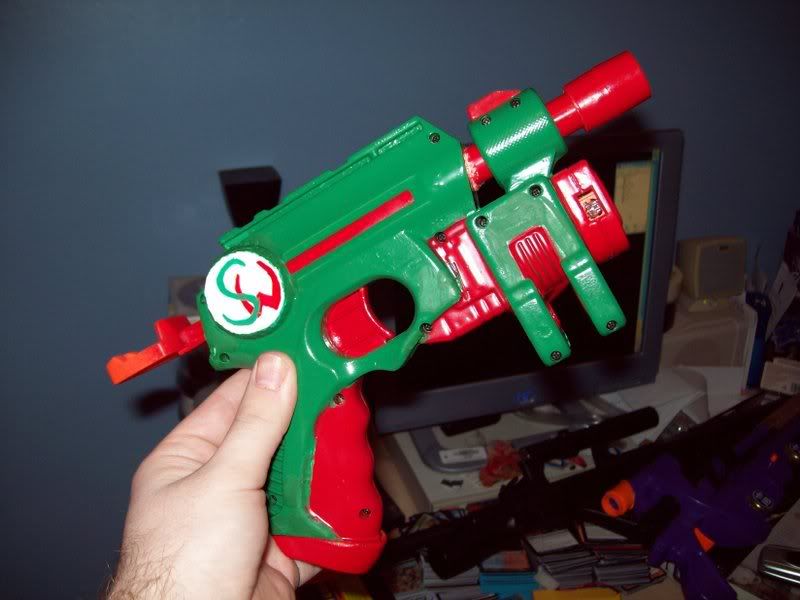
Valentine's gift for the girl I've been dating. (We met at my campus's Nerf war; Green & red are her favorite colors)
#142660 Spring Ohio War
Posted by
on 26 February 2008 - 05:38 PM
in
Nerf Wars
#145066 +bow: Diy Thread
Posted by
on 14 March 2008 - 07:57 AM
in
Homemades

The barrel being cut at that angle (to look more like a syringe needle) does not seem to affect accuracy or ranges.
My Insignia

Lethal Injection in her carrying case; a genuine postmortem bag (body bag), complete with toe-tags to document kills.

#145950 Spring Ohio War
Posted by
on 20 March 2008 - 09:53 AM
in
Nerf Wars
#147130 Taggers In 1/2in Pvc
Posted by
on 26 March 2008 - 05:06 PM
in
General Nerf
#148980 Sidearm/secondary Guns
Posted by
on 02 April 2008 - 10:44 PM
in
General Nerf
#149056 Crayola Barrels
Posted by
on 03 April 2008 - 10:36 AM
in
General Nerf
http://nerfhaven.com...wtopic=7453&hl=
The other option, and probably the best, to is buy some PETG tubing from OMC; sure it'll take a couple days longer to reach you than if you drove to a retail outlet for markers, but it'll be much less expensive. (10-pack of Crayola markers being just shy of $3 for 10 barrels, or 4 barrels for $0.50 from a foot of PETG.) Take the advice of someone who's invested too much in Crayola markers for barrel material.
#151094 Summer Dcno
Posted by
on 14 April 2008 - 08:05 AM
in
Nerf Wars
#151465 Official "show-off Your Crossbow" Thread
Posted by
on 16 April 2008 - 05:40 PM
in
Modifications
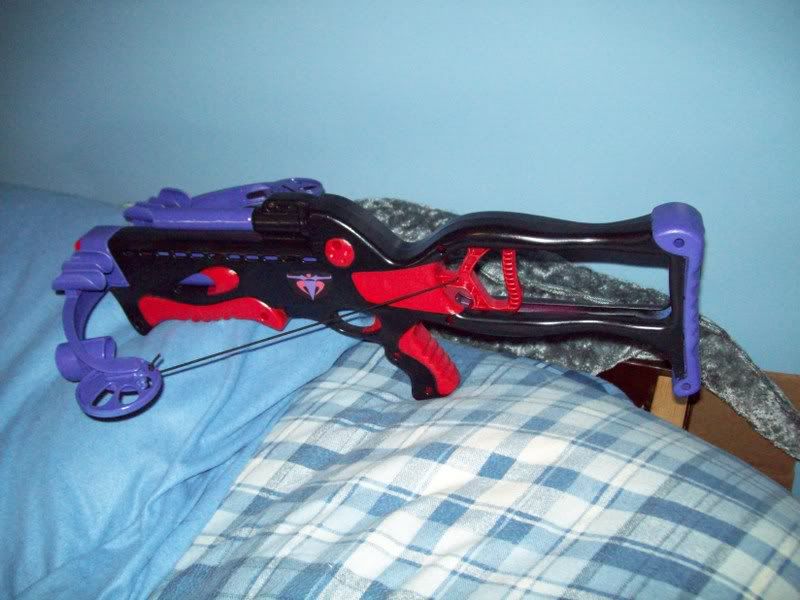

Name: The Scythe
Mods Done: Level 4 mod, Arrowstorm spring replacement, 1/2" PVC or PETG barrels, (changed as needed) mounted to a cpvc barrel via a coupler. (Tag darts/Stefans)
Integrations: N/A (currently)
Comments: After my university's paper published an article about the University of Cincinnati Nerf Club, a group of architects and engineers read about me, and sought me out for guidance and counsel. They have this annual event where all the students are divided into groups of 3-4, and must construct a bridge able to support the weight of the group. Each year the event has a theme, and they had chosen the (at the time, off air) American Gladiators. They wanted me help to construct a small arsenal of weaponry to be used during their Assault game. As it turned out, one of the architect students had a handful of very old nerf guns. Among them were a broken Arrowstorm, and stock Crossbow.
I found this color scheme to resemble my insignia (emblazoned on the side, above the grip) when viewed from above. At the moment, bungees are not used, I have created a strip of steel angle-bar which I have curved to fit behind the limbs. I'm going to use the steel limbs to attach bungees.
#151606 Aluminum On Aluminum
Posted by
on 17 April 2008 - 11:16 AM
in
Modifications
Any any case, soldering is probably going to be your best option, as the heat is much more localized, and would be less likely (than an acetylene or MAPP torch) to destroy the rest of the workpiece.

