- NerfHaven
- → roboman's Content
roboman's Content
There have been 414 items by roboman (Search limited from 07-December 96)
#334384 Homemades Picture Thread
 Posted by
roboman
on 30 September 2013 - 09:57 PM
in
Homemades
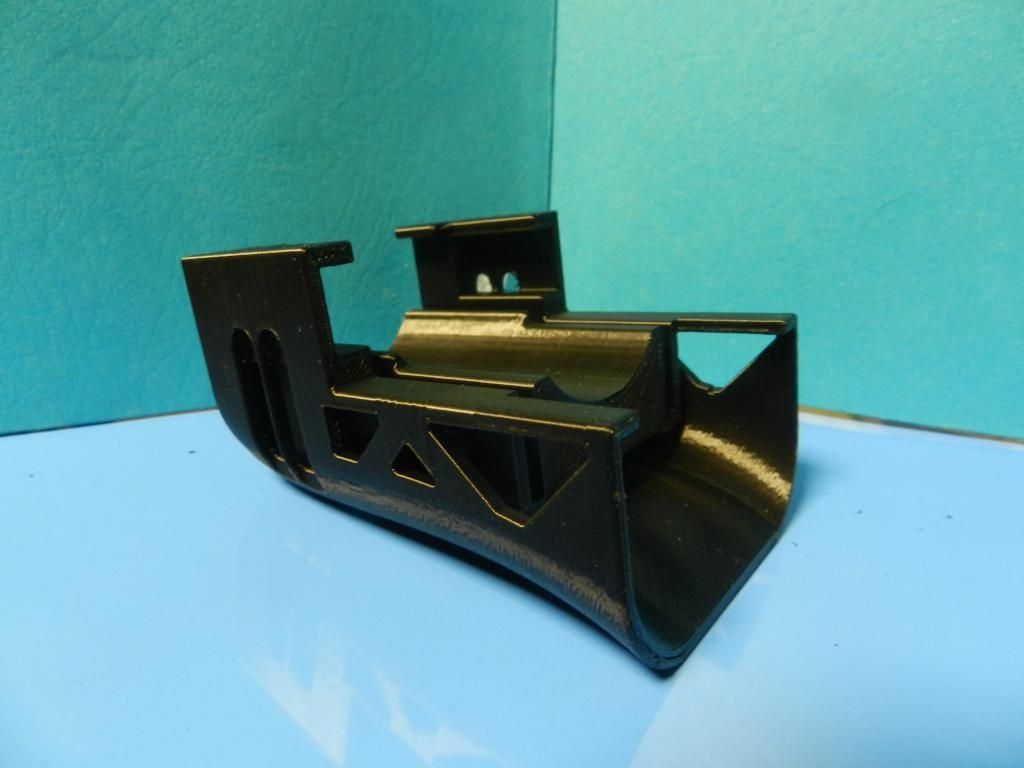
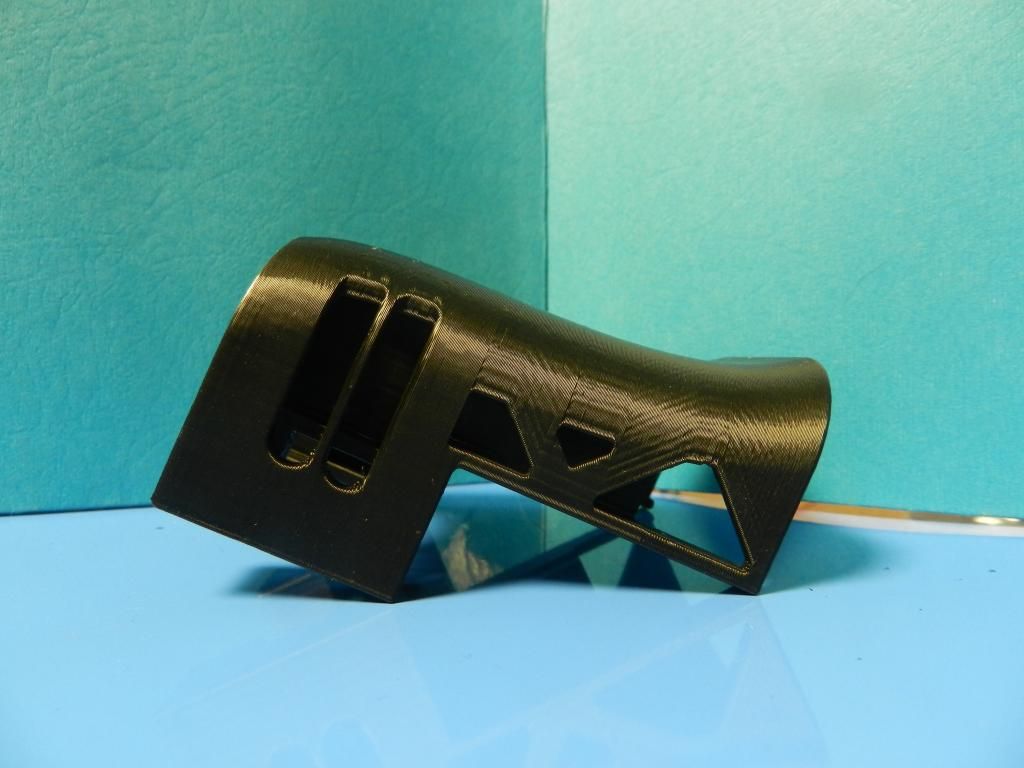
Full Album Here
#334306 Ultrafire 14500 protected issues
 Posted by
roboman
on 28 September 2013 - 02:42 PM
in
General Nerf
#334084 3k Tank Issue
 Posted by
roboman
on 17 September 2013 - 01:11 PM
in
Modifications
#334081 3k Tank Issue
 Posted by
roboman
on 17 September 2013 - 12:56 PM
in
Modifications
#332705 Apocalypse 2013
 Posted by
roboman
on 04 August 2013 - 10:55 PM
in
Nerf Wars
Pros:
-Seeing some awesome people again, and meeting others for the first time
-Freeze tag (and lots of it)
-VIP
-Nothing of mine broke, for once
Cons:
-The weather, as always
-Not having a change of shirt, shoes, or socks
-Pumpbows were not ready in time
I am still really sore from that. Definitely worth getting soaked in both rain and sweat for the experience, though. Hopefully, I'll be able to make it out there again next year, schedule permitting. I'd really rather not go through the whole "I'm going to build a whole bunch of pumpbows to fund my trip" thing again, so I need to figure out how to leave for school 2-ish weeks early next year.
#332440 Homemades Picture Thread
 Posted by
roboman
on 29 July 2013 - 02:38 AM
in
Homemades

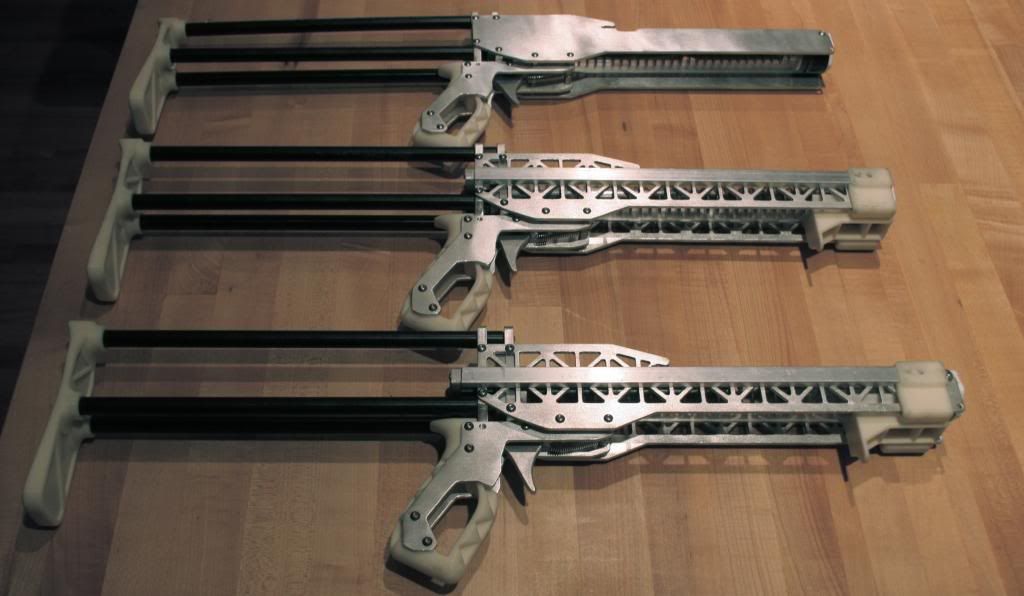
30 aluminum pumpbow sideplates. Cut free from the sheets, sanded, drilled, and wire brushed. I'll probably end up polishing them lightly to smooth out the surface a bit more, so you get the textured look of brushed metal without the roughness. The main issue will be removing the polishing compound from the surface, as I found out earlier today when I tried it on one plate. It ended up taking me about half an hour to scrub the rouge off of the plate.
My new wire wheel/buffer is in the background. I highly recommend them for anyone who does a lot of work with metal, since it takes care of deburring for you. That one is currently on sale at Harbor Freight for $40, and the brass wire wheel is another $5. Works great. The buffing wheel lets you have very high-polished surfaces if you use the right compound for the metal you're polishing.
#332062 A Better Alternative to Spade Bits
 Posted by
roboman
on 17 July 2013 - 10:18 PM
in
Darts and Barrels
#331609 Modification and Paintjob Pictures
 Posted by
roboman
on 06 July 2013 - 01:18 AM
in
Modifications
#331591 Modification and Paintjob Pictures
 Posted by
roboman
on 05 July 2013 - 07:32 PM
in
Modifications
#331466 possible balls for a homeade
 Posted by
roboman
on 01 July 2013 - 07:35 PM
in
Darts and Barrels
#331277 Starting My Research Here
 Posted by
roboman
on 25 June 2013 - 10:58 PM
in
Homemades
Roboman: Those look great! I assume those are metal, finished with some sort of white spray?
Shmmee: Of course, I'm building this for longevity as well as not-kill-people-with-plastic-shard'ity, hahIn experimenting with the gun you showed me, did you ever try the hand tank/regulator combo? I'm curious what the pumps to shot ratio was.
Draconis: The regulator should prevent the inconsistency, more or less, I thought?
Once again, thanks for everyone that has put in their input, its been great!
They are polypropylene. Rated to 500 psi burst, 120 working. If you could somehow get one to fail, it would just tear, and would not send shrapnel anywhere. Super lightweight, too.
#331271 Starting My Research Here
 Posted by
roboman
on 25 June 2013 - 07:25 PM
in
Homemades
These are awesome, and really cheap. They've got them in 3 sizes. They should work well for your purposes.I'm really excited to see these two posts, this gives me a great starting point. Thanks shmmee and rego for that, much appreciated.
A quick question - just because I'm not a fan of the bladder style tanks, do you think it would be possible use a rigid back pressure tank such as aluminum with a regulator attached? Or do you think it would be inefficient due to a long priming (or pumping) time and a low amount of cycles (shots fired)? If hand-pumping a rigid tank wouldn't work, I may have to consider using an air source such as a HPA tank.
#331205 Nerf Elite Mega Centurion - Preview and Internals
 Posted by
roboman
on 23 June 2013 - 10:04 PM
in
News
#331201 Nerf Elite Mega Centurion - Preview and Internals
 Posted by
roboman
on 23 June 2013 - 09:32 PM
in
News
#331192 Nerf Elite Mega Centurion - Preview and Internals
 Posted by
roboman
on 23 June 2013 - 06:30 PM
in
News
Also, could you provide internals pictures with everything in place, like the ones in the Internal Directory?
#331145 [WIP] Stampede ACB, the Arduino-powered Stampede ECS
 Posted by
roboman
on 22 June 2013 - 01:17 PM
in
Modifications
#331065 [WIP] Stampede ACB, the Arduino-powered Stampede ECS
 Posted by
roboman
on 19 June 2013 - 11:16 PM
in
Modifications
You might also want to consider a switch to detect the position of the plunger at the extremes of its travel, so you don't have to rely on timing to get the cycle correct.
#331010 Stretching Foam
 Posted by
roboman
on 18 June 2013 - 12:37 PM
in
Darts and Barrels
Ya, I was thinking of a method similar to what Ryan mentioned it his slug making thread.
I used to use other barrels (mcmaster sch80, PETG, 9/16 brass) and they worked pretty well, but they were just expensive and all needed pvc couplers which were sometimes to big to use. I just like the cpvc because it is mad cheap and has its own couplers.
As for other foams, I really like foam that I can use a high-temp hot glue gun on just because it is much easier on the fingers and makes, in my opinion, better darts, and from What I hear mcmaster foam can't be used with a high temp hot glue guns.
I would really like people who actually stretch or have stretched their foam to respond(no offense roboman). And if anyone has different methods then what has been posted on Nerfhaven I would love to hear them.
Yeah, Sch40 PVC couplers can get annoying, I totally see where you're coming from there. If you're REALLY careful, you might be able to drill out some CPVC to accept PETG, so you can stick with CPVC couplers, but use a looser barrel material. Alternatively, you can get [mcm]1658T49{/mcm], which is compatible with CPVC couplers, but is aluminum and has the same ID as PETG. Not as cheap as CPVC, but certainly not super expensive.
Mcmaster foam can sort of be used with high-temp guns, but only if you move quickly. I have a dual-temp gun, and I switch back and forth somewhat frequently to maintain a temperature somewhere in between the two extremes, but that's obviously less than ideal.
I have actually stretched foam, as I said, but I've only used the hand-stretching method with limited success.
#330976 Stretching Foam
 Posted by
roboman
on 17 June 2013 - 08:12 PM
in
Darts and Barrels
As for the big foam, it should work similarly, though you may need to pull a bit harder to get it to change diameters effectively.
You know that you can buy foam from other online suppliers, right? I usually get mine from Mcmaster, and while it's not necessarily the best out there, it works fine for me, and conveniently comes from the same place I order most other supplies for projects. It also tends to be a bit smaller than most other foam, for whatever reason (snug, but not particularly tight in CPVC-sized barrels). Of course, I can totally understand not wanting to throw out a bunch of foam, just because it barely doesn't fit.
You might consider switching to looser barrels on everything, though. That's usually significantly easier than shrinking your foam.
#330803 Is anyone interested in CAD drawings of stock parts?
 Posted by
roboman
on 11 June 2013 - 10:54 PM
in
Homemades
My experience with digital calipers has been poor. I have a small one I need to return, it holds a zero so poorly, but I needed to do some metric measurements. I plan on getting a metric dial eventually. You can see this when you open and close them repeatedly, and they loose their zero. Even higher end ones do this, I've yet to see one that didn't, but I've limited exposure and probably haven't seen anyone spend enough money for a really reliable one.
STL files are the ones generally used by 3D printers. Also, most CAD programs don't do a whole lost with them without reprocessing them into their native format.
Another thing to note, but in passing, is that Nerf stuff is made overseas, and made to metric specs, 12mm instead of .5 inches, for example. The two don't match exactly, so if you're measuring in inches, you'll get odd numbers. If you try to round them, you'll be off by varying margins. Something to keep in mind, nice thing about Solidworks is it'll convert the two, so you can put a metric into an inch model and get the right dimension.
I've never had any issues with digital calipers of any brand - I've used both Starret and Harbor Freight (essentially the best of the best and the worst of the worst, respectively). Littlemachineshop.com has some nice intermediate models that work quite well and are priced reasonably.
True, but there are still relatively few printers in the community. I have access to a couple very high-end ones through school, as do a couple others, and 3 or 4 people have RepRap variants or Makerbots. Many, many more people have access to CAD, and .stl files import as triangle meshes into SolidWorks, which are a pain to edit or mate to. Most other CAD packages won't even let you open them (Inventor, for example, which is in widespread use because it's free to students). I'm not saying release a STEP instead of a .stl, I'm saying release a STEP in addition to the other formats, so that more people can use your files.
Unit conversions should not be a problem. When you start getting down to 4 places past the decimal, those measurements vary significantly with temperature if you're measuring correctly. A few thousandths is probably better than the tolerances present on the actual molded parts. However, you're not supposed to state a tolerance on the CAD model - it's supposed to be absolute. Drawing sheets state a tolerance because they're inspection tools and are supposed to tell an inspector how far off a part can be from the nominal dimension before it has to be rejected.
#330768 Is anyone interested in CAD drawings of stock parts?
 Posted by
roboman
on 10 June 2013 - 09:26 PM
in
Homemades
Incidentally, STEP AP203 files may be more useful to a majority of the community. I vastly prefer .sldprt, because I'm SW certified and that's what I usually use for CAD, but most people here use free software. STEP is a universal format, and should be open-able by most major CAD packages.
#330197 Electrical Problems
 Posted by
roboman
on 24 May 2013 - 01:46 AM
in
Modifications
18 gauge wire is rated for 16 amps, by the way. The only way you're hitting or exceeding that is if you're physically stalling the motor.
I've got that same pushbutton, and it can handle much more current than the package says. As it is, it's rated for 3A at 125V. That's plenty for this application - if that motor is drawing more than 3A for a significant period of time, something else is seriously wrong with your system.
The reason your wires melted when you tried it is because you shorted out your battery in the second setup. You basically created a very big fuse.
Now, there's a chance the compressor could be protected against reverse polarity with a diode of some sort. That's somewhat unlikely, but certainly a possibility. Try hooking red to red and black to black, like you're supposed to do anyways. Even if it doesn't fix your issue, it's a good habit to be in.
Check your compressor without the switch by touching the leads to the terminals in the battery connector. It doesn't matter how you hook it up, so long as you don't short out the battery. If it doesn't run like that, then you've either got mechanical problems or just a bad compressor.
#329623 Rapid Fire AS-20 help
 Posted by
roboman
on 10 May 2013 - 10:20 PM
in
General Nerf
- NerfHaven
- → roboman's Content
- Terms of Service and Privacy Policy
- Code of Conduct ·


