rork's Content
There have been 899 items by rork (Search limited from 07-December 96)
#274577 Wincno
 Posted by
on 11 May 2010 - 10:21 PM
in
Nerf Wars
Posted by
on 11 May 2010 - 10:21 PM
in
Nerf Wars
#274250 Wincno
Posted by
on 07 May 2010 - 03:49 PM
in
Nerf Wars
#273085 Cfnf #4......summer Fl Nerfing At It's Best!
Posted by
on 23 April 2010 - 10:05 AM
in
Nerf Wars
#272526 Time To Look Inside... The Ldr!
Posted by
on 18 April 2010 - 01:30 AM
in
Homemades
1. Black guns are a bad idea. My PVC cannons either stay white, or get covered in colorful electrical tape. This thing would be disallowed in any war I was running, unless you allowed me to festoon it in pink/orange tape.
2. This is not a SNAP in any way, shape, or form, and those who say it is do not know what makes a SNAP a SNAP. It's much more like a singled FAR. I would love some good, clear pics of your trigger.
3. Airsoftguy, your name is Airsoftguy. Kindly shut the fuck up.
4. Drilling holes in your plunger is a fine idea, as that appears to be 1/2" PVC, which is muy overkill. Personally, I would go smaller, or take a small router bit to it.
#272160 My 2010 Hiatus
Posted by
on 13 April 2010 - 11:23 PM
in
Off Topic
#271652 Wincno
Posted by
on 08 April 2010 - 02:34 PM
in
Nerf Wars
#270129 Wincno
Posted by
on 23 March 2010 - 08:59 PM
in
Nerf Wars
#269843 Scorpion Ldr
Posted by
on 21 March 2010 - 05:37 PM
in
Homemades
#269419 Wincno
Posted by
on 16 March 2010 - 11:46 PM
in
Nerf Wars
#269253 Spring Seno Tune-up War
Posted by
on 15 March 2010 - 09:54 PM
in
Nerf Wars
#269174 Spring Seno Tune-up War
Posted by
on 15 March 2010 - 02:27 AM
in
Nerf Wars
#268694 Wincno
Posted by
on 09 March 2010 - 06:07 PM
in
Nerf Wars
#268692 Wincno
Posted by
on 09 March 2010 - 05:37 PM
in
Nerf Wars
#268470 Homemade Gun?
Posted by
on 08 March 2010 - 03:32 AM
in
Homemades
#268405 Pvat-piston Valve Air Tank
Posted by
on 07 March 2010 - 07:53 PM
in
Homemades
#268350 Wincno
Posted by
on 07 March 2010 - 02:57 PM
in
Nerf Wars
#268242 Snapbow Mk. V
Posted by
on 06 March 2010 - 12:51 PM
in
Homemades
Merzlin: That's a great idea. I normally discount anything that involves 3/4" pvc fitting over 1/2", since it's marginally too small, but in this case, that would be perfect, and would allow you to make one-piece snap-on bits as long as a particular integration required.
#268190 Snapbow Mk. V
Posted by
on 05 March 2010 - 10:47 PM
in
Homemades

#268186 Homemades Picture Thread
Posted by
on 05 March 2010 - 10:08 PM
in
Homemades

My latest handiwork.
#268184 Snapbow Mk. V
Posted by
on 05 March 2010 - 10:01 PM
in
Homemades
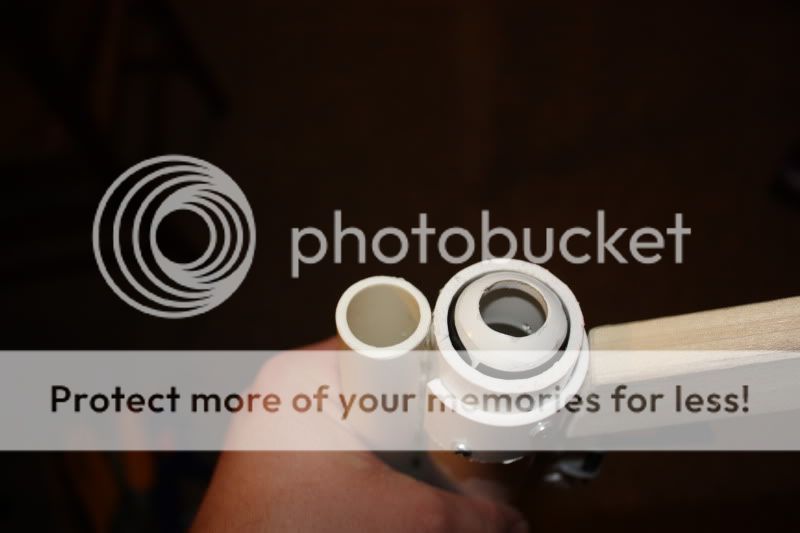
I decided that SNAPs need an effective modular integration system that is as simple and rugged as the gun itself. I was inspired by Carbon's handle design.
Start with a length of 1/2" PVC. Glue it on with your adhesive of choice. The large amount of contact area means that the glue joint will be very strong.

Grind out the center ring of a 1/2" coupler. Remove a section comprising 1/4 of the coupler. Mount it on the accessory you're adding. If you use screws, grind out a section of the rail piece for the heads to rest in.


Add the accessory. Anchor it with screws.

With this system, if you can attach a 1/2" coupler to it, you can mount it on your SNAPbow and remove it whenever you want. it's also perfectly possible to add more rails on the sides/top, making complex snap-on/off integrations a true possibility, even cleanly integrated, removable pumps and airguns.
#268152 Snapbow Mk. V
Posted by
on 05 March 2010 - 04:25 PM
in
Homemades
#268093 Snapbow Mk. V
Posted by
on 05 March 2010 - 12:14 AM
in
Homemades
Mindwarrior: yeah, with slug darts, it's pretty much identical. With heavier darts, I'm sure the +bow would have the edge, not that it matters, since I use slugs exclusively.
#268061 Snapbow Mk. V
Posted by
on 04 March 2010 - 07:38 PM
in
Homemades
What I was suggesting is that they make PVC fittings design to fit on the inside so that you don't have to mess around with e-tape by buying the correct size parts. But I suppose they might be difficult to find or expensive.
That would work great, but I have never seen them, ever.
#268034 Snapbow Mk. V
Posted by
on 04 March 2010 - 04:50 PM
in
Homemades
#267914 Homemade At2k Tank.
Posted by
on 03 March 2010 - 08:57 PM
in
Homemades
#267858 Snapbow Mk. V
Posted by
on 03 March 2010 - 04:50 PM
in
Homemades
#267848 Snapbow Mk. V
Posted by
on 03 March 2010 - 04:39 PM
in
Homemades
Mindwarrior, it would be about $40-50 to buy everything. They end up costing way less if, like me, you have a good parts bin.
Diamondback: thanks!
#267765 Snapbow Mk. V
Posted by
on 03 March 2010 - 01:23 AM
in
Homemades
#267761 Snapbow Mk. V
Posted by
on 03 March 2010 - 01:06 AM
in
Homemades
N9: It's very comfortable. It's extremely sturdy. You're full of it.
#267753 Snapbow Mk. V
Posted by
on 03 March 2010 - 12:41 AM
in
Homemades
SNAPbow Mk. V.
Materials Needed:
Main Blaster Body:
1’ 1 ¼” sched. 40 pvc
6” ¾” sched. 40 pvc
1”x½” bushing
Handle/Stock:
#8x1 ½” screws (2)
1x2 Poplar board (or the handle material of your choice)
¾” poplar (or matching) dowel
½” pvc tee OR elbow
½” pvc 45
Trigger:
Industrial-strength clothespin
Roofing nail
4” zip ties (2)
8” zip tie
1 ½ “ angle bracket
Plunger Assembly:
Superlative plunger head (http://nerfhaven.com...showtopic=18314)
1 1/2" cpvc endcap
2 11/4" OD steel fender washers
1 appropriately sized nylon spacer (look at the photo)
1 #6 11/4" bolt
1 11/4" rubber fender washer
1 11/2" rubber fender washer
1 #8 finishing washer
1 #6 wing nut
1’ of ½” cpvc
½” cpvc T
¾” pvc endcap
[k25] OR Plusbow spring
Adhesives, screws, and so on:
Epoxy Putty
CA glue/Solvent weld
Goop
Hot glue
#6 ½” pan head sheet metal screws.
Main Body:
Wrap your 1” bushing in etape until it fits reasonably snugly in the pressure chamber (PC hereafter). Slather it with goop and seat it. Anchor it with 3 screws. Cut your ¾” pvc like so, grind it to fit your zip tie, and glue it along the top of the PC. I like hot glue followed by goop, but epoxy would also do fine. Drill a hole 3 ¼” from the rear of the PC for your trigger pin (4” if you’re using a plusbow spring). Wrap your ¾” endcap in a bit of tape, slide it into the PC until it’s pretty much flush, and drill a hole in each side. These screws will be how you disassemble the gun.


This photo doesn't feature the groove/zip tie, but you get the idea.
Trigger Assembly: Cut your clothespin down, fill with epoxy putty, drill, and assemble--pretty basic stuff. Make sure the pin is cut long enough; the superlative head fit’s the PC more loosely than does a traditionally made SNAP head, and a too-short pin is an invitation to catch slippage. Zip-tie the trigger on. No glue is necessary, although gooping it on is fine too. Fit a bit of cpvc over the angle bracket, or glue a block/randomly selected bit of flotsam to the handle to prevent overtravel.


Make your superlative plunger head. Mount on your plunger shaft, using 2 screws or a pin. Add your spring, drill out your ¾” endcap, and add your handle. Lubricate with silicone grease, and nothing but silicone grease. Assemble, add a barrel, and shoot people.

Handle and Stock:
Pretty self-explanatory. Make your handle, Carbon-style. You’ll need to grind/gut a groove for the screw heads to fit into. Pop it on, lift it up, and glue it down with high-guality CA glue/solvent weld. Super, super solid. Also a major pain in the ass to get off if your handle fails, so make sure your handle is built properly. Conversely, you can anchor it with 4-5 screws as shown
It will just take longer to disassemble.The handle should be butted against the back of the trigger, holding the trigger in place.


Cut a dowel to the proper length for your stock, bulking it out as needed with etape. Add fittings as shown and screw it down.


Plunger Assembly:
Maintenance: Re-lube infrequently. Pull the plunger and wipe it down occasionally, to remove any accumulated grime. I recommend priming by holding the foregrip in your non-dominant hand, and pulling back with your dominant hand. Use a long, tight barrel--I use 16” of cpvc, lubricated with silicone spray.
#267606 Wincno
Posted by
on 02 March 2010 - 04:35 PM
in
Nerf Wars
#267591 The Fomebow - Extensive Bow And Arrow Makeover.
Posted by
on 02 March 2010 - 01:50 PM
in
Modifications
#267409 Wincno
Posted by
on 28 February 2010 - 07:57 PM
in
Nerf Wars
#267394 Wincno
Posted by
on 28 February 2010 - 05:04 PM
in
Nerf Wars
#267376 Winter Seno: The Squeakquel
Posted by
on 28 February 2010 - 01:11 PM
in
Nerf Wars
-4-round hopper on a SNAPbow? Probably the most perfect nerf gun ever. And for anyone who thinks they'll like my guns better now, they shoot as far as my BBBB.
-Trying to dodge civilians all damn day.
-Umpa's 1500s are super cool, even though the weather was too cool for 'em.
-"Damn, my barrel!"
-Unholy carpet of darts. I'm glad I made extra.
-Me, Umpa, and Pheylan all get my Badass Seal of Approval. The rest of you will have to redeem yourselves.
-Umpa's darts buzzing toward me like little robotic bees. at WiNCNO, I will only be allowing slug darts and single BBs.
-Getting a shit ton of cool kills, including a bunch of double kills.
-Level shots on moving targets that required 5-6' of windage.
#267293 Winter Seno: The Squeakquel
Posted by
on 27 February 2010 - 10:03 PM
in
Nerf Wars
#266944 The Hamp (high Airflow Manual Plunger)
Posted by
on 25 February 2010 - 07:46 PM
in
Homemades
#266940 Winter Seno: The Squeakquel
Posted by
on 25 February 2010 - 07:40 PM
in
Nerf Wars
#266900 Pvc Nerf Gun Rack I Made
Posted by
on 25 February 2010 - 04:50 PM
in
General Nerf
#266535 Tek 6 Re-barrel Problems
Posted by
on 23 February 2010 - 12:29 AM
in
Modifications

